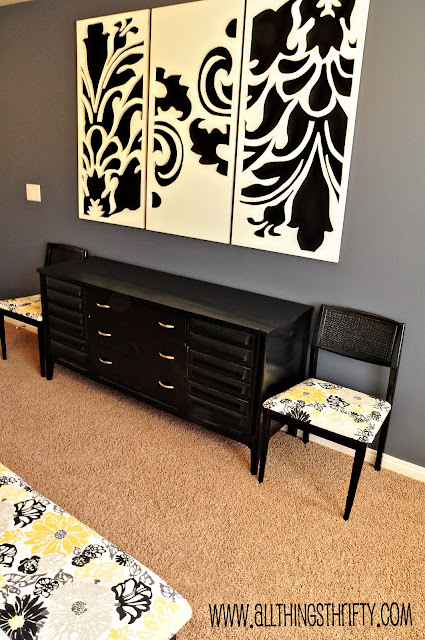
The design I chose was from a pillow (see image below). I used a projector to trace the design onto the MDF boards. After I traced the design, the hubsters cut it out with a jigsaw. I told him I would help, but I think he was afraid I’d screw it up. 🙂 So, he spent 5 1/2 hours cutting out the design for me. After that, I primed and painted them and then upholstered the back with black felt.

The concept turned out exactly how I wanted it to, but just think about the possibilities. You could do ANY design that you wanted! The projector makes it super easy to trace on whichever design you choose, so you don’t have to worry about being “artistically” talented.
Sometimes a huge wall in a room can be a challenge, but a project like this is perfect and CHEAP to take up the entire wall.

If you are interested in making this project yourself, feel free to use this pattern and link back to
All Things Thrifty!
This project is part of a decorating contest. Click on the image below and vote for your favorite project!


What an IMPACT! Amazing cutting action.. oh my gosh.
Outstanding once again!
Donna
that is awesome! maybe i can get my handy hubby to help me make one. i'm voting for you again this week. i'm doing my first ever giveaway (pottery barn giftcard and some of my crafts), so come by for a visit @ http://www.barefeetonthedashboard.blogspot.com.
Great impact and totally love the design too. It would go very well in my daughters room too. Seeing that I hate cleaning though, and lack the required husband and tool, I thing that I would stick at just painting the image on. Even that would be impressive. It's just wonderful to see how things can be done so cheaply.
So great looking. Very very nice.
Very pretty!!
This was one of my favorites since I first saw it as a link to another post while wandering around on your site. I had this crazy thought, but sadly not the money to see it through. I was wondering…since you said in your glazing furniture 101 post that you have to tint the glaze the color that you would like, what would be the result if you used a less subdued color? Say, a yellow or green chair or table with blue or pink or green or even red glaze? I've been dying to try this but just can't afford it! (Mother of twin toddlers about to turn one. my hands are pretty full) Let me know if you ever try it!
Too amazing! I just love it!!
Check out my new
GIVEAWAY!!!
~Morgan
Meet Virginia!
Meet Virginia!
Meet Virginia!
I am dying to know what fabric you used on the chairs. The black and yellow is gorgeous. Do you remember what the fabric was? Was it home decor or quilting? Thanks!
Awe! That is beautiful. I love the color, it looks so chic! First visit!
Adin B
http://itssewtasticmama.blogspot.com/2010/04/green-bag-ladys-40th-earth-day-freebie.html
I have an obsession with damask and this is amazing. I'll have to put this on my list of things to make.
Is there a way that you could make this image bigger so that I can print it and frame it in 3 seperate frames? When I click on the link it is a bit too small for the frames and stretching it blurs the image. Hope you can help! Thanks!
Very amazing!! Color is very beautiful. http://www.eurroexport.com
Dear Brooke, I thought you'd like to see what I've done, inspired by you. 🙂
I posted the result in my blog. I know you won't understand cause it's in Portuguese, but anyway you can have an idea and get proud of your amazing blog. 😉
here you are: http://casadeordem.blogspot.com/2011/10/meu-primeiro-eu-que-fiz.html
thanks for being such an inspiration! 🙂
marília
rio de janeiro, brazil
liked ^^!
So, wondering what you do with these projects when you change it up and create new ones? I would love to buy this from you 😉 if you are looking to sell!! email me purpleberies@hotmail.com