The post is sponsored by The Home Depot. All opinions are 100% mine.
We all know that flu season is upon us, and with four kids in public school, I can’t count the amount of times that the kids have brought germs home from school. It feels inevitable.
I think most teachers do an amazing job of trying to keep their classrooms clean to prevent germs from spreading. I cannot imagine the amount of Clorox wipes that a teacher goes through in one year. It’s probably astronomical. Clorox wipes is an absolute necessity for teachers, since they kill 99.9% of viruses and bacteria with their killing power! I know our school uses them to wipe down desks multiple times a day, wipe down countertops, and even toys.
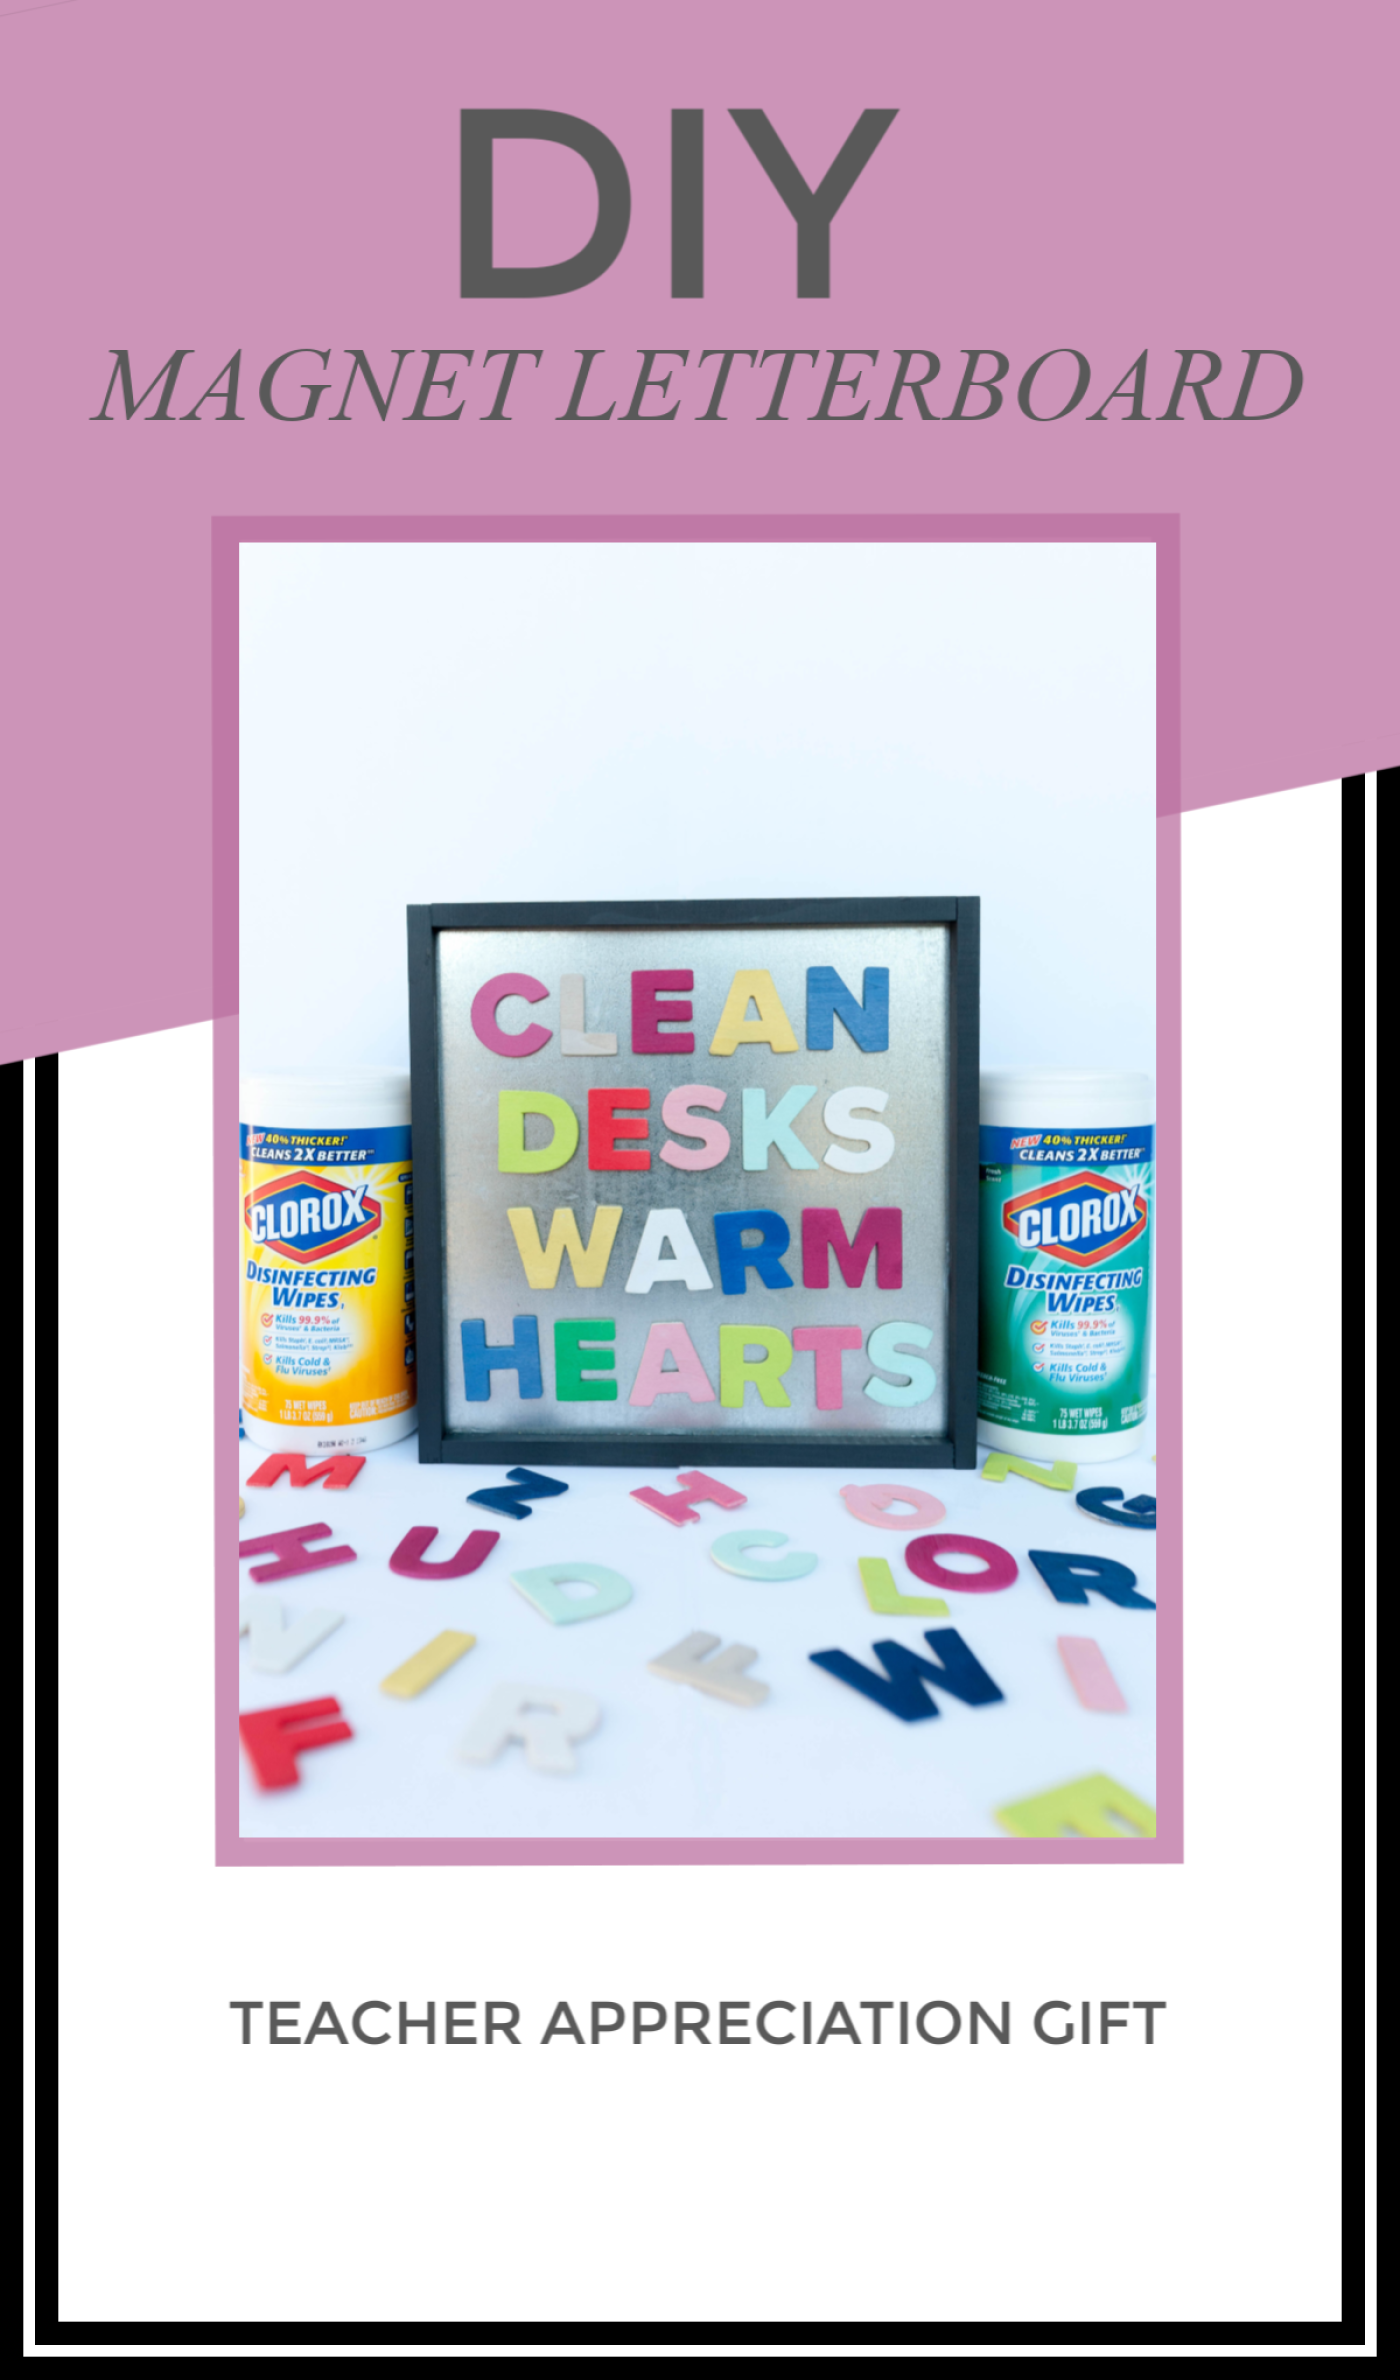
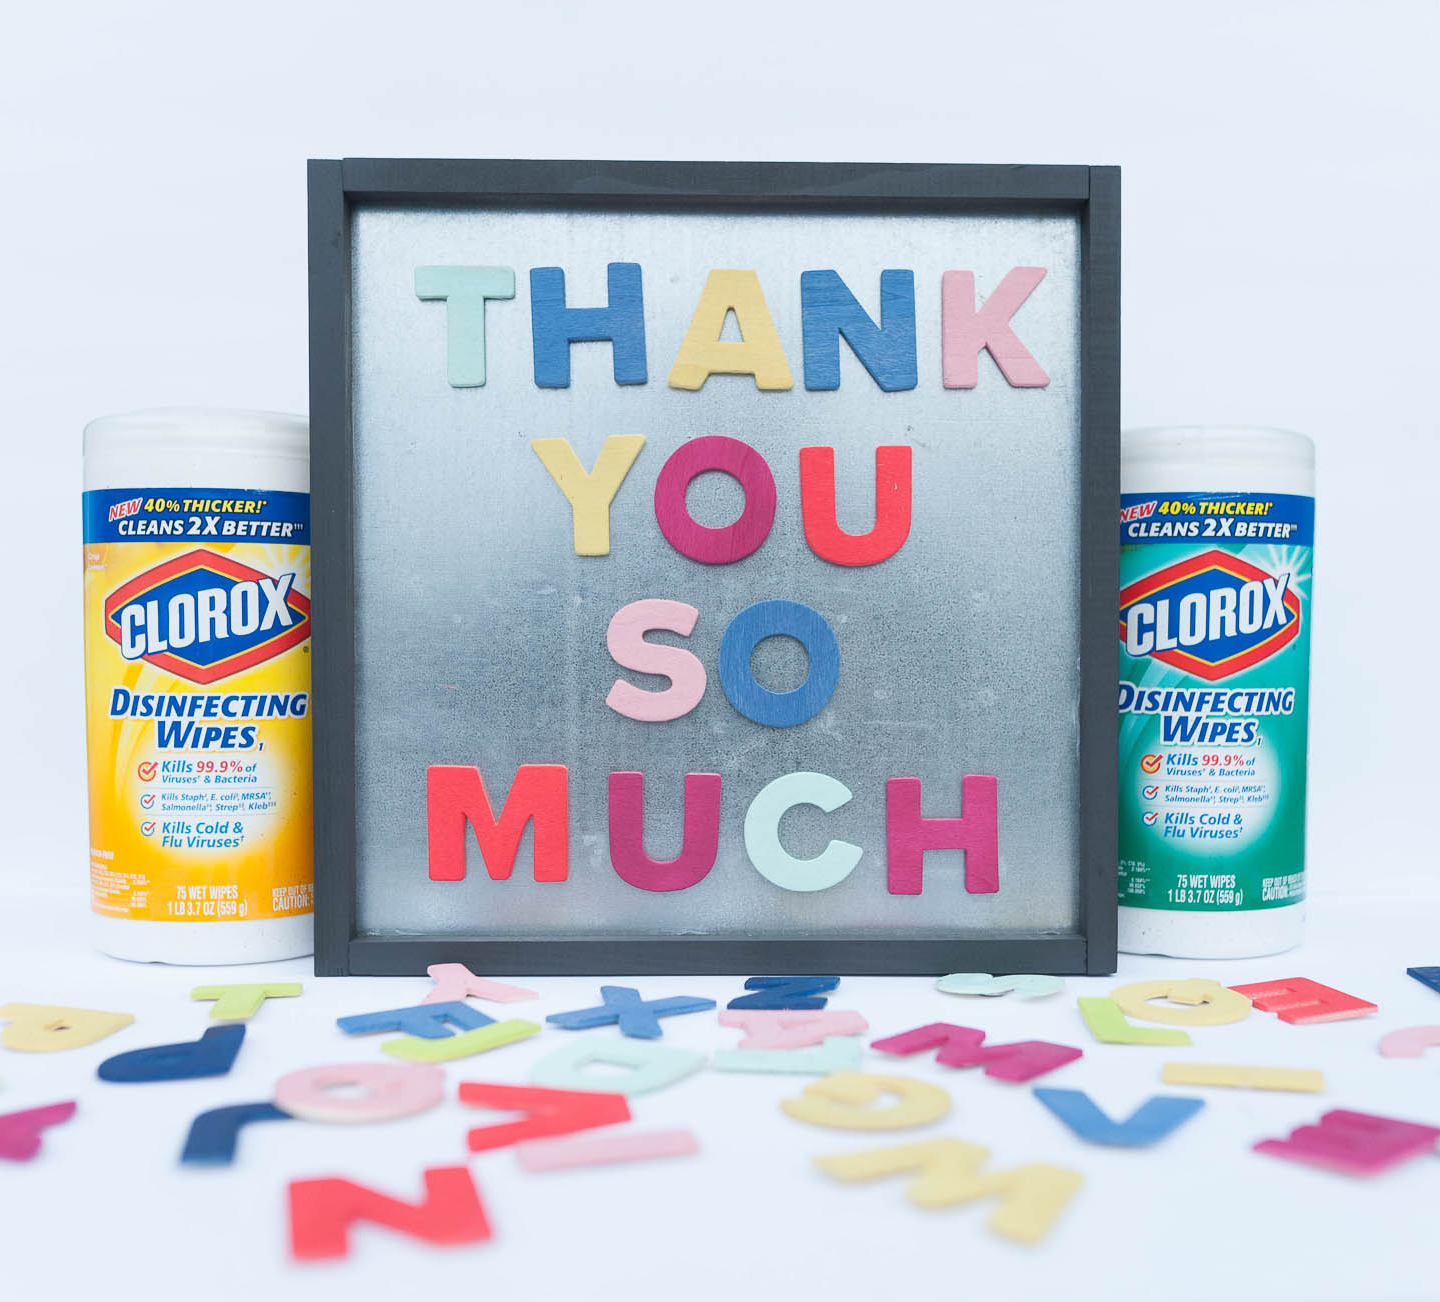
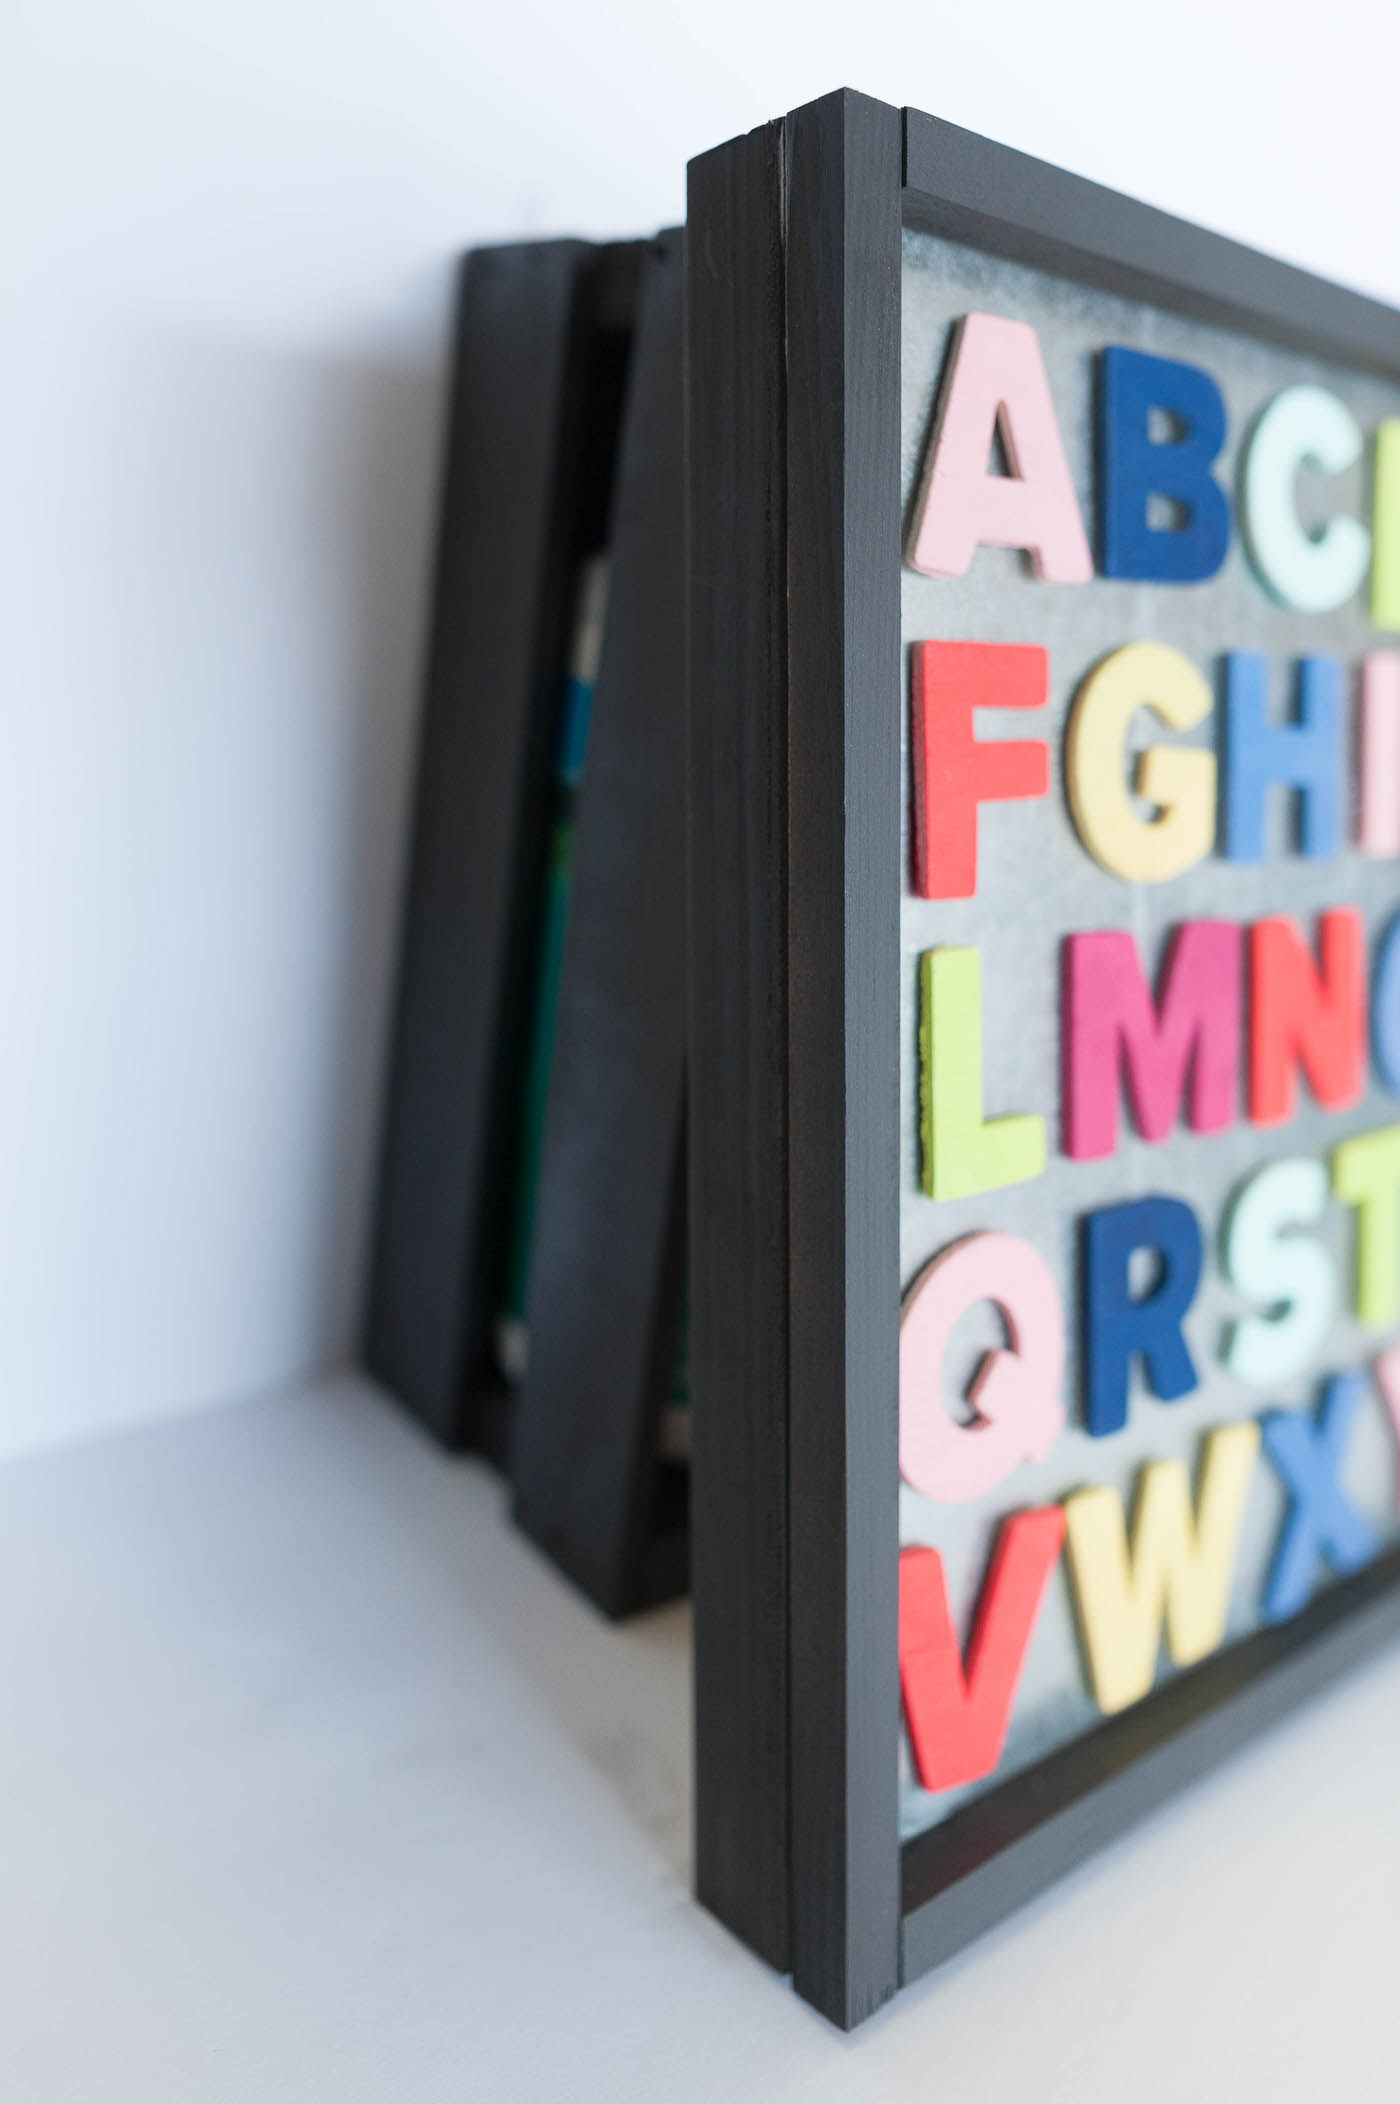
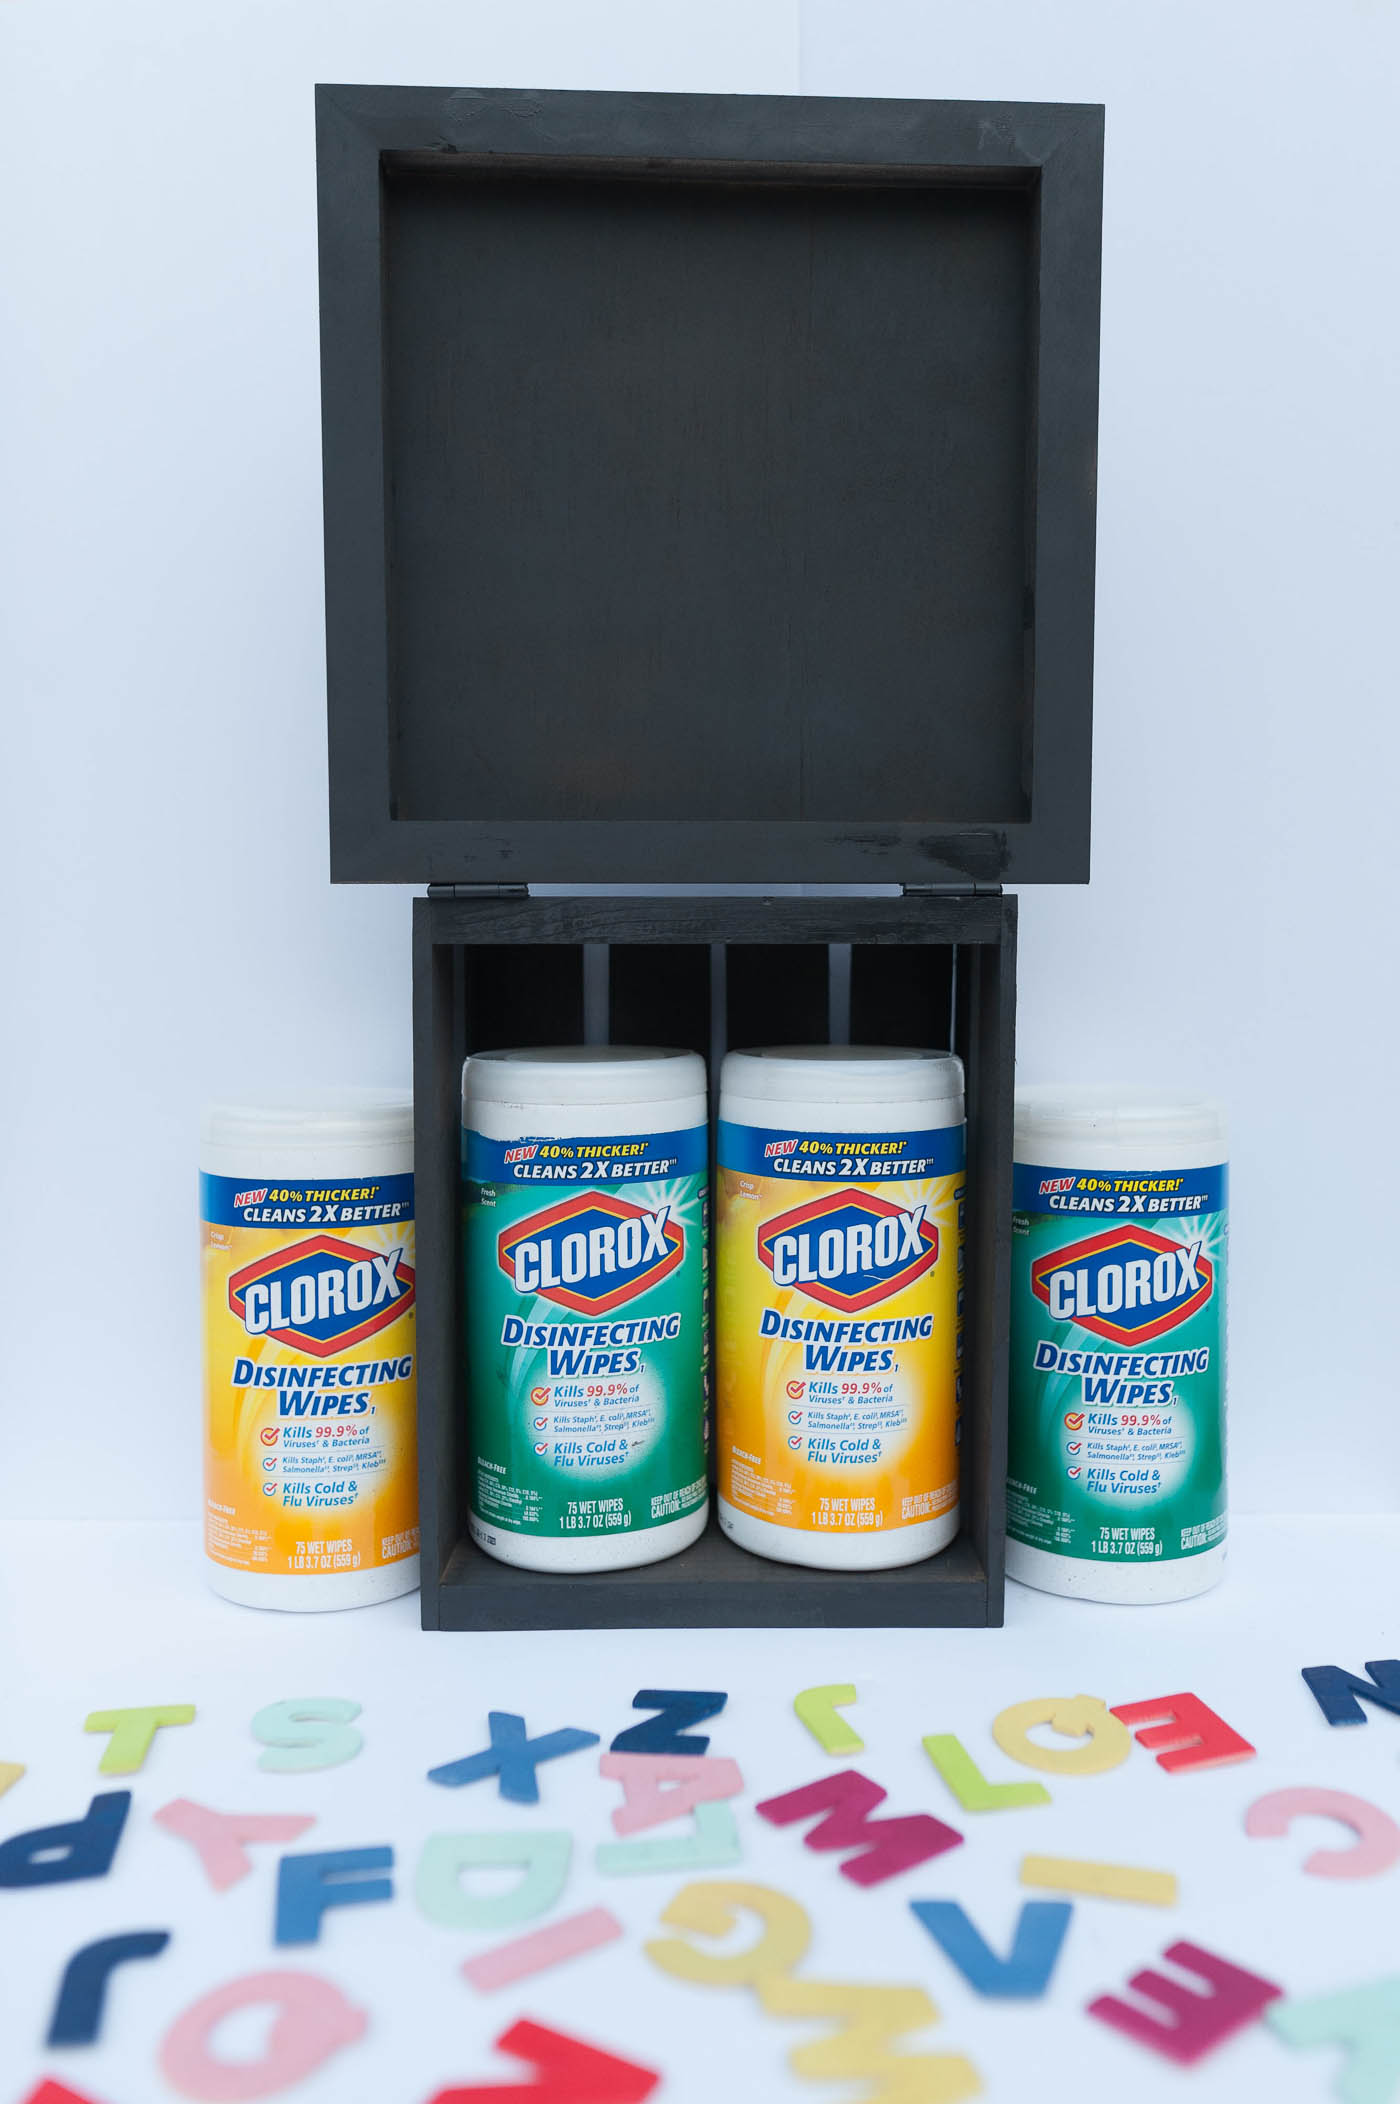
Since I’m a huge fan or Clorox wipes myself, I thought it might be fun to make a fun and useful gift for my son’s teacher! The fun magnet letter board can sit right on the counter of his teacher’s classroom and inside, it holds two rolls of Clorox wipes.
I’m so excited at how cute the project turned out! I cannot wait to surprise Creed’s teacher. Check out how I made it below.
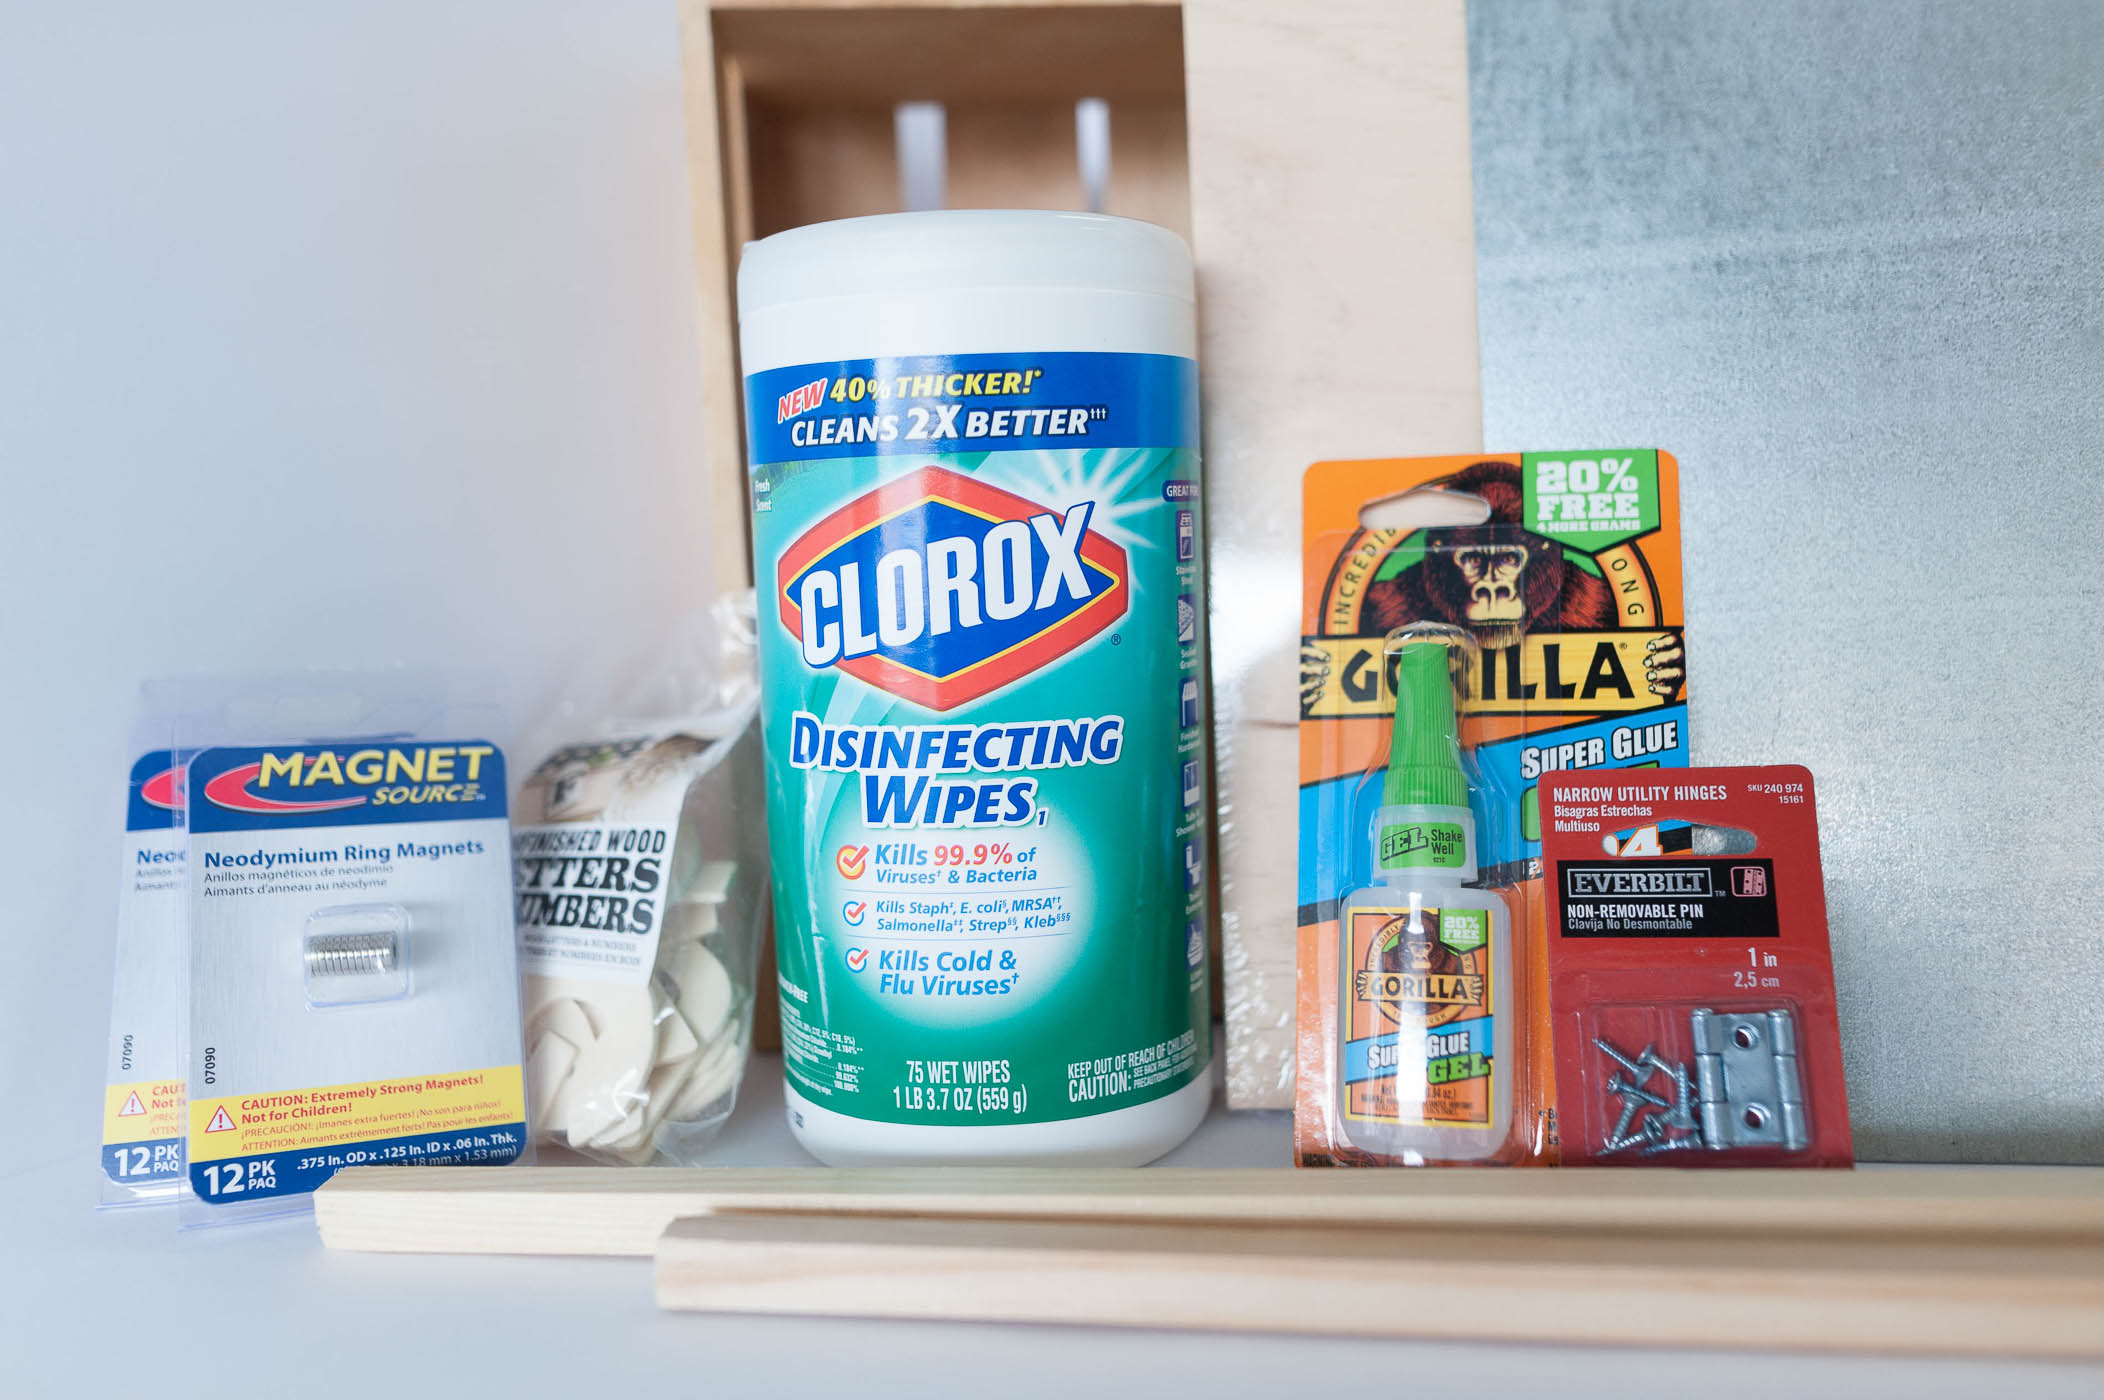
Supplies List:
Two 1/2″x1/2″ trim wood pieces
Tools needed:
Drill or screwdriver
Miter Saw {if you don’t have this, the employees at Home Depot can help you by making your cuts}
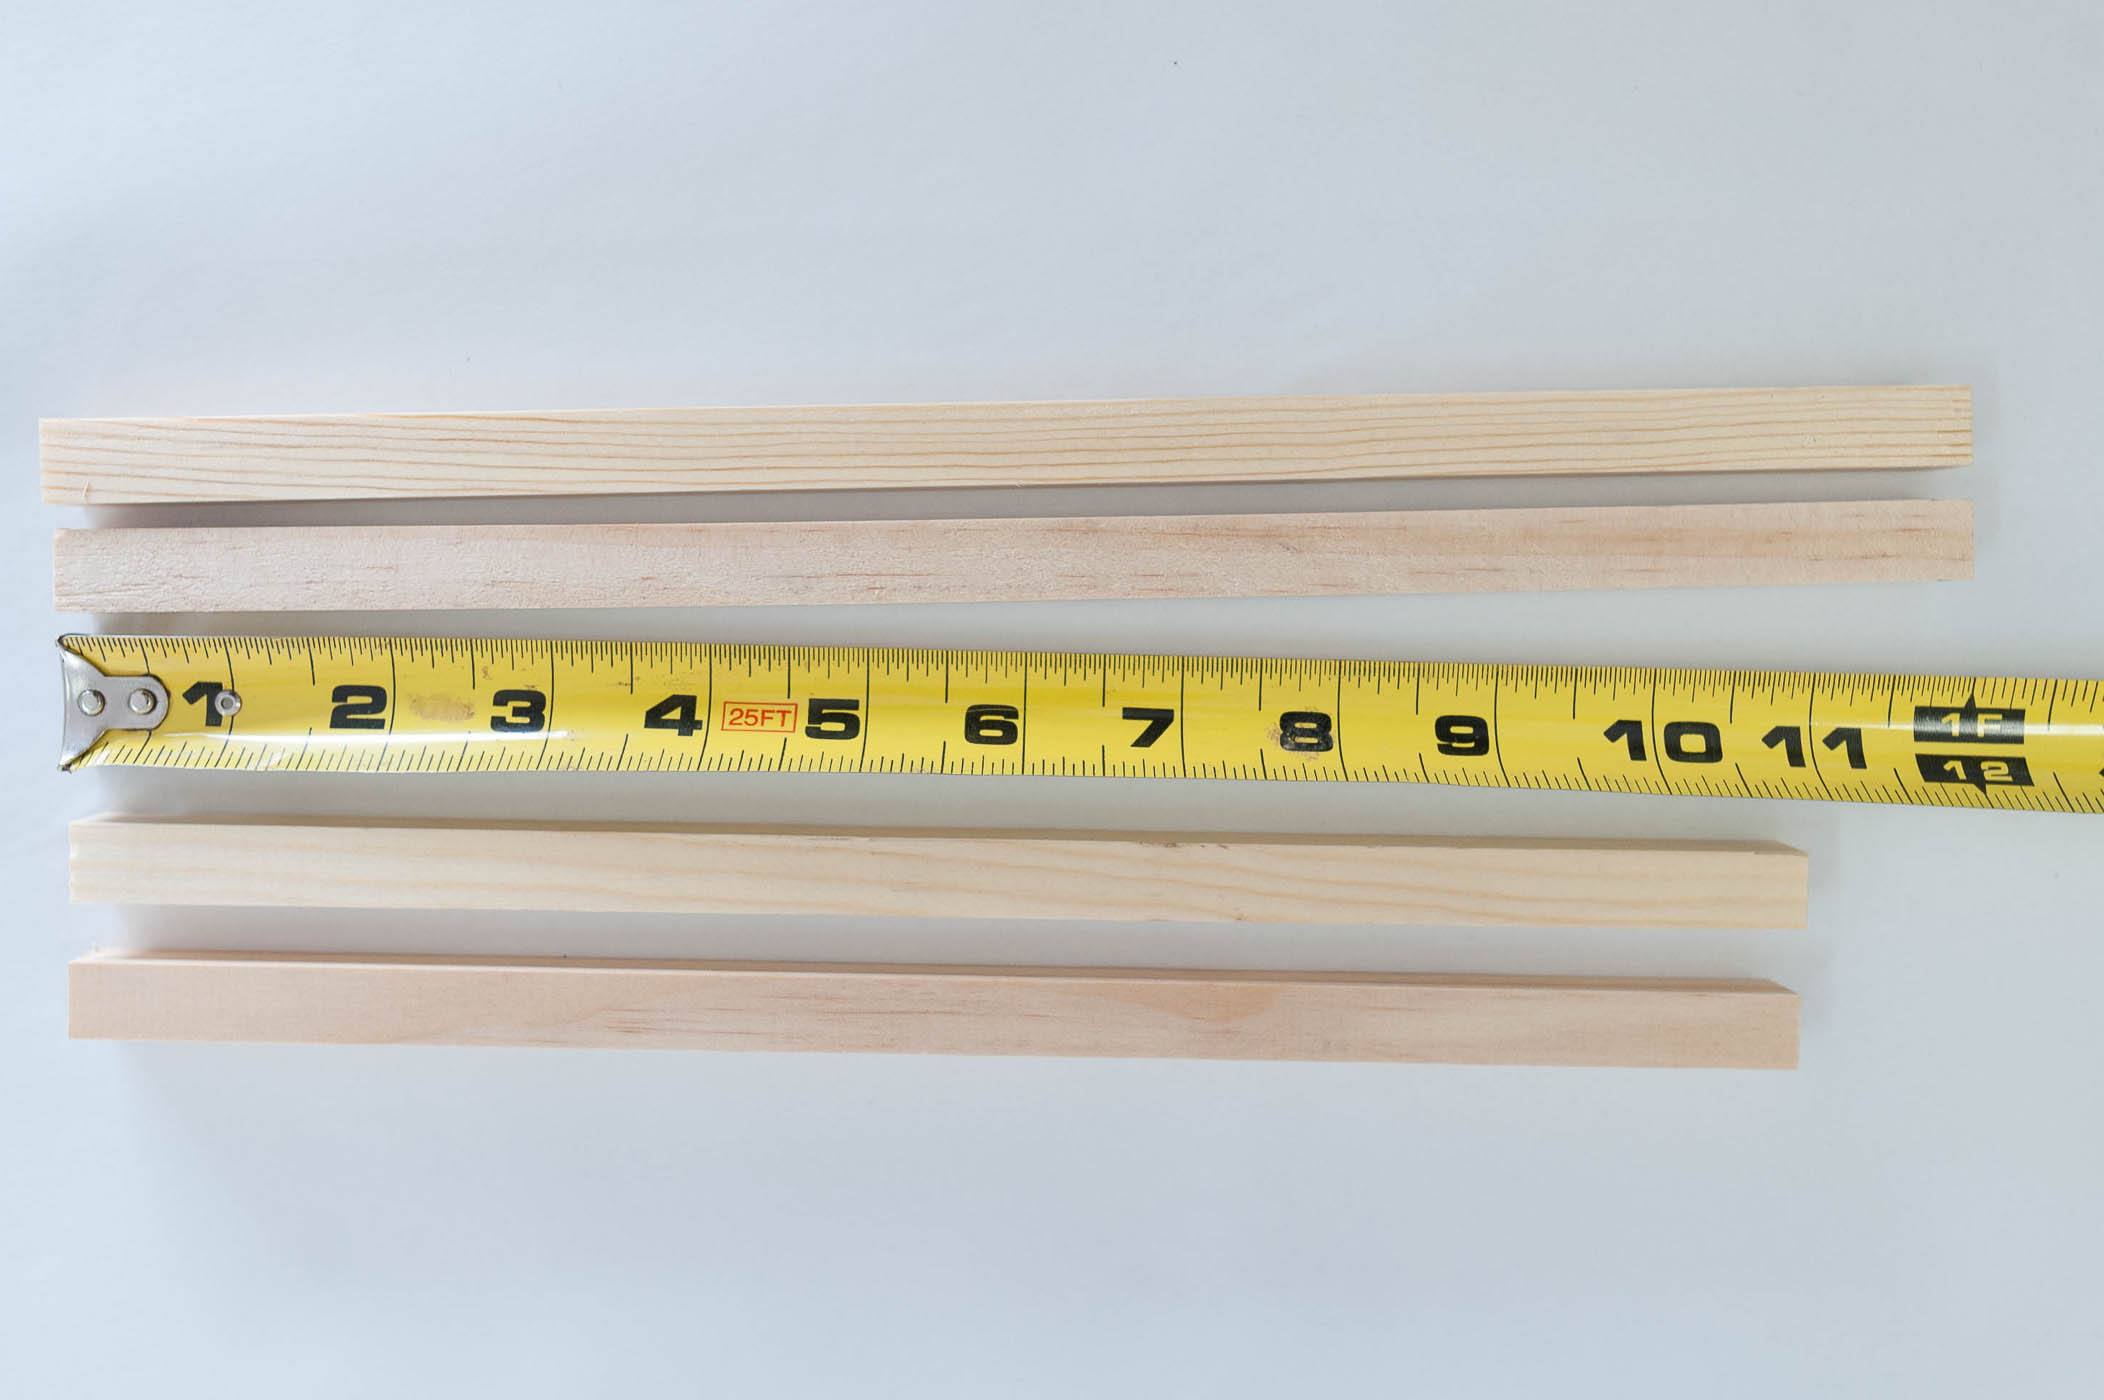
Step 1: Measure and cut your 1/2” X 1/2” wooden trim pieces. If you don’t have a miter saw, you can have the Home Depot Associates cut them for you in the store. 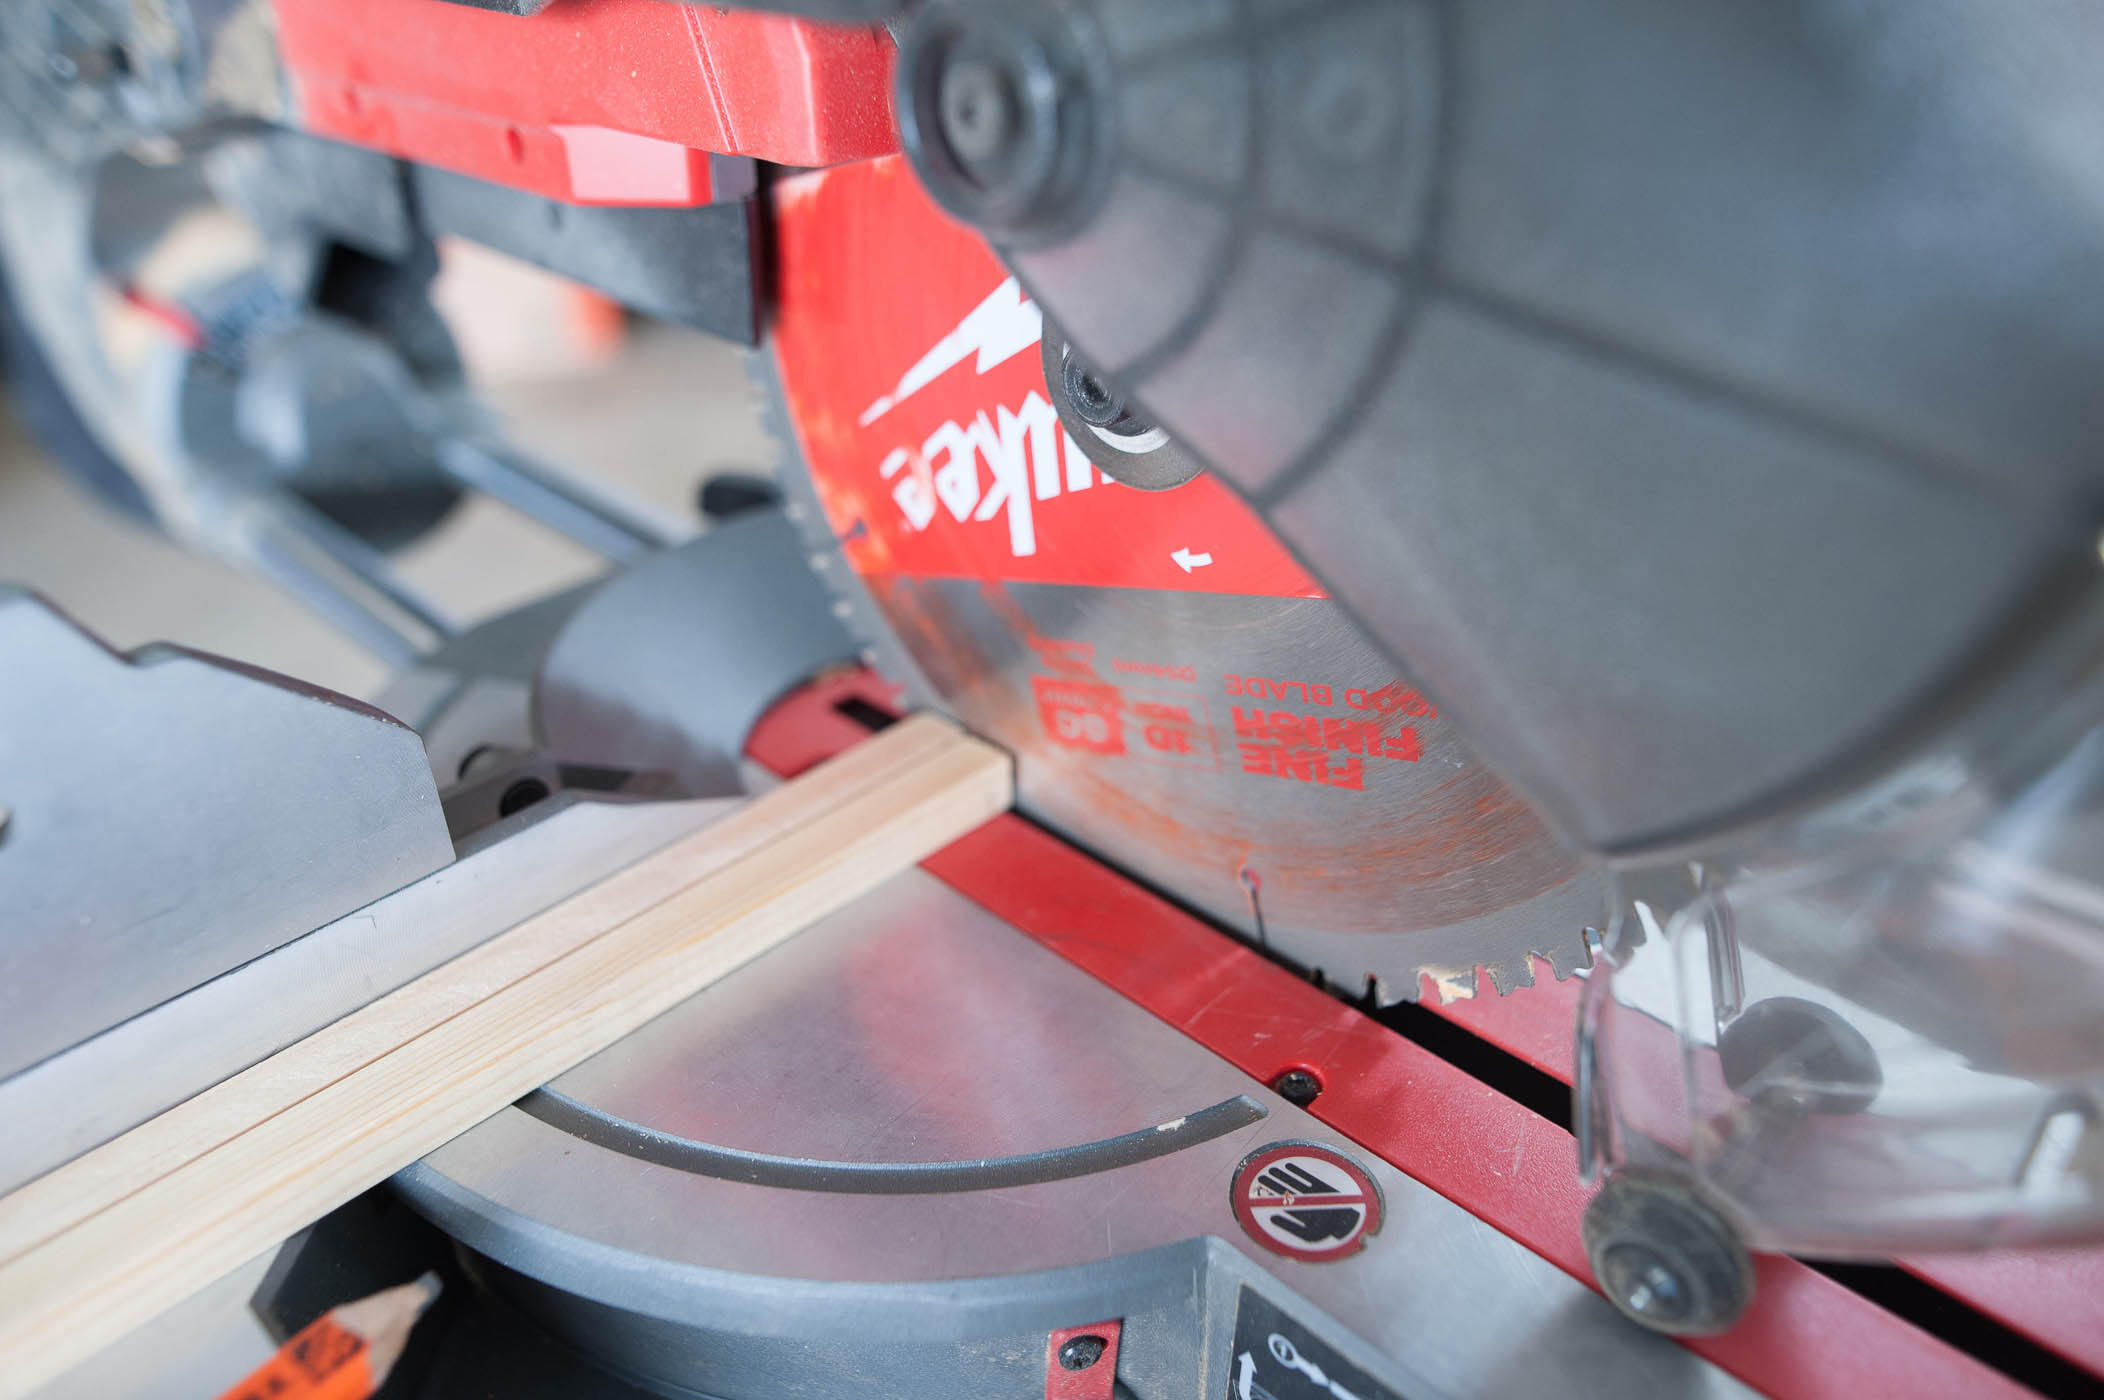
You need two pieces that are exactly 12 inches, and two pieces that are 10 7/8 inches.
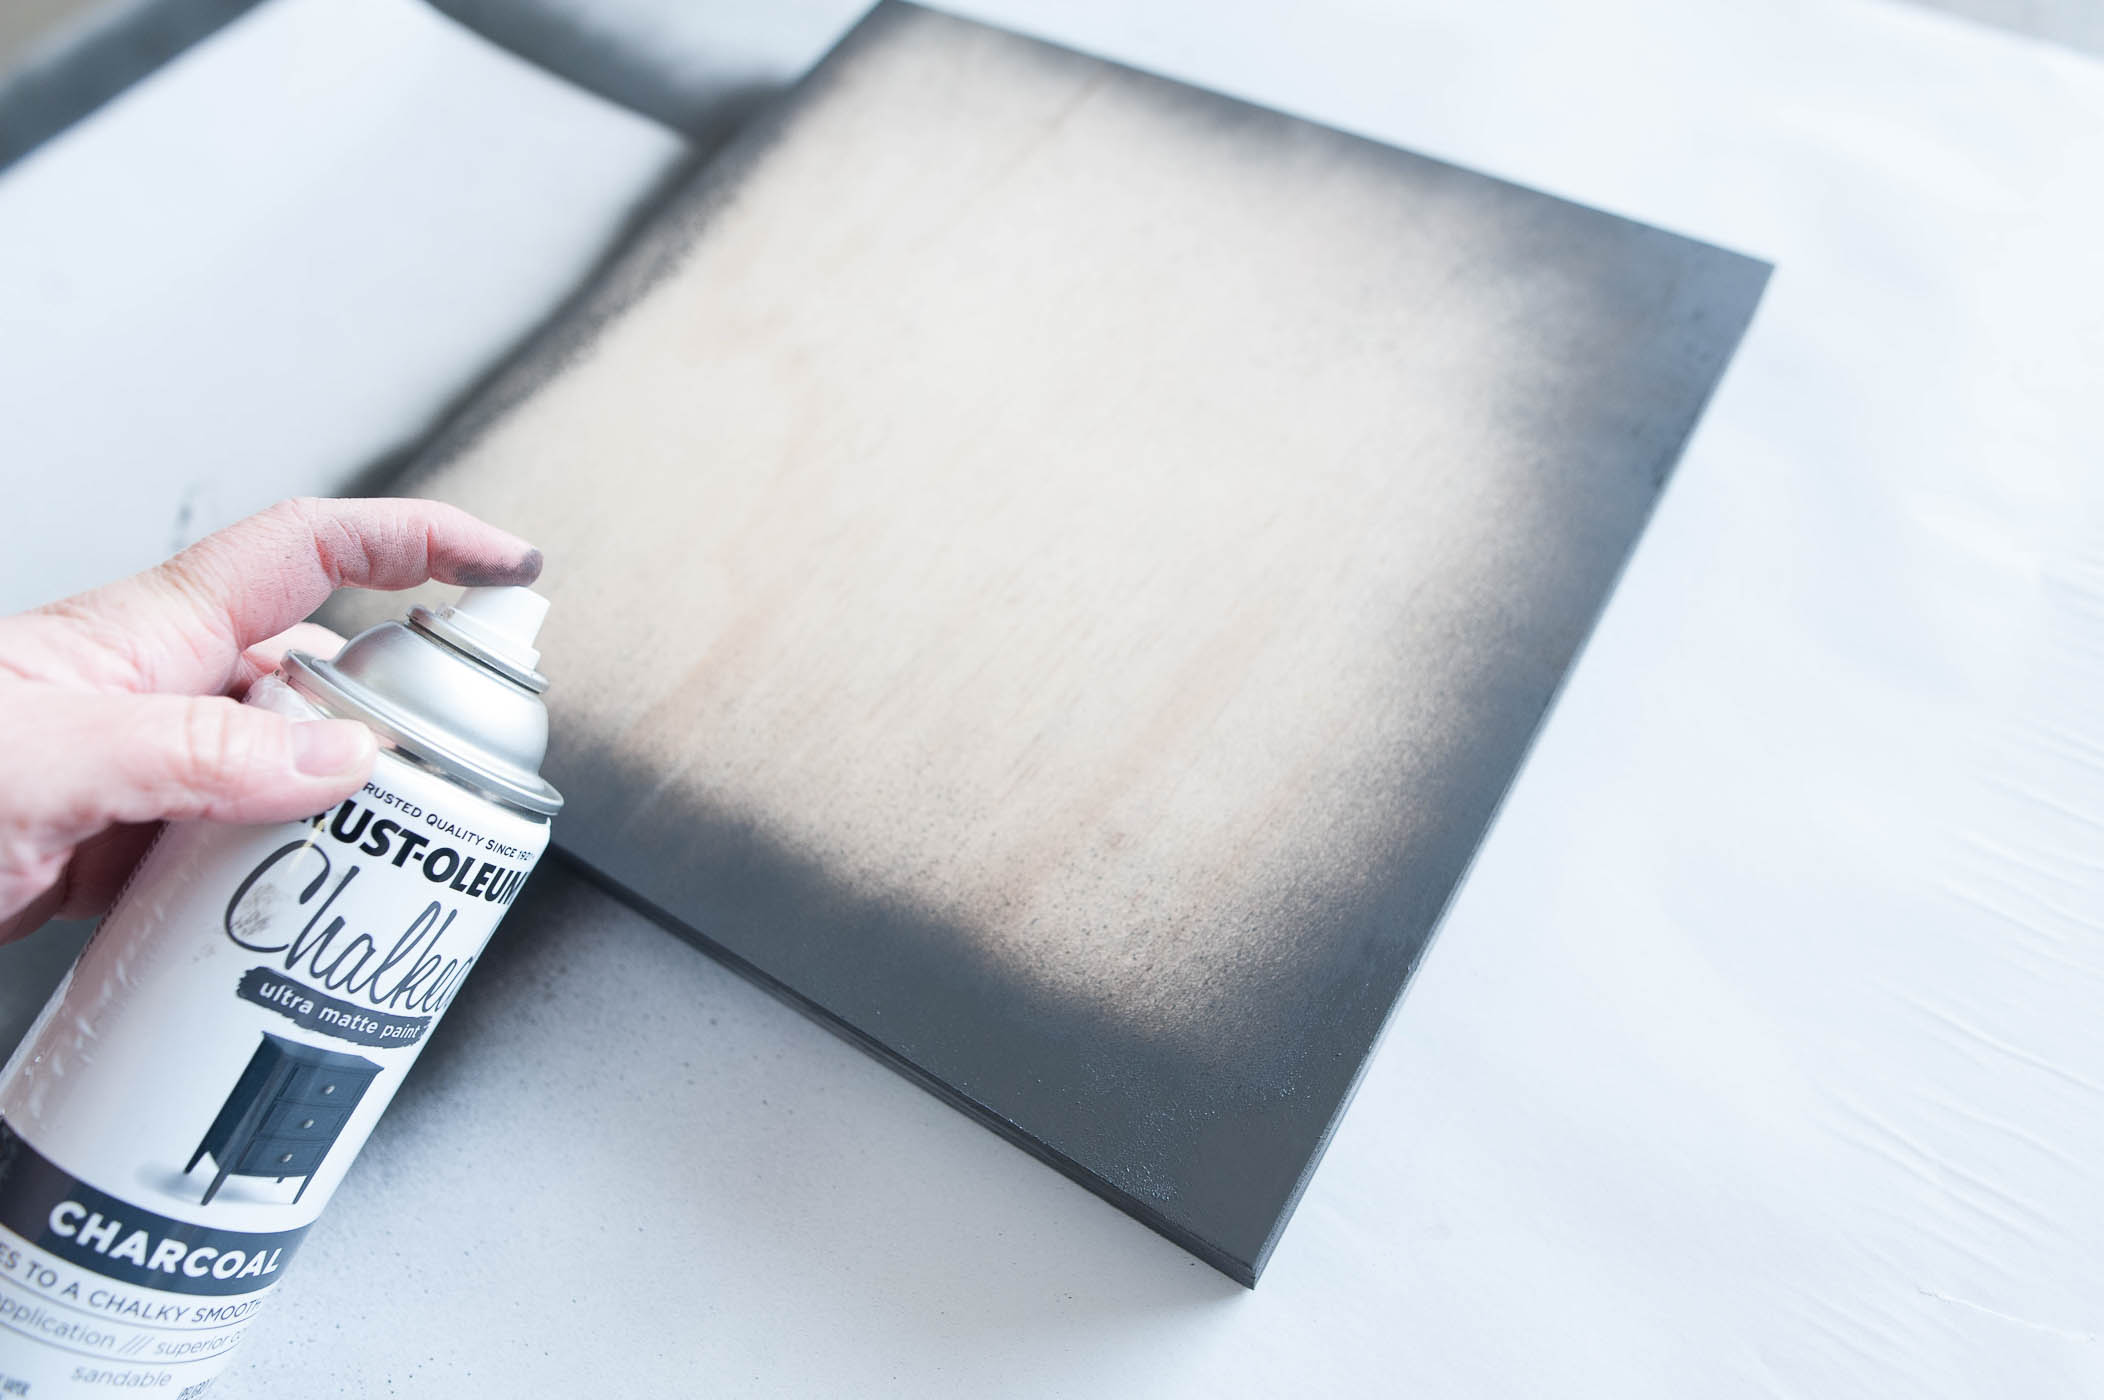
Step 2: Paint the edges of your wooden canvas and your trim pieces. No need to pain the entire canvas, it will be covered up with sheet metal. I used Chalked Charcoal spray paint for this.
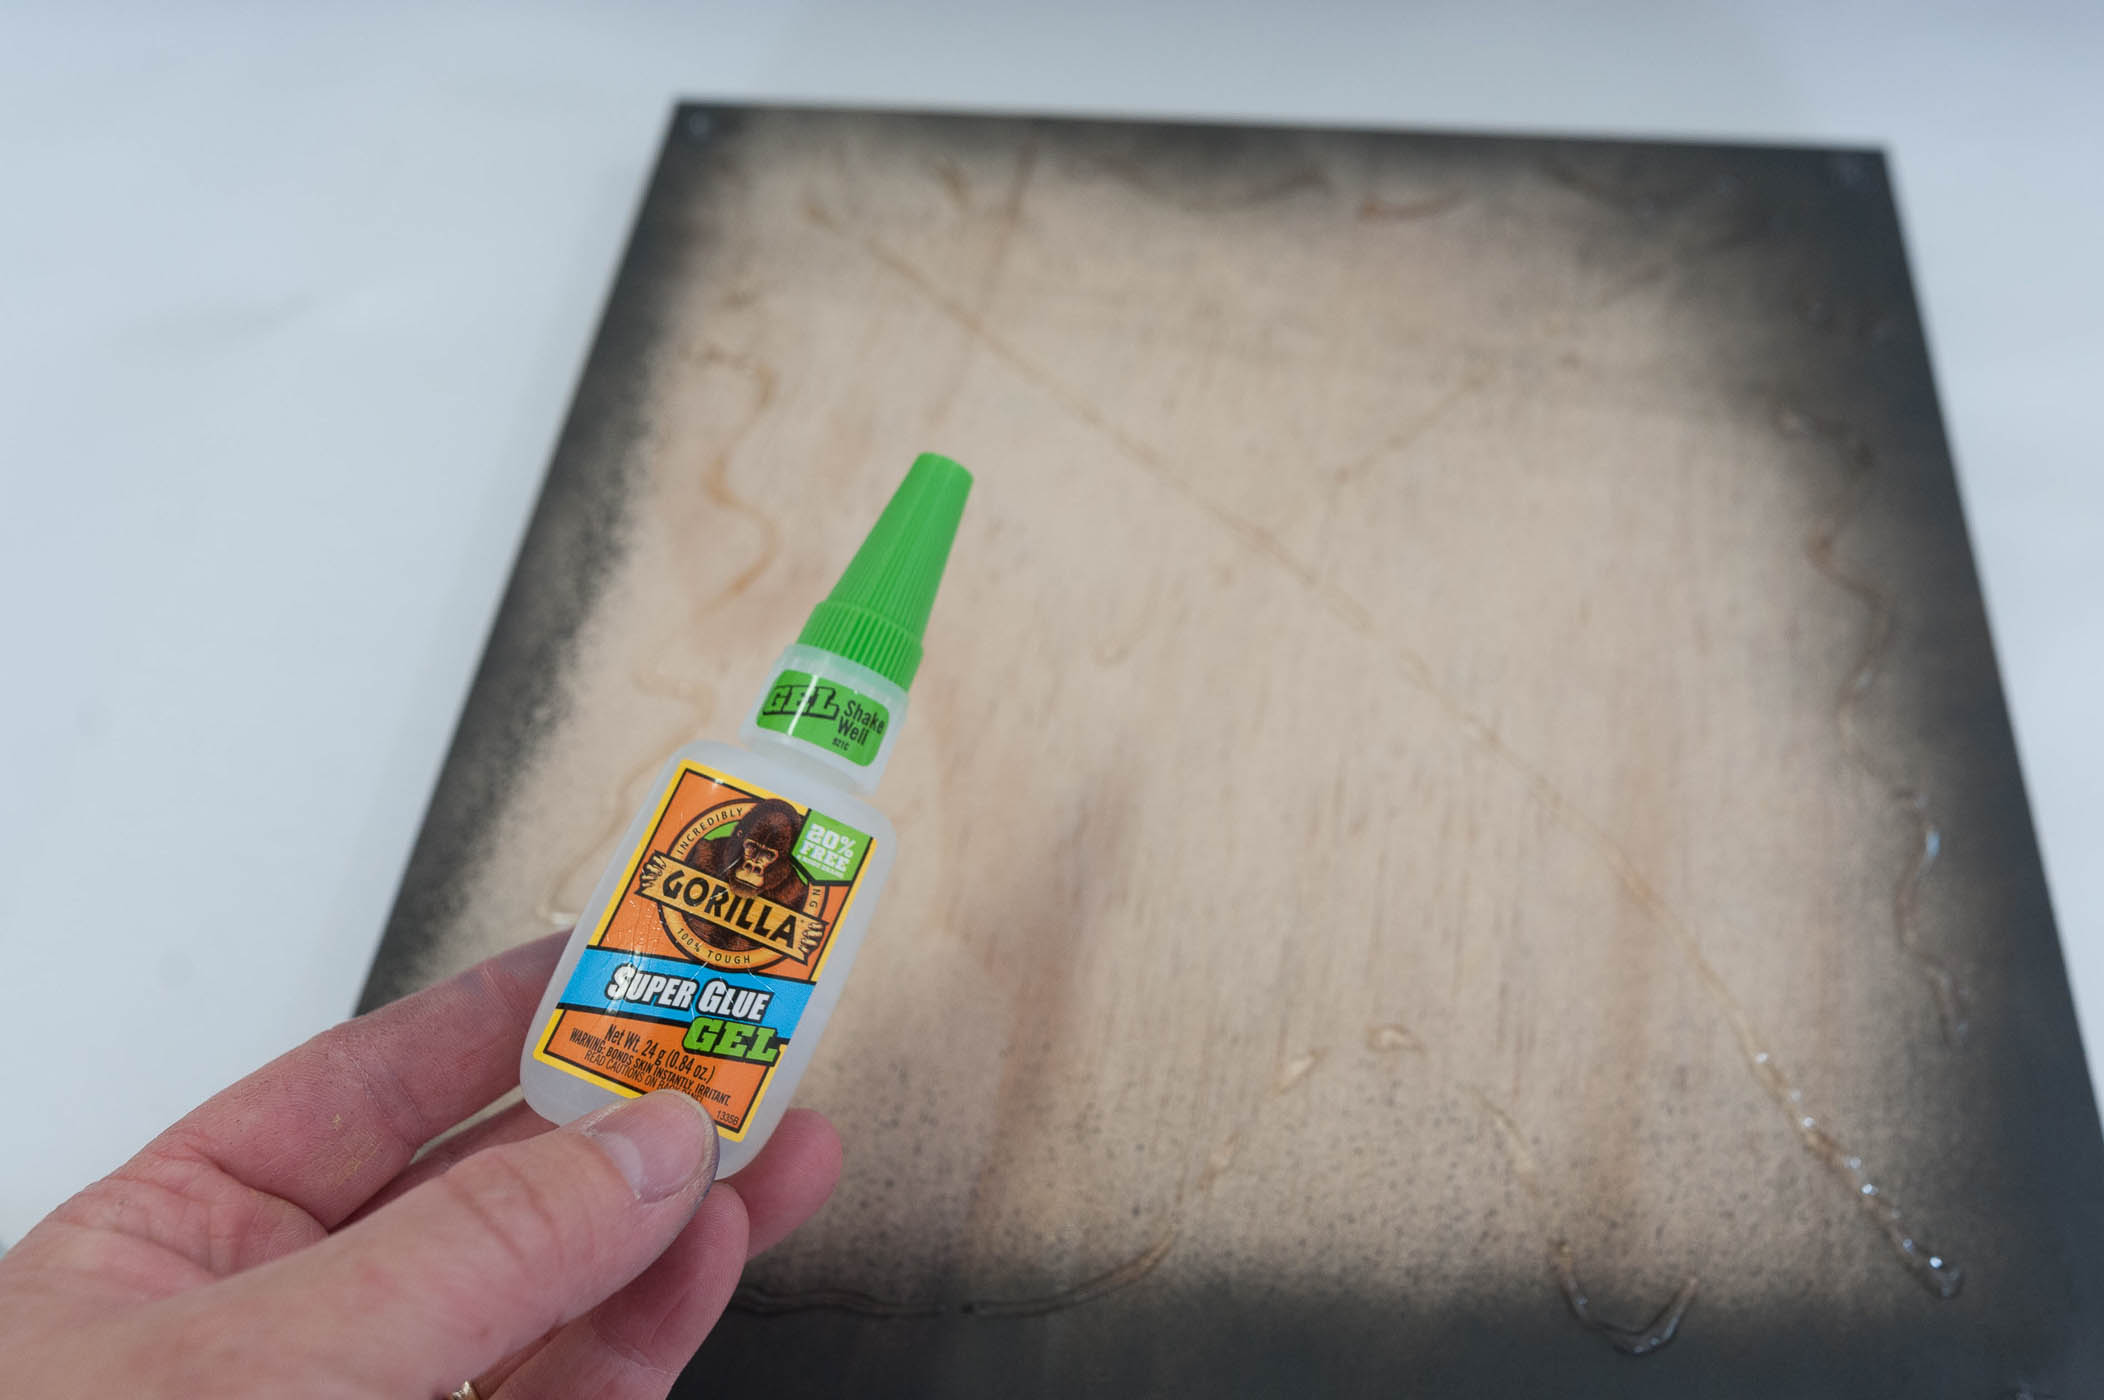
Step 3: Use construction adhesive to glue your 12×12 piece of sheet metal to the wooden canvas, then glue your trim pieces to the metal edges to create the look of a frame.
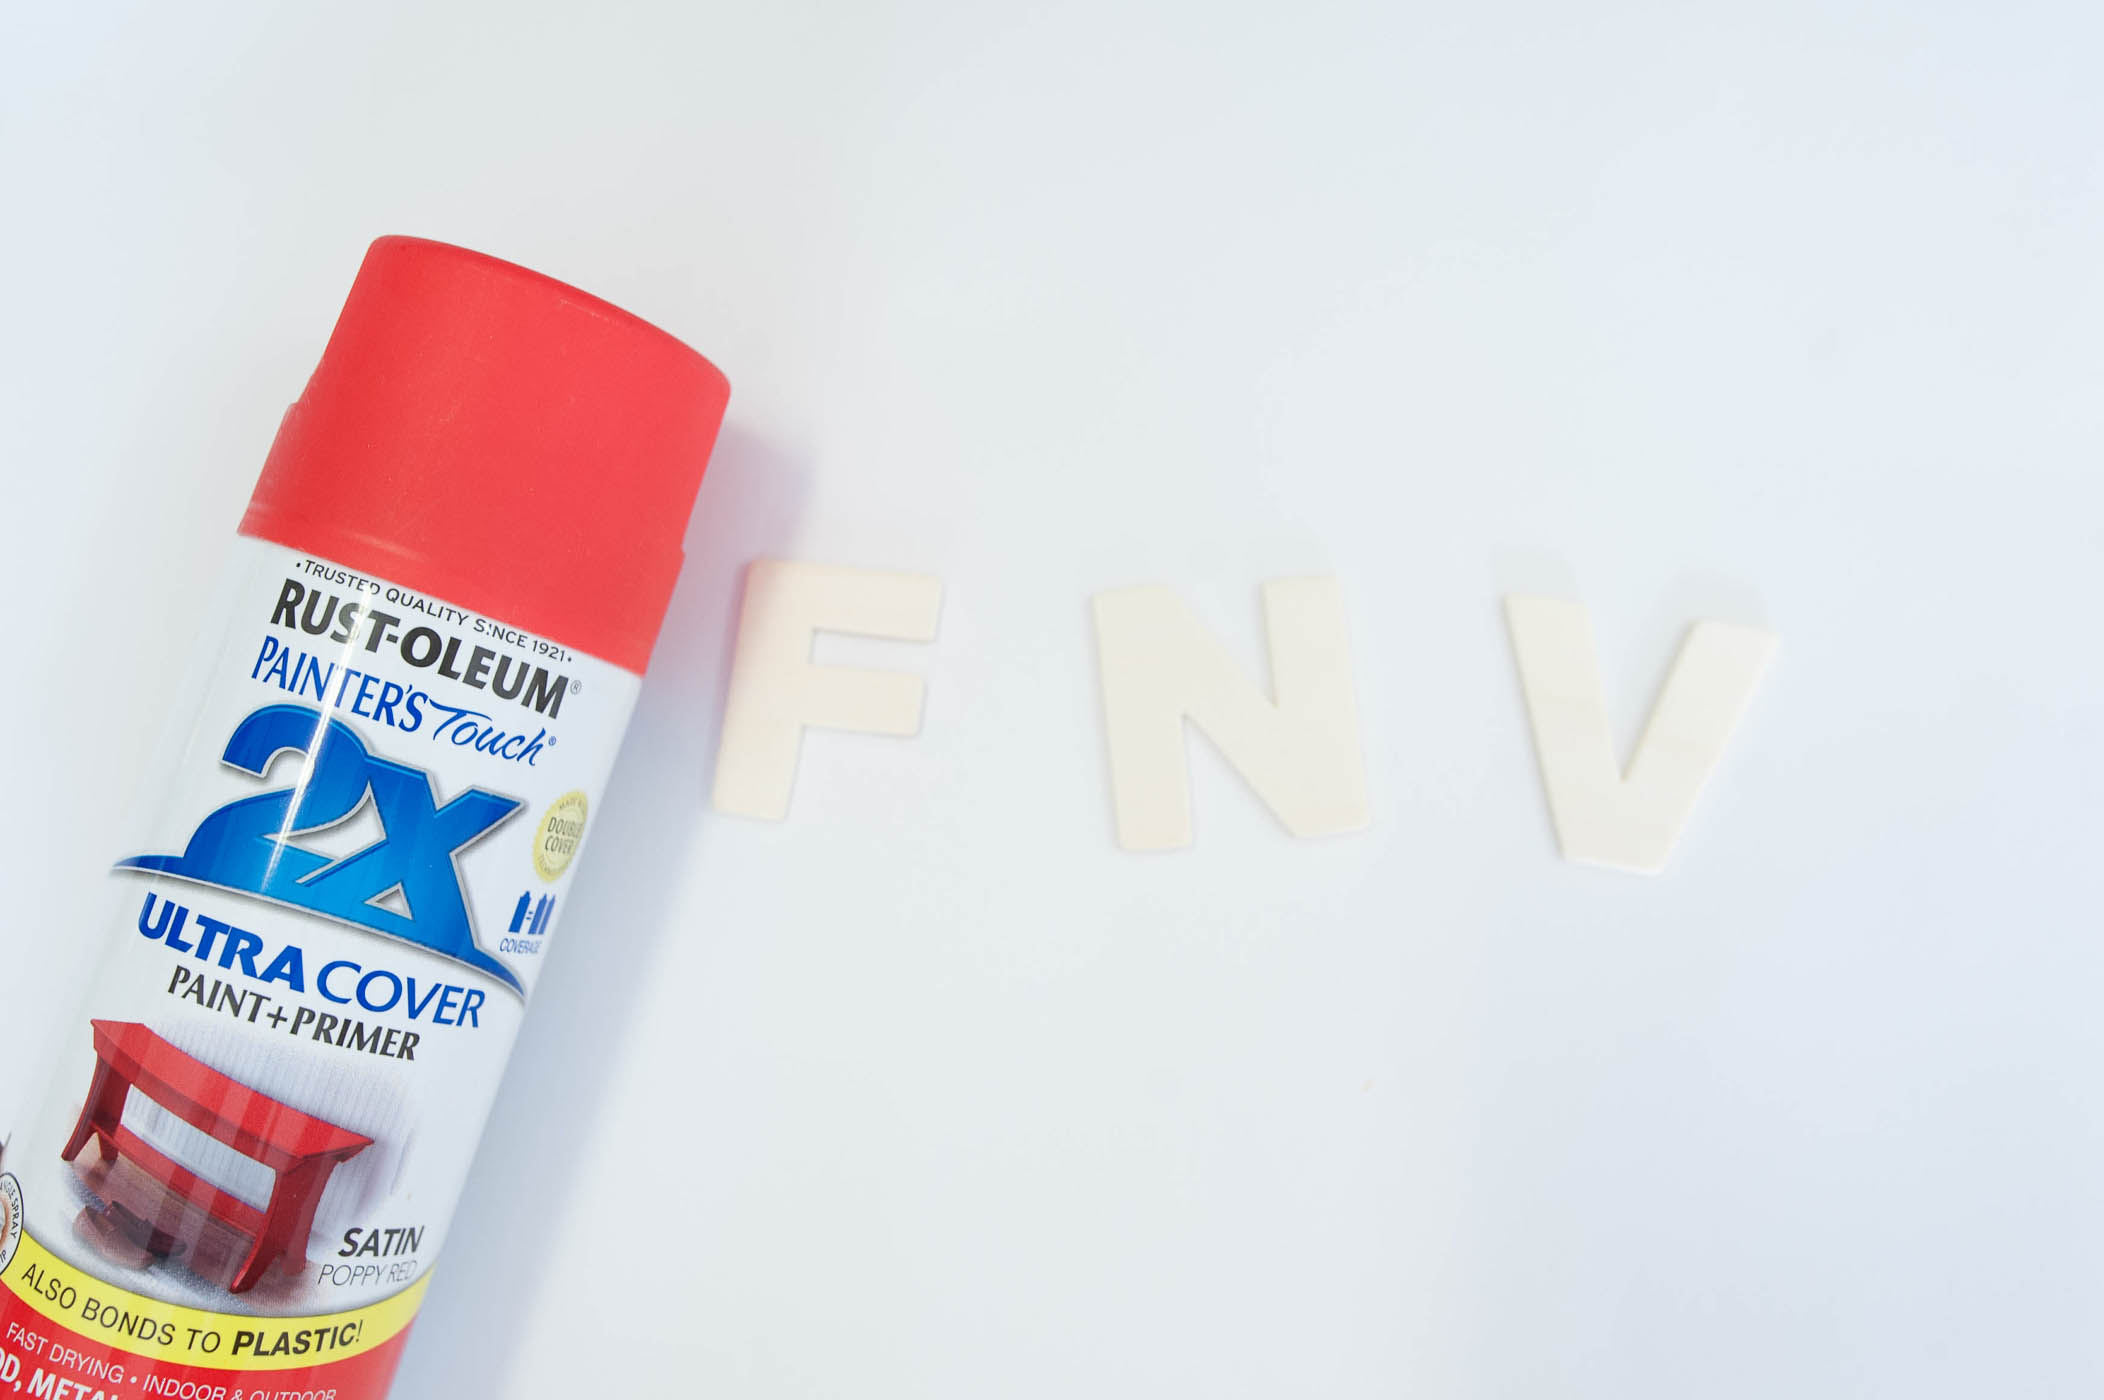
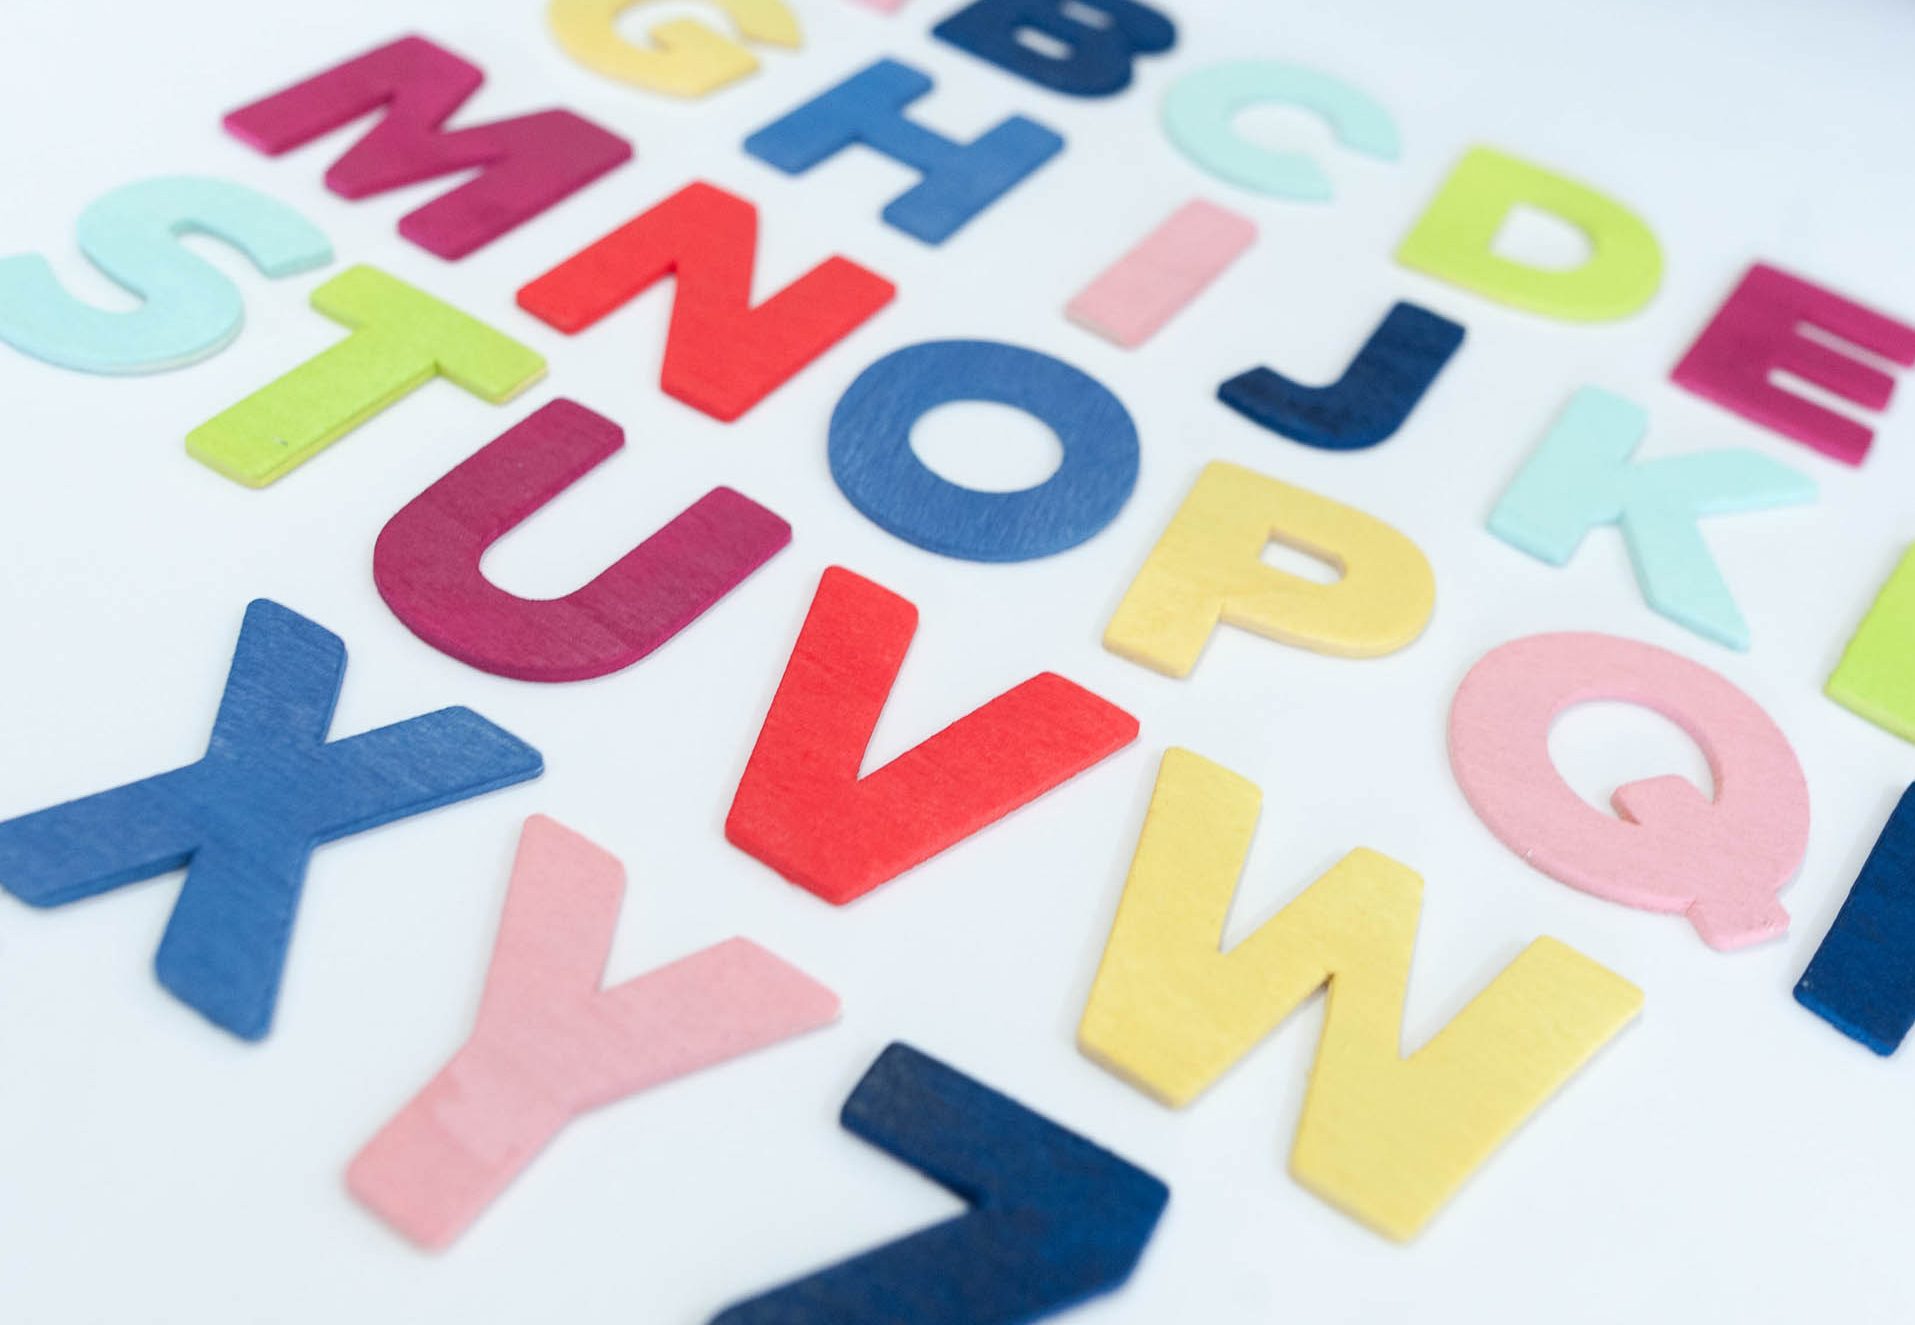
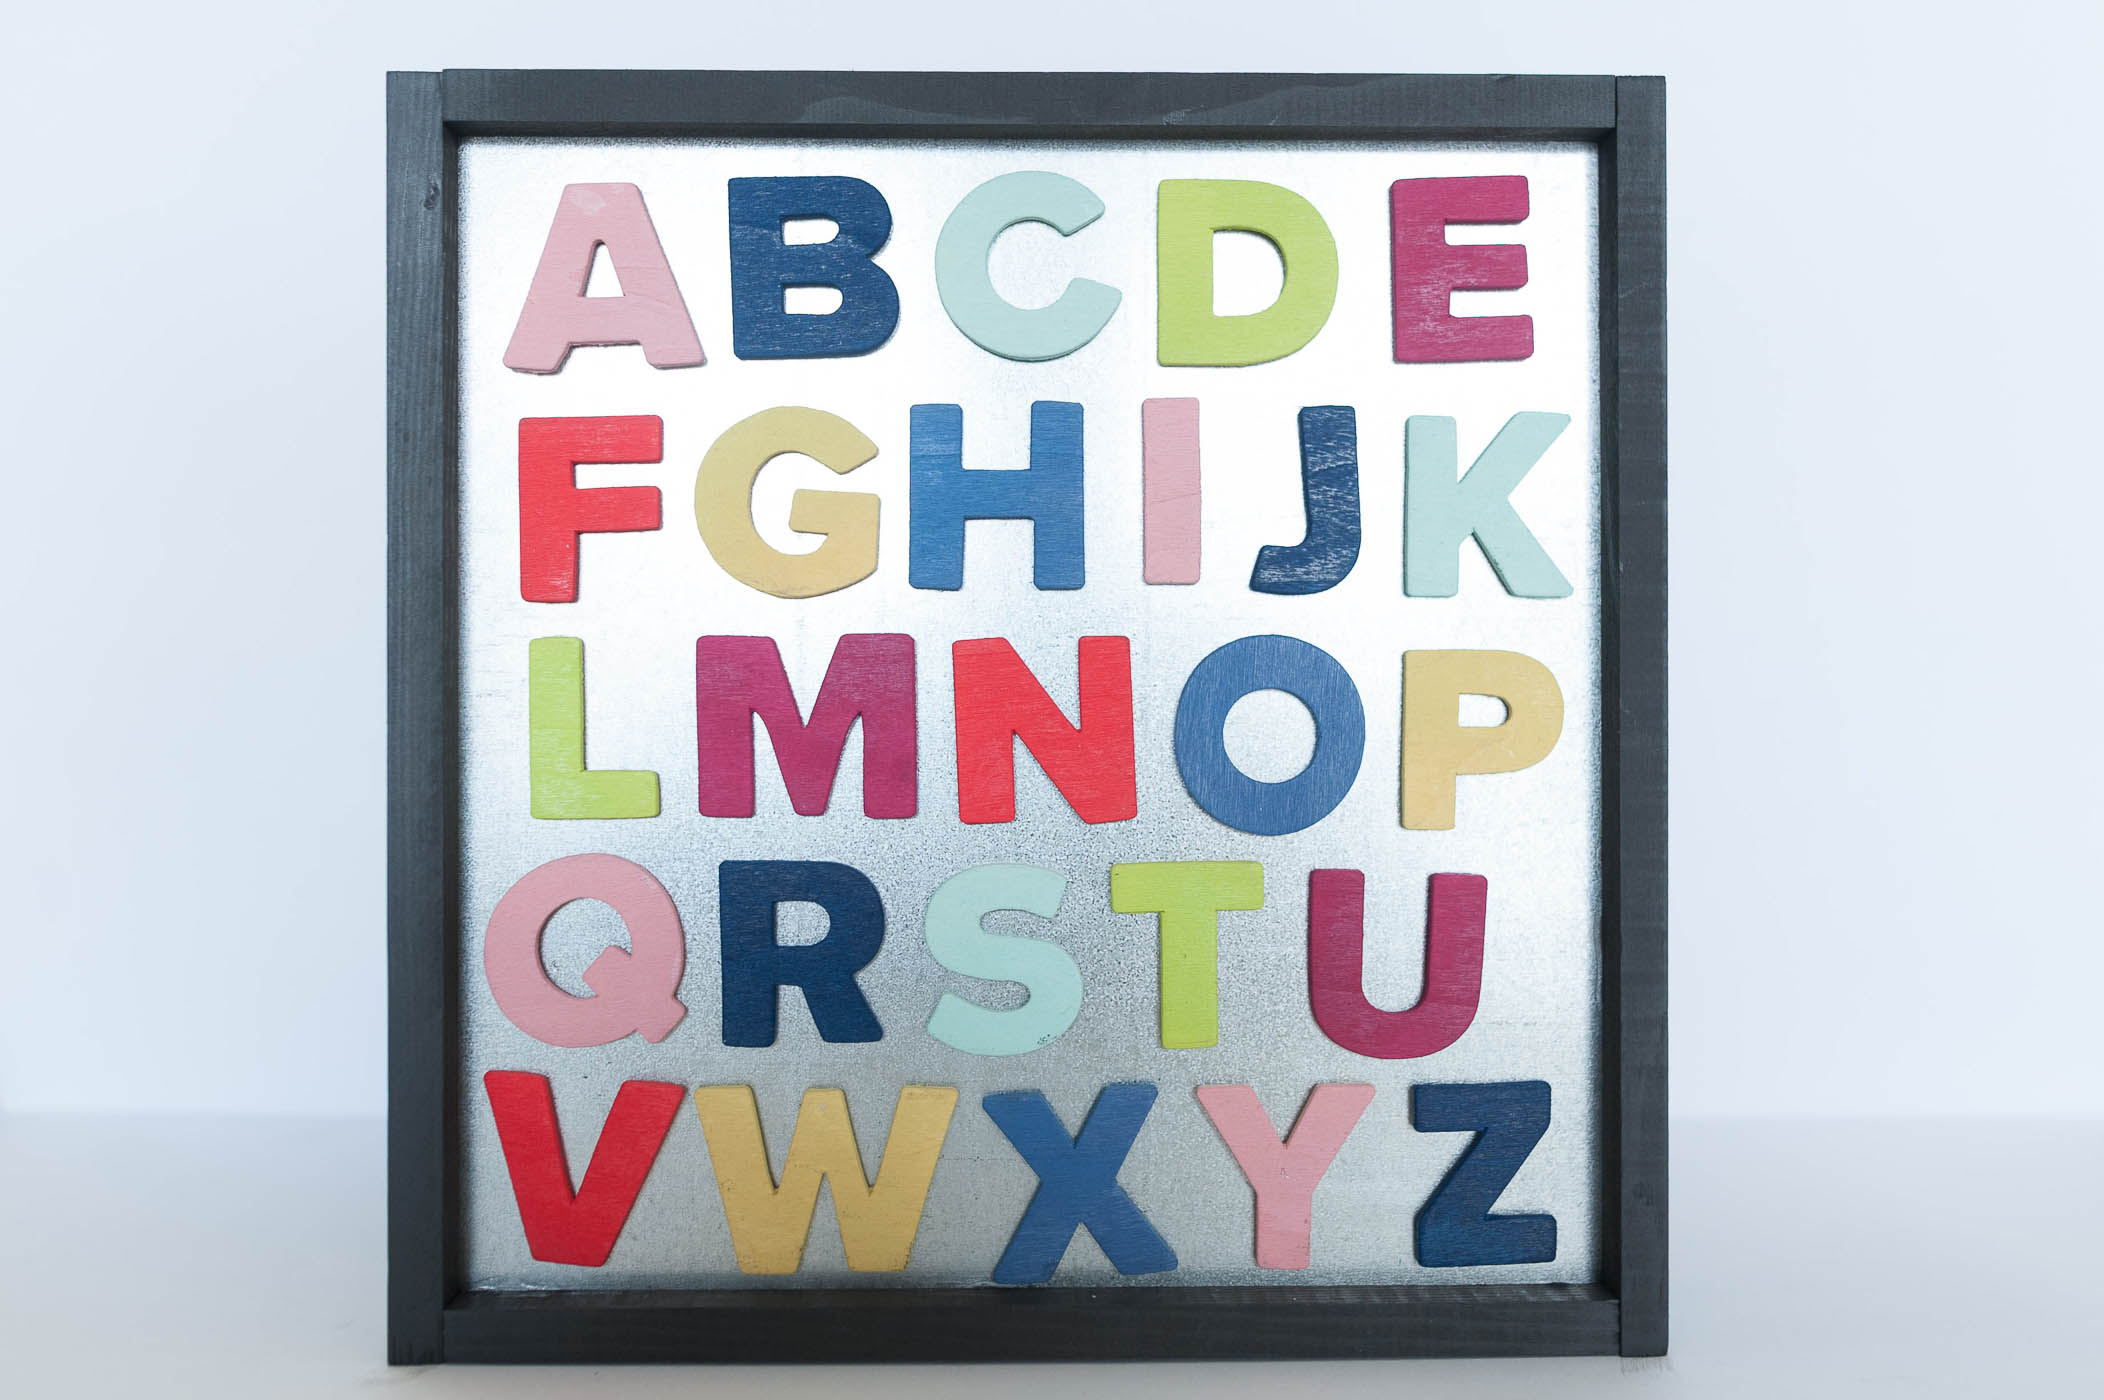
Step 4: Paint your wooden letters with spray paint and let dry completely.

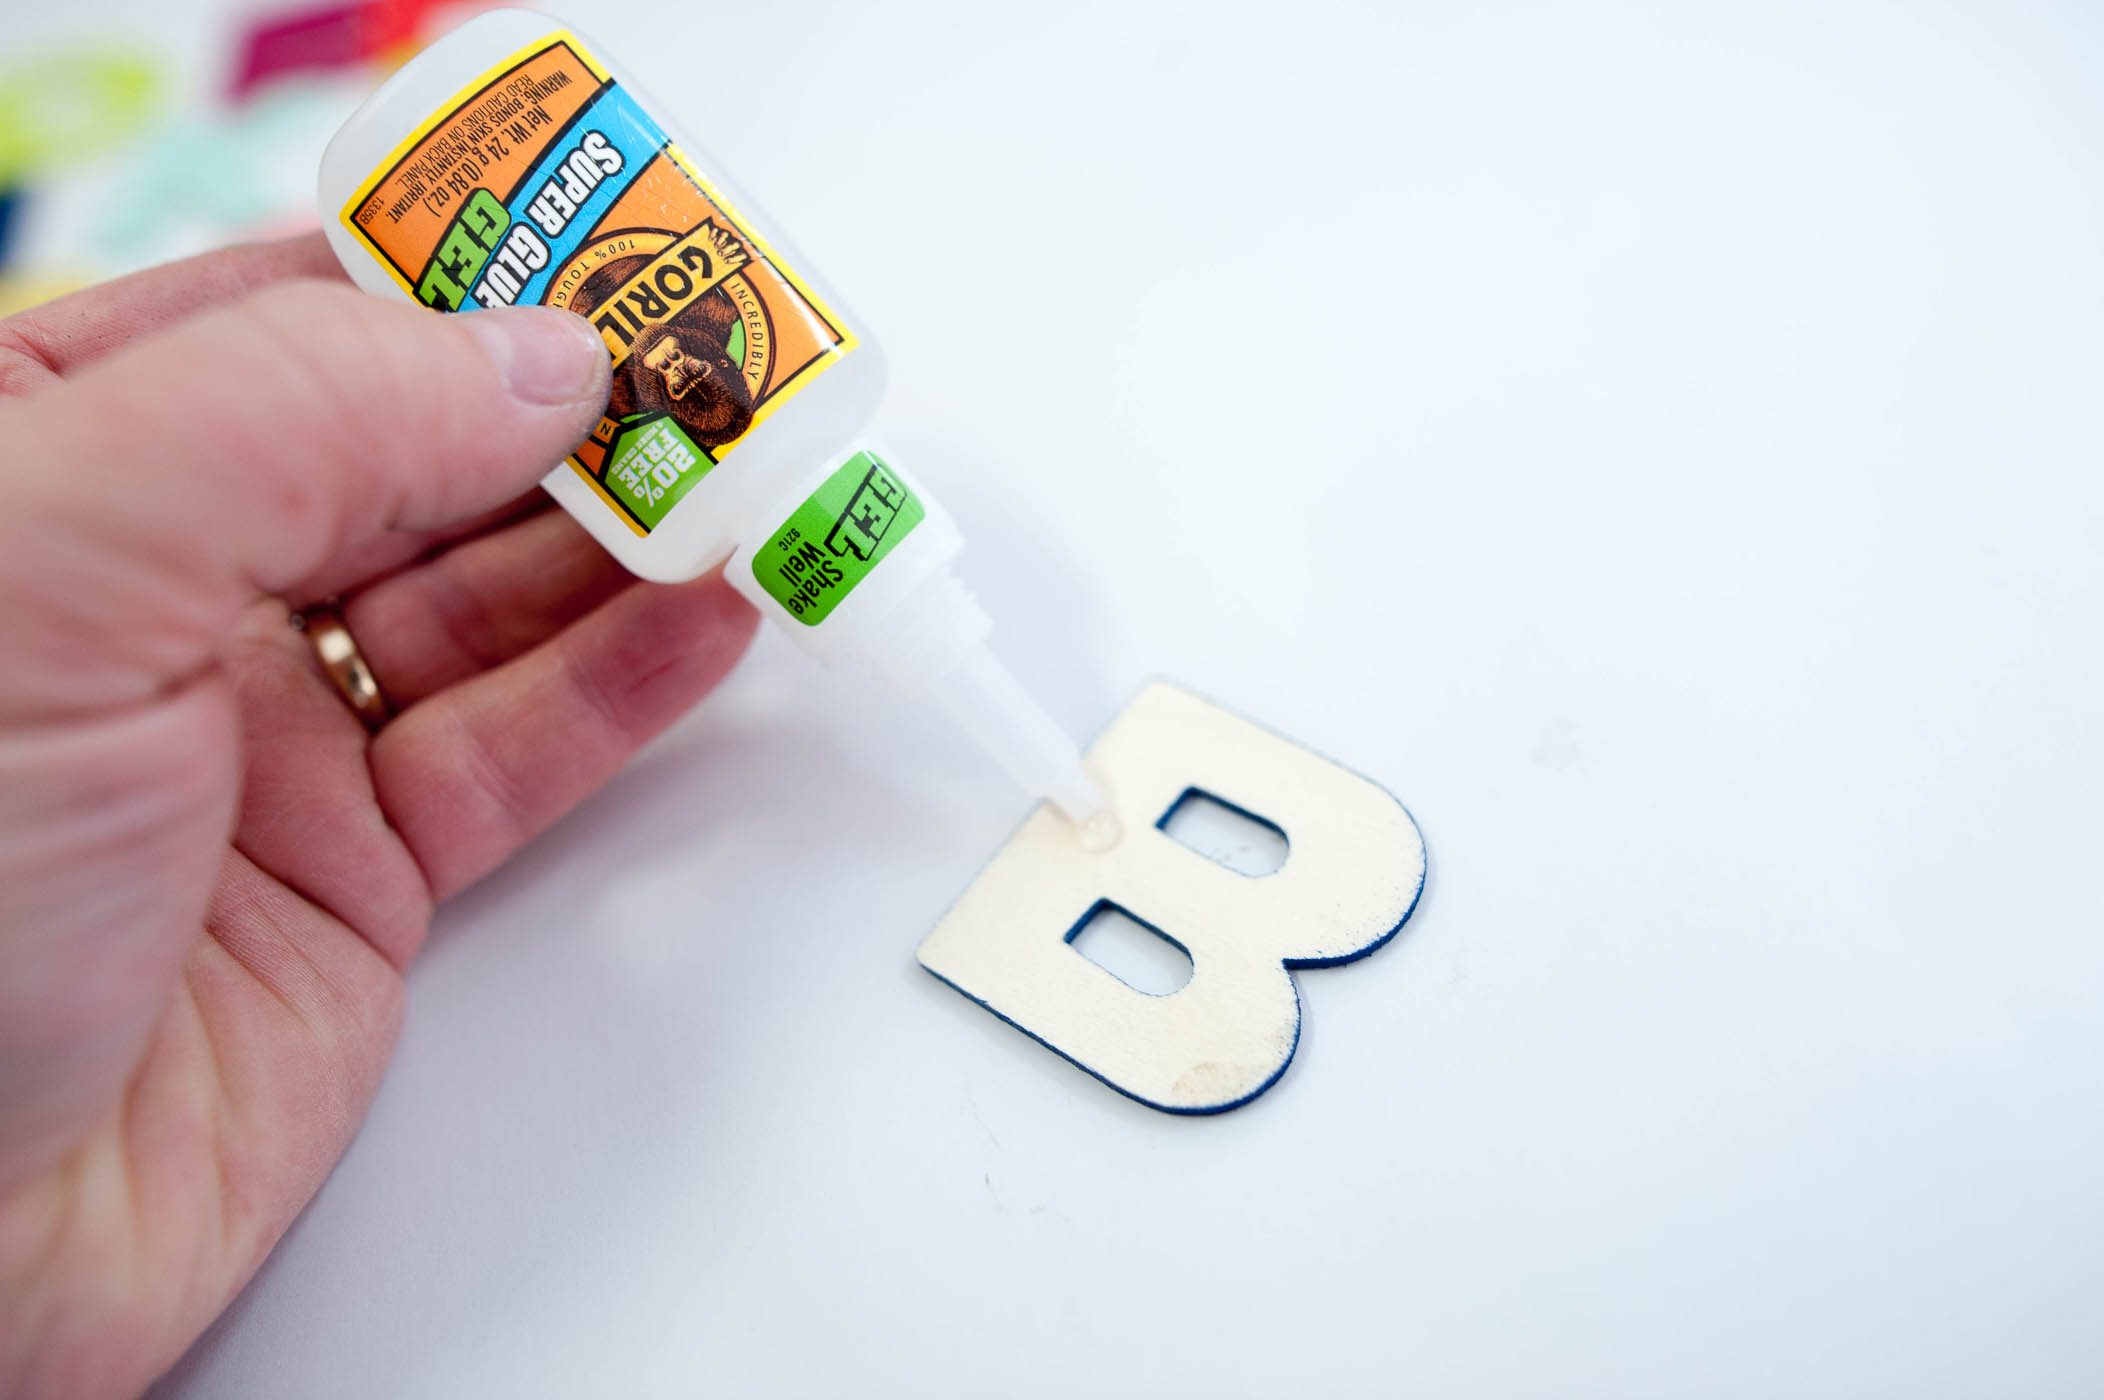
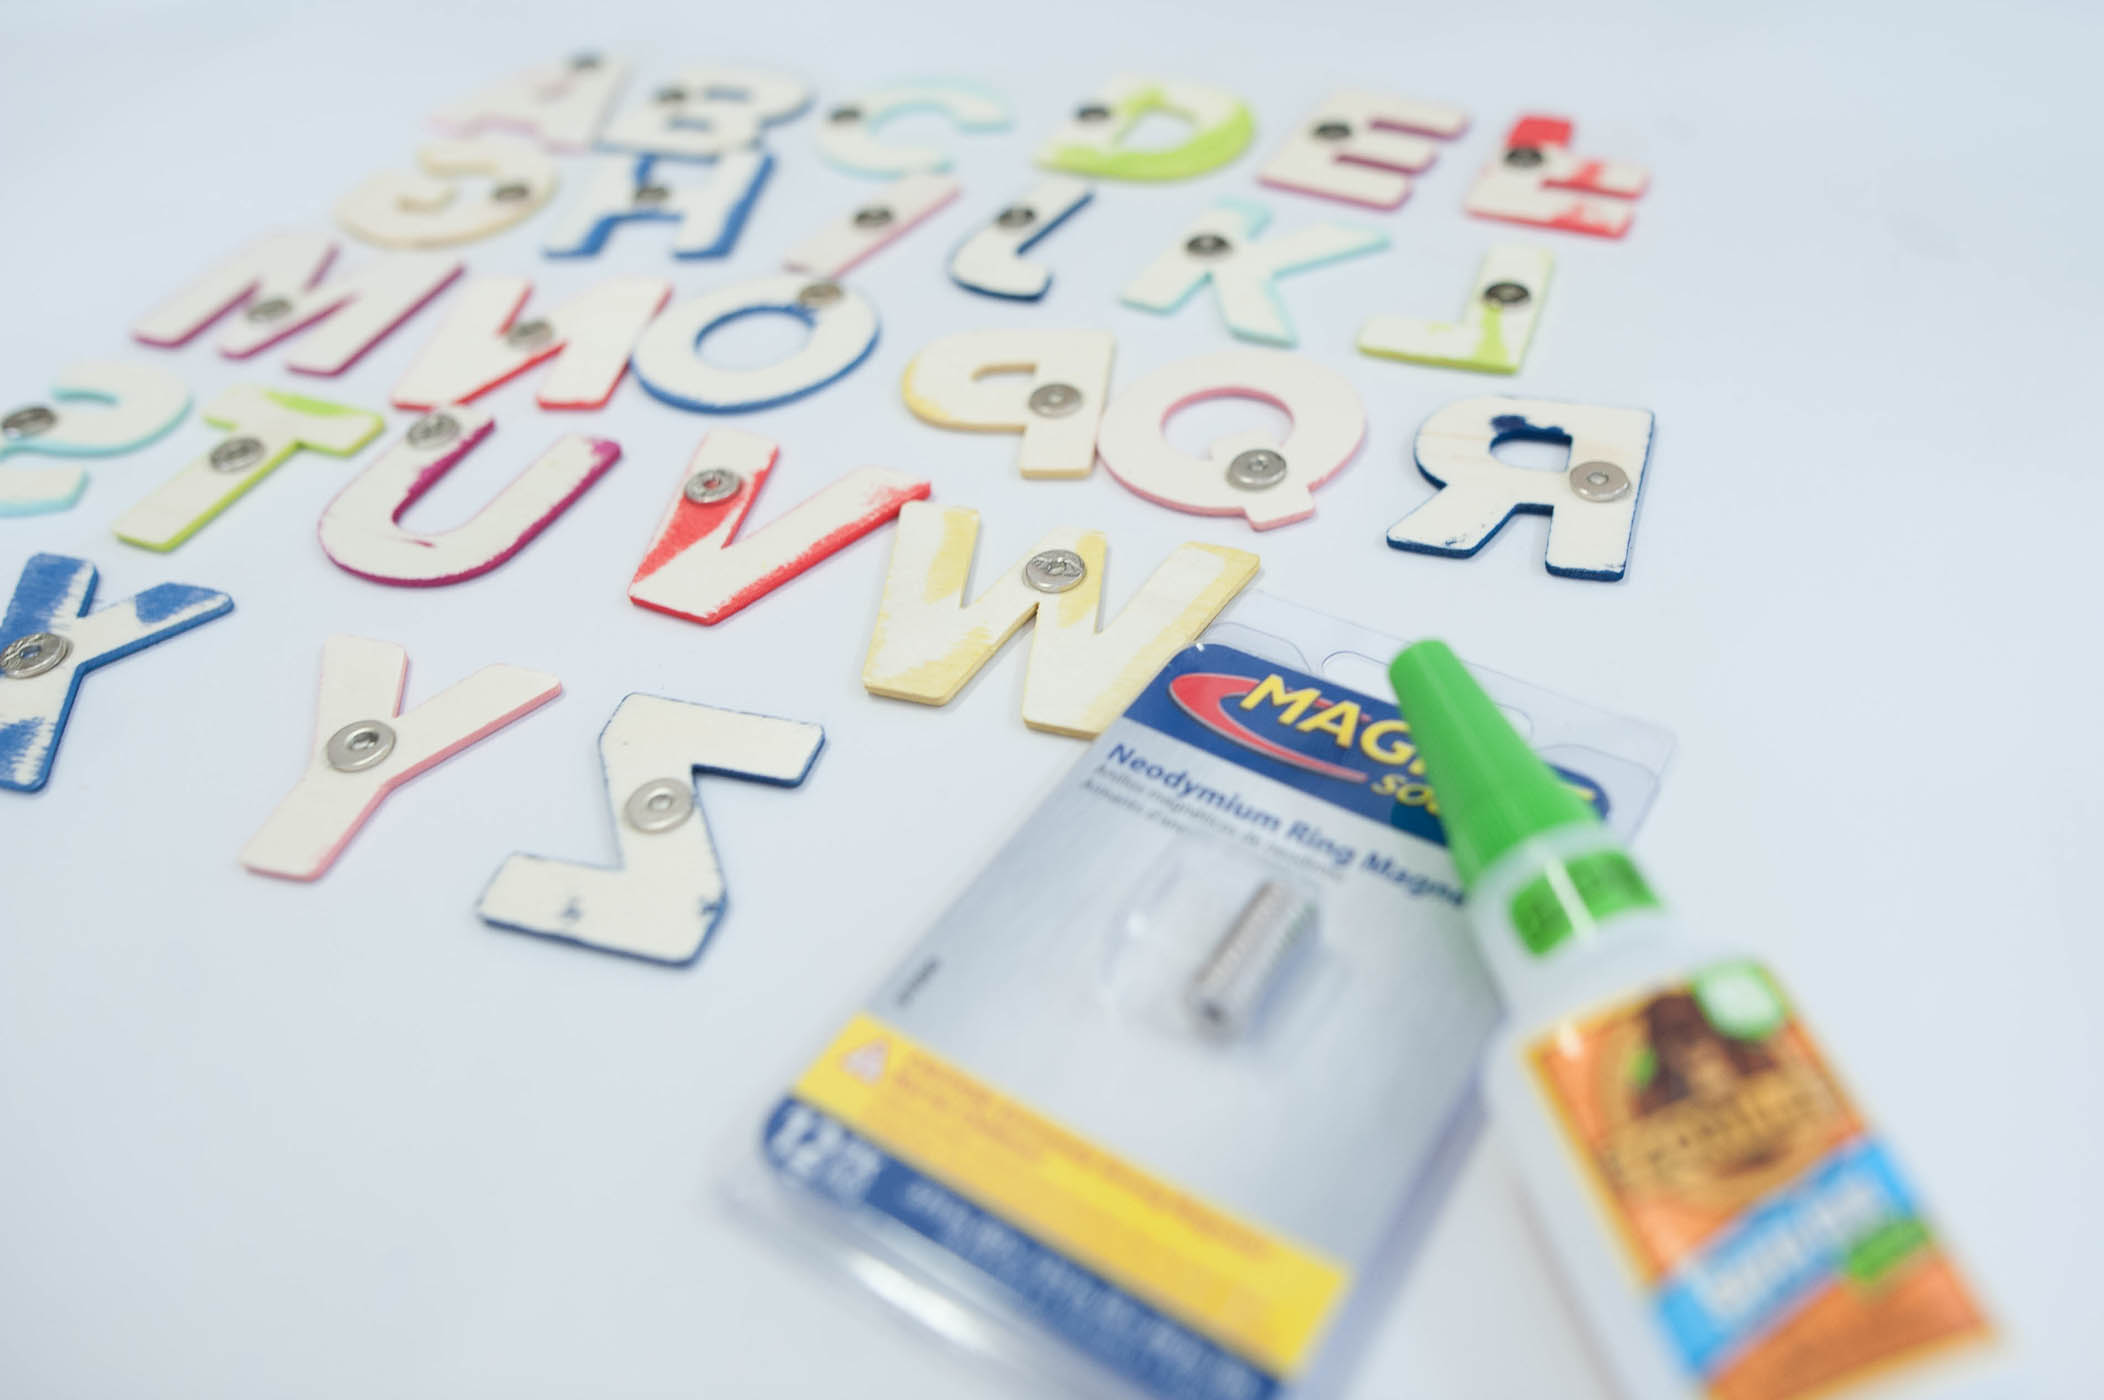
Step 5: Glue small magnets to the back side of the letters.
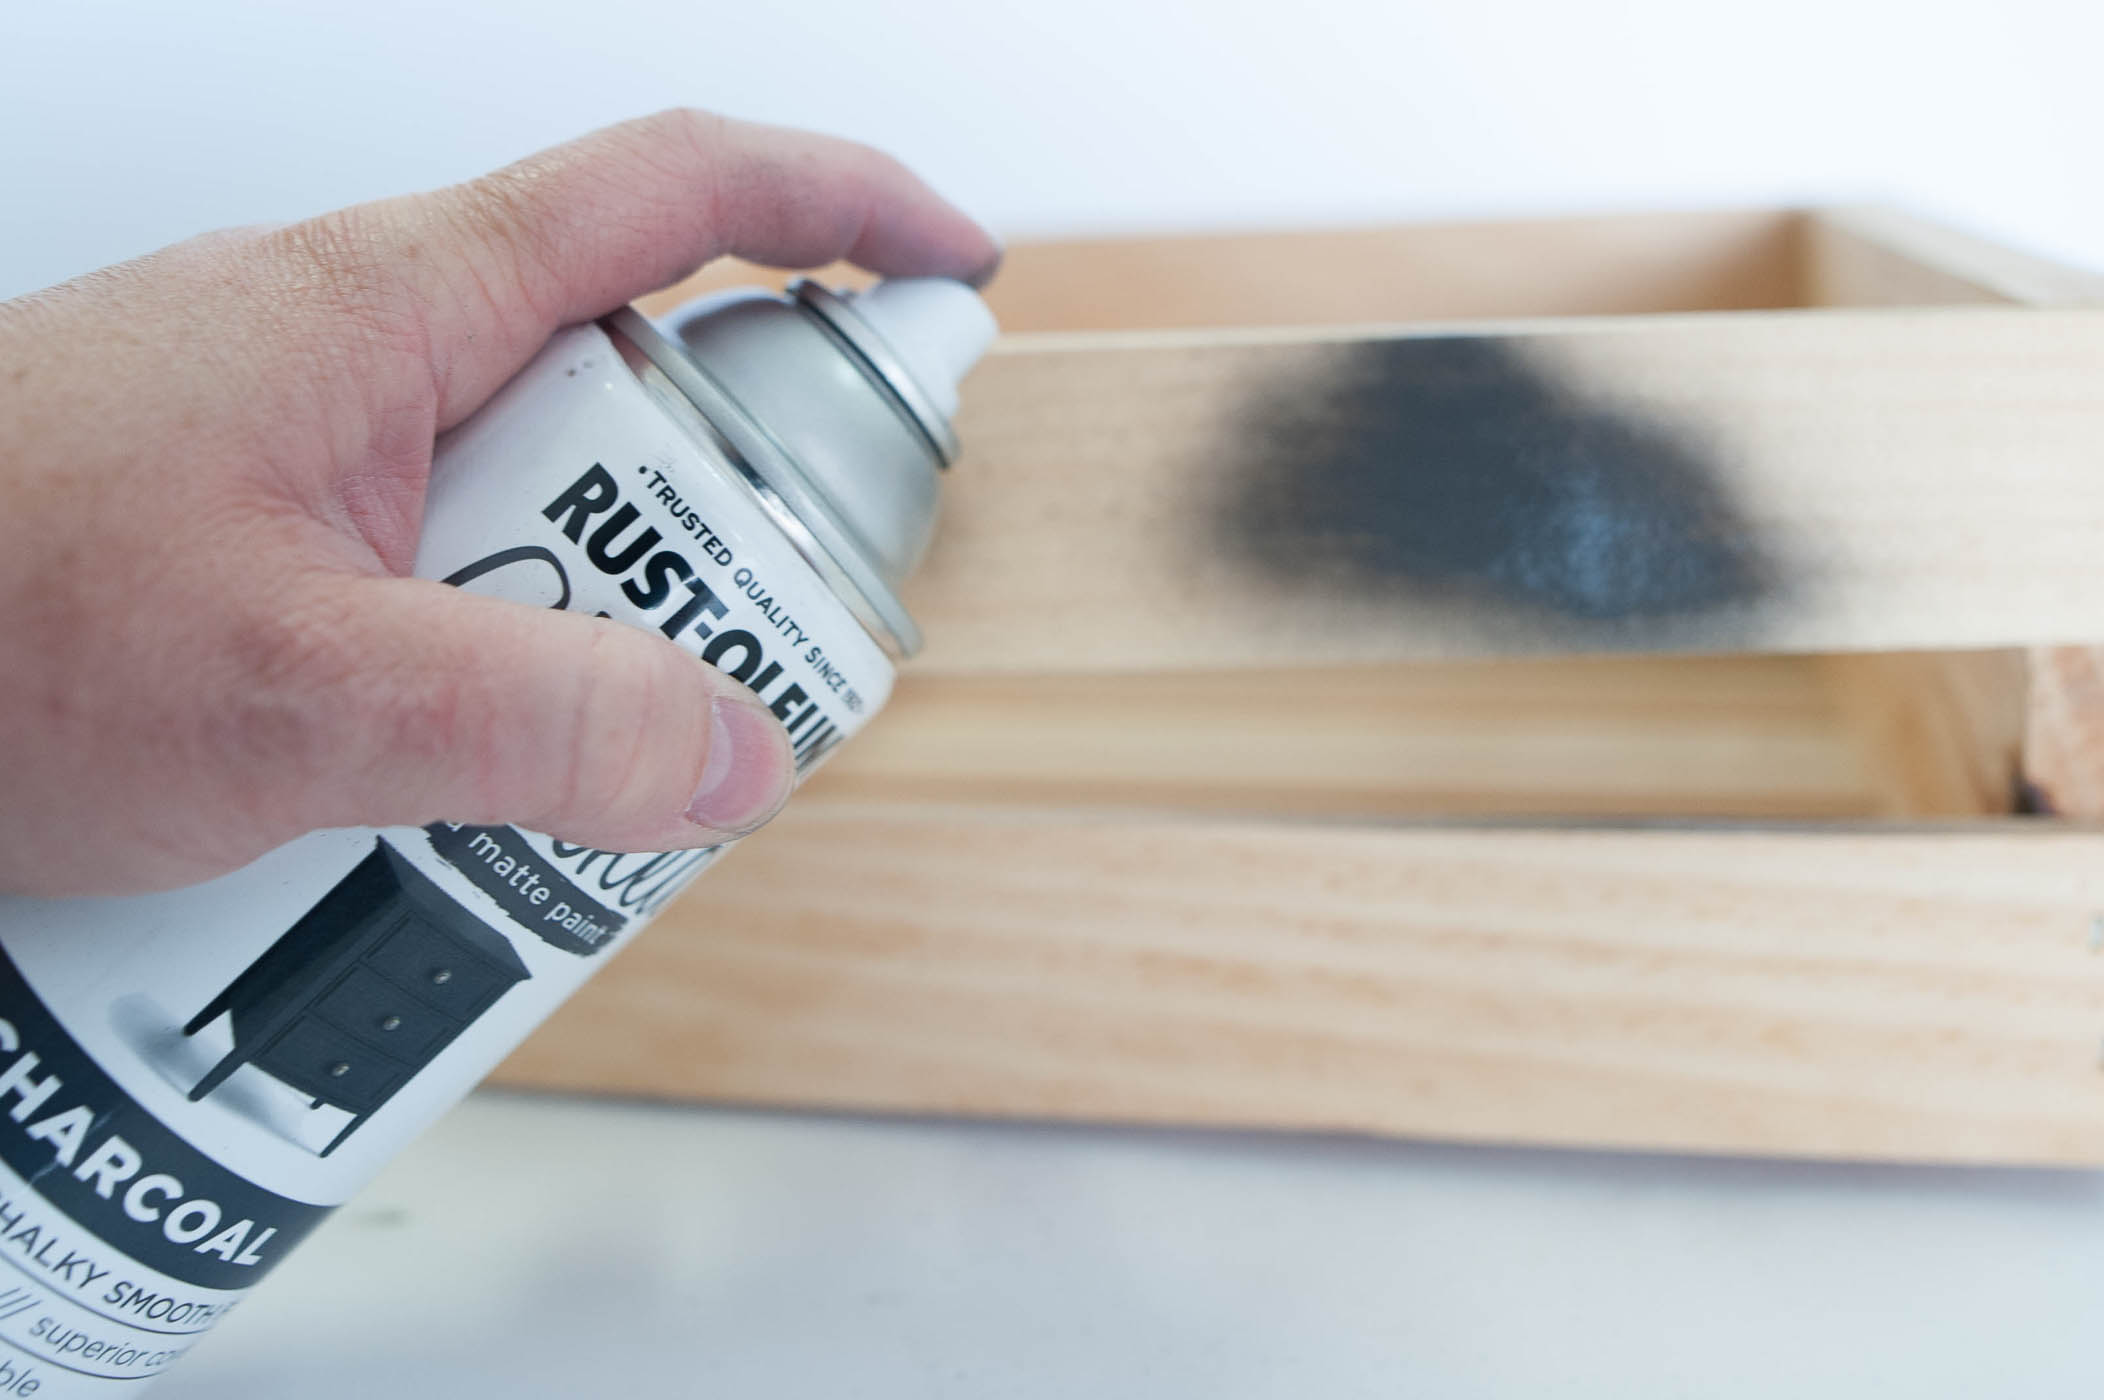
Step 6: Paint the wooden crate and let dry completely.
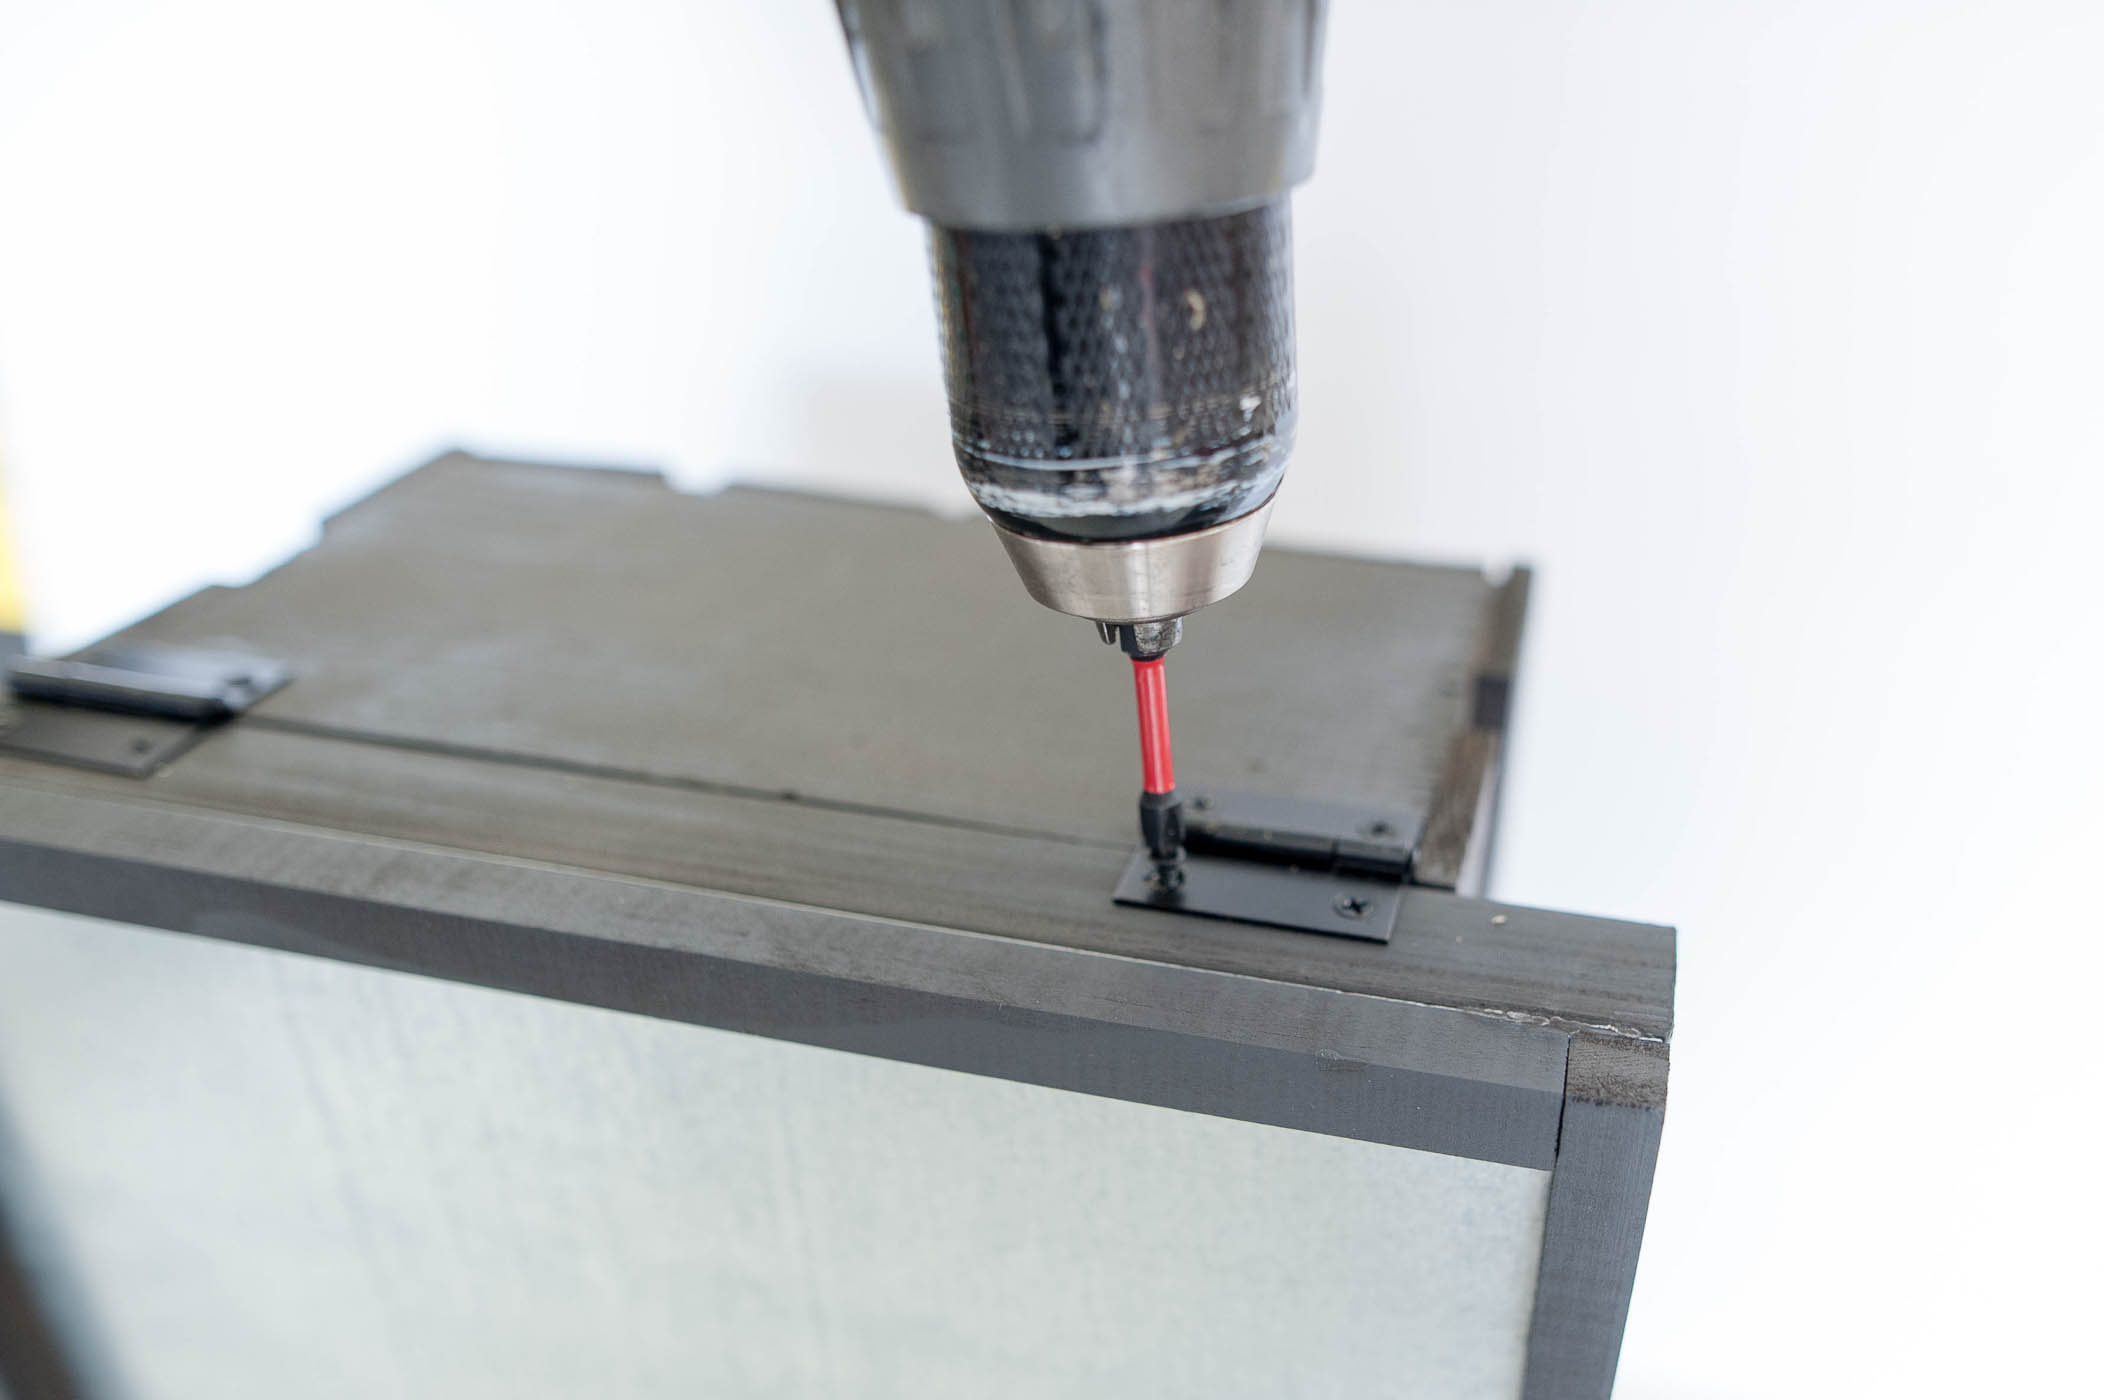
Step 7: Connect the wooden canvas to the wooden crate with small hinges.
Step 8: Place letter magnets onto the metal.
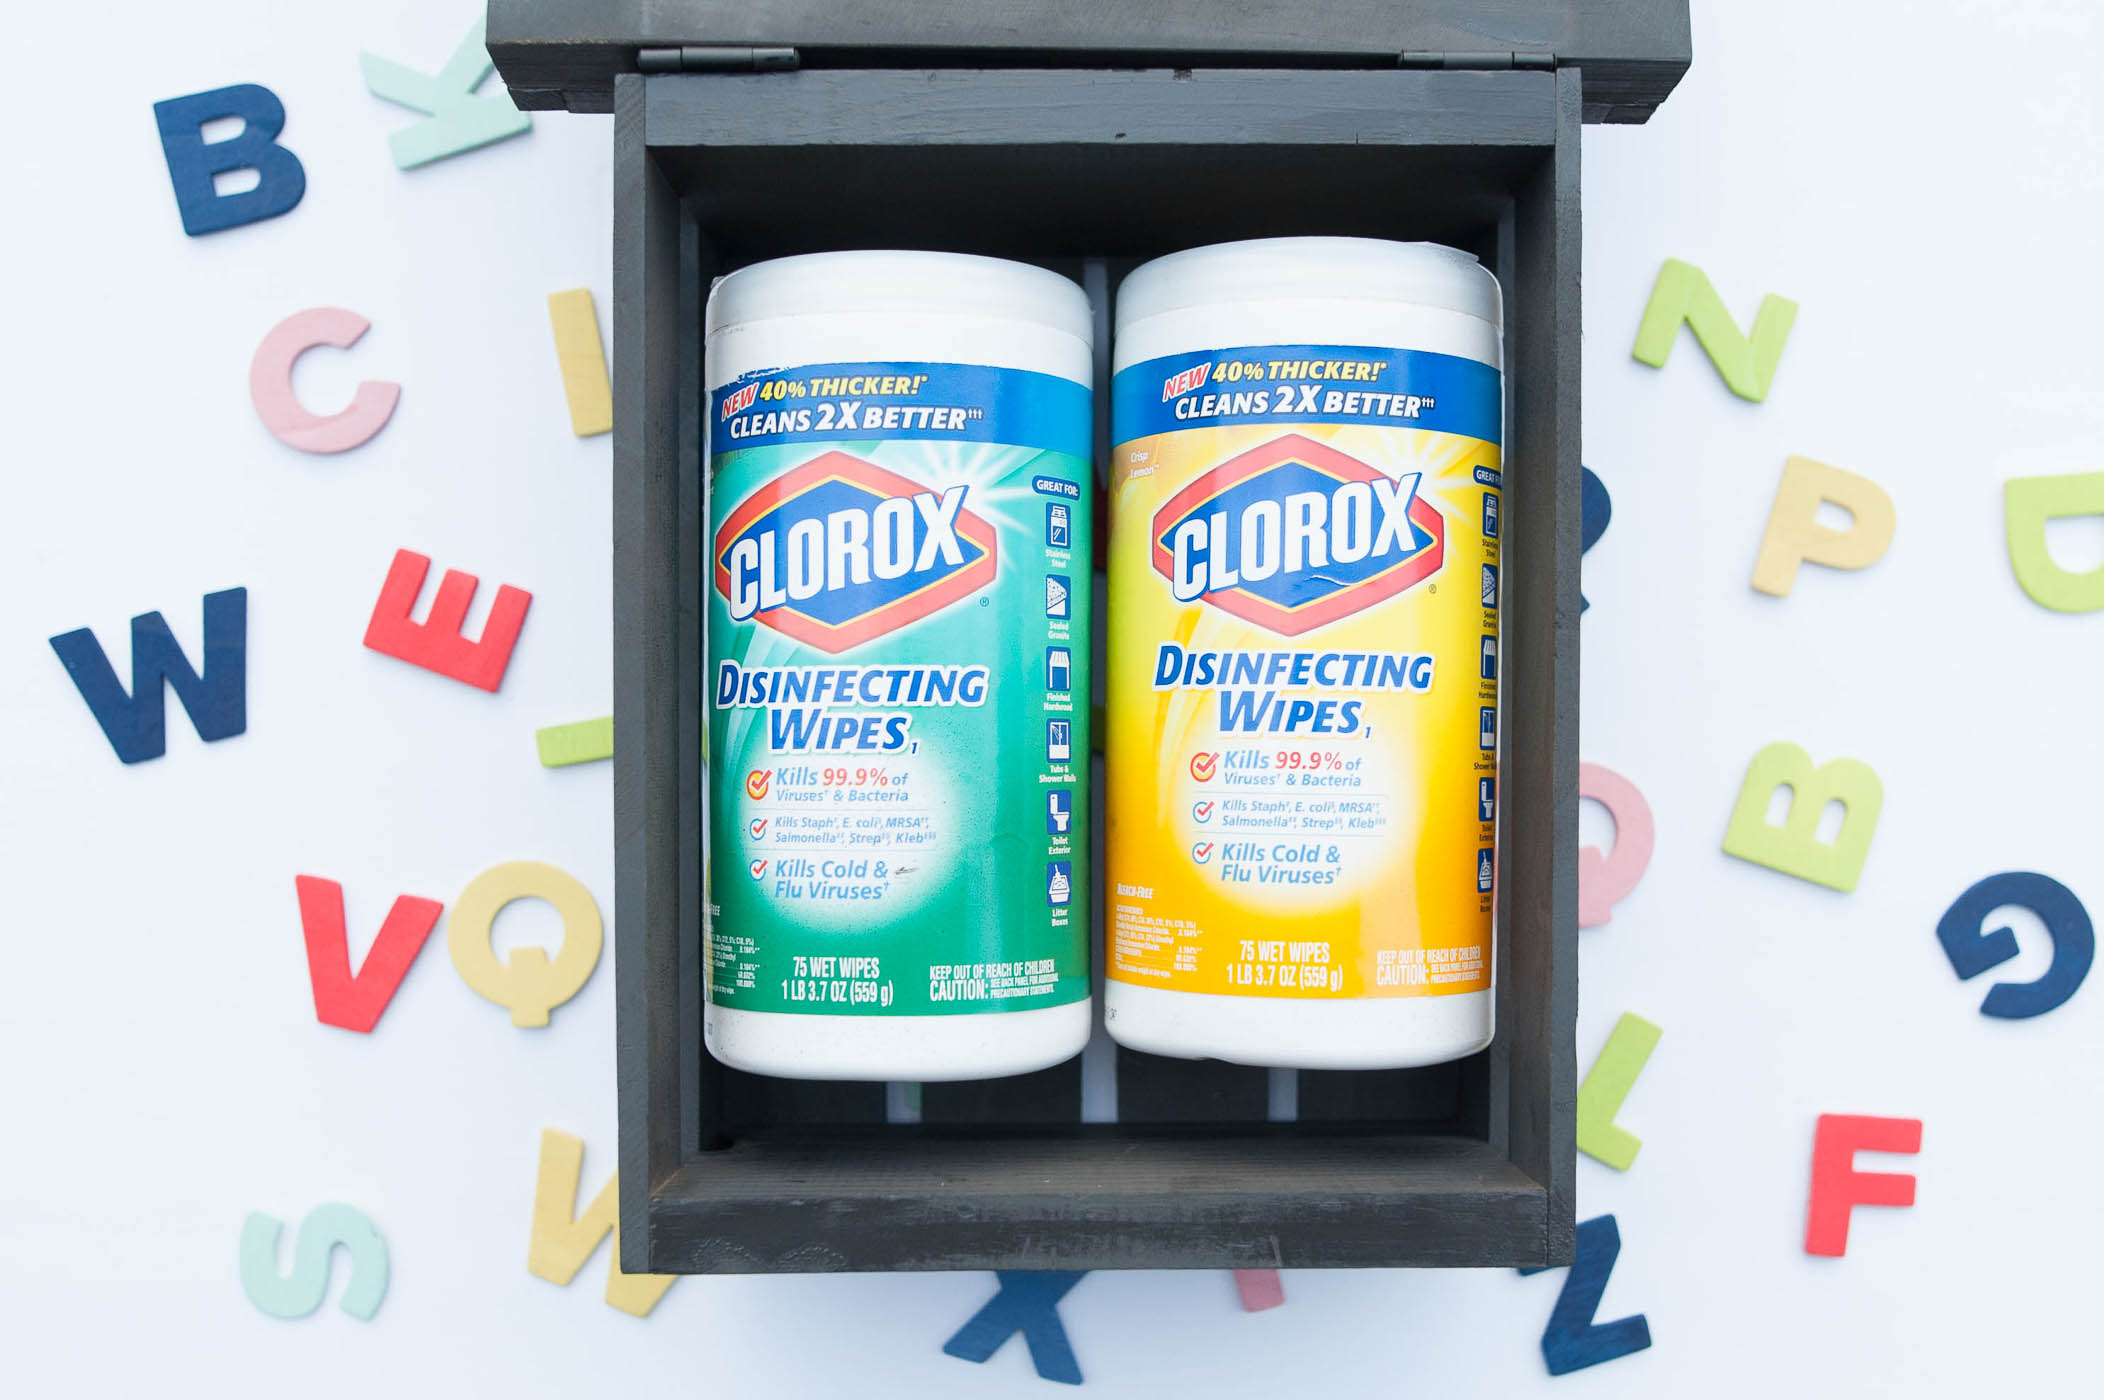
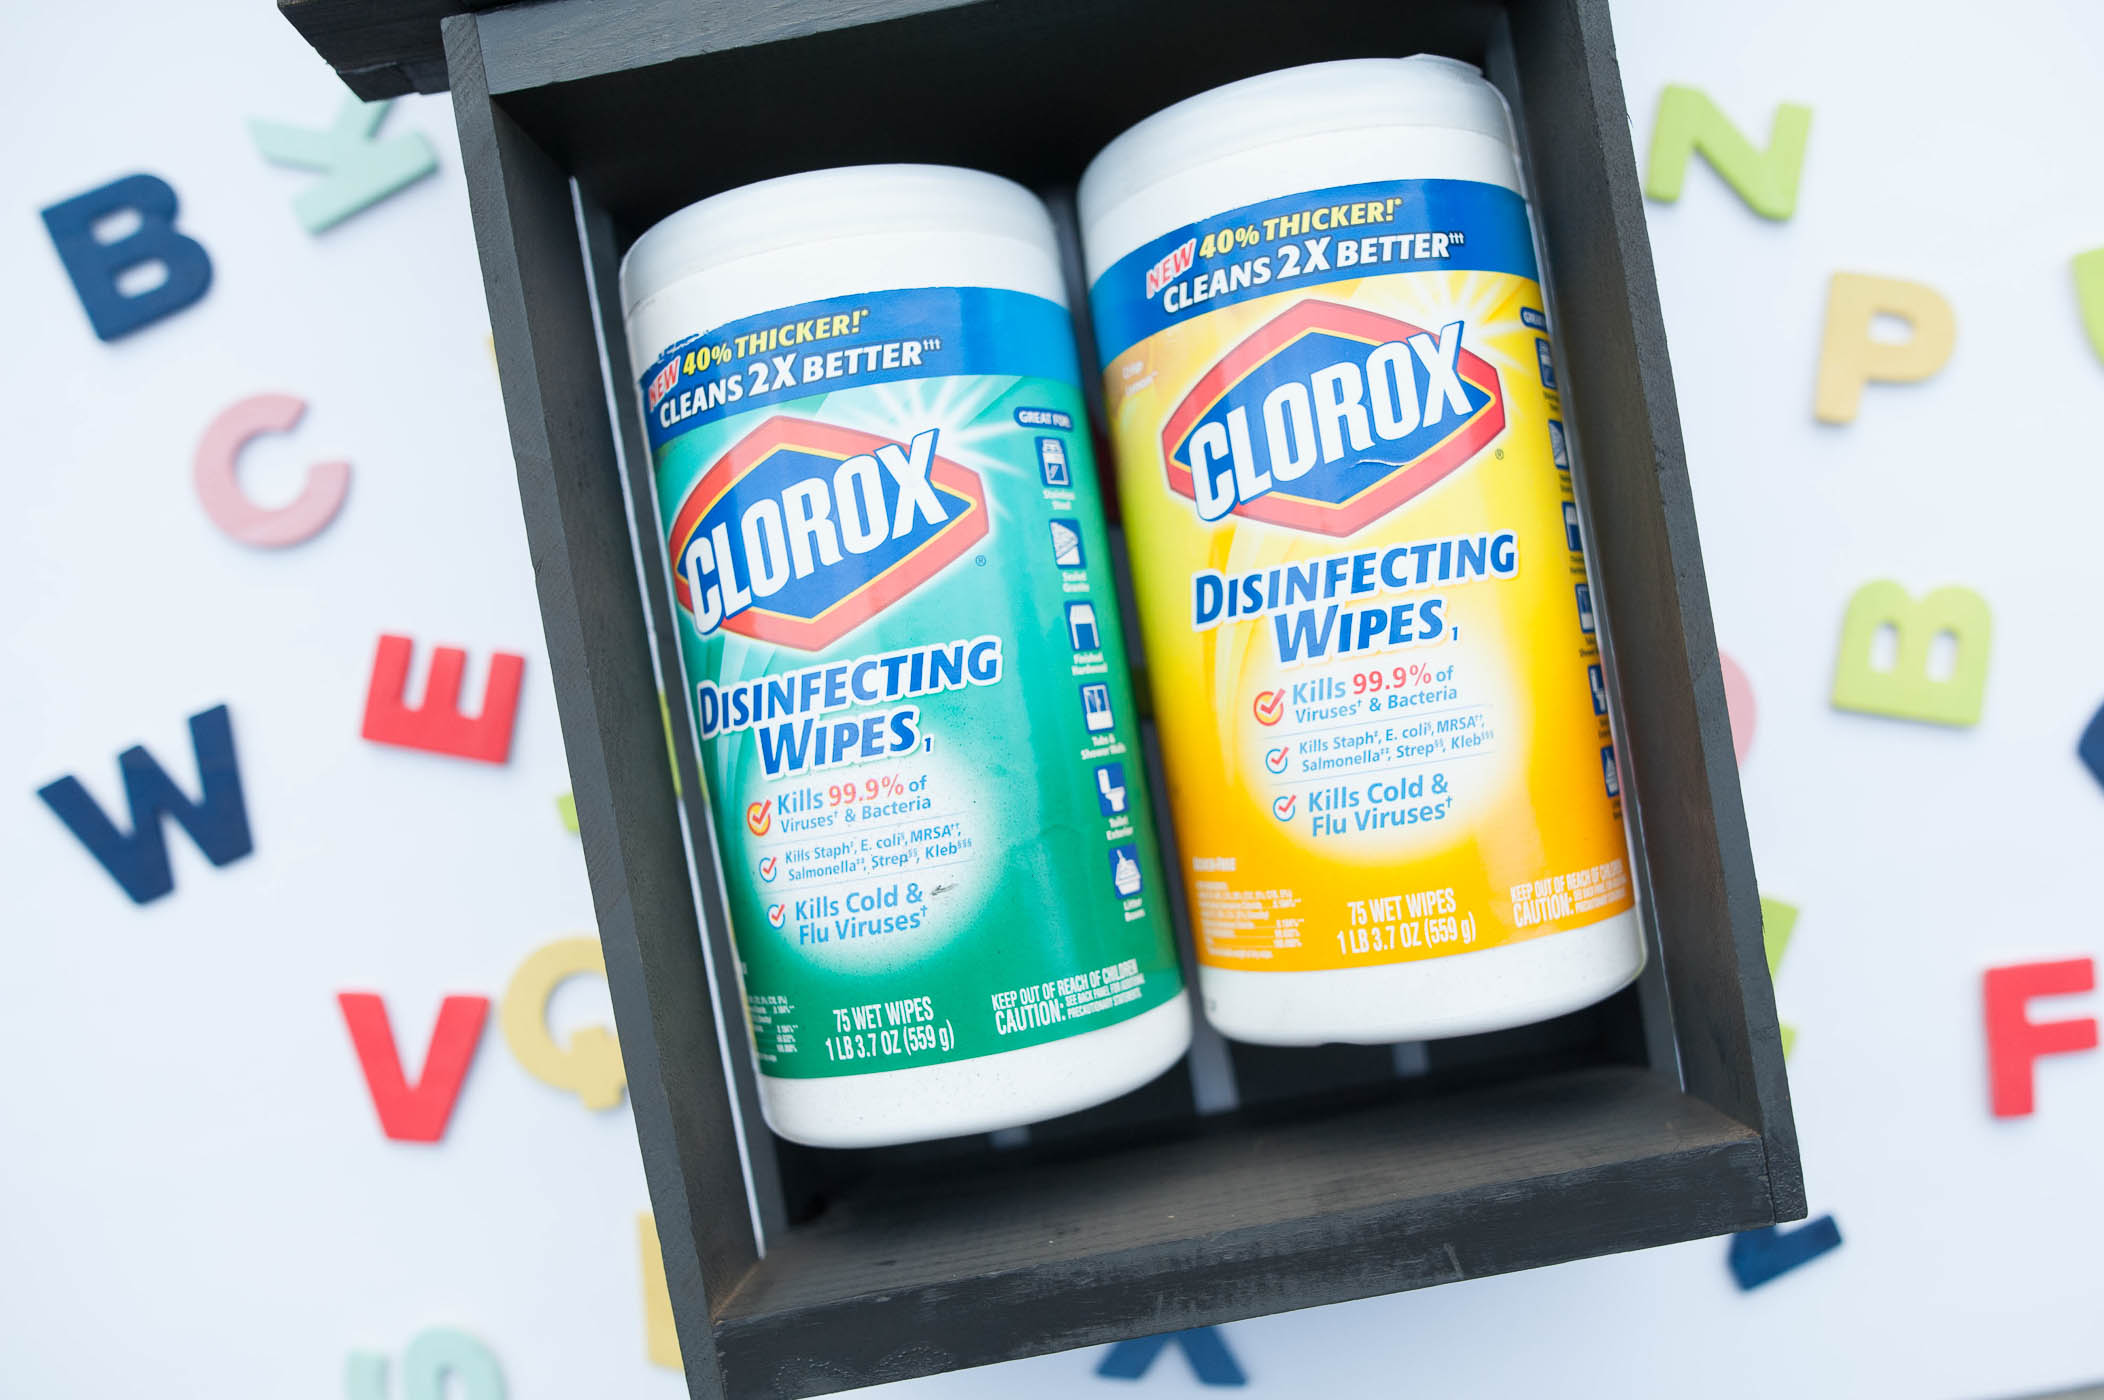
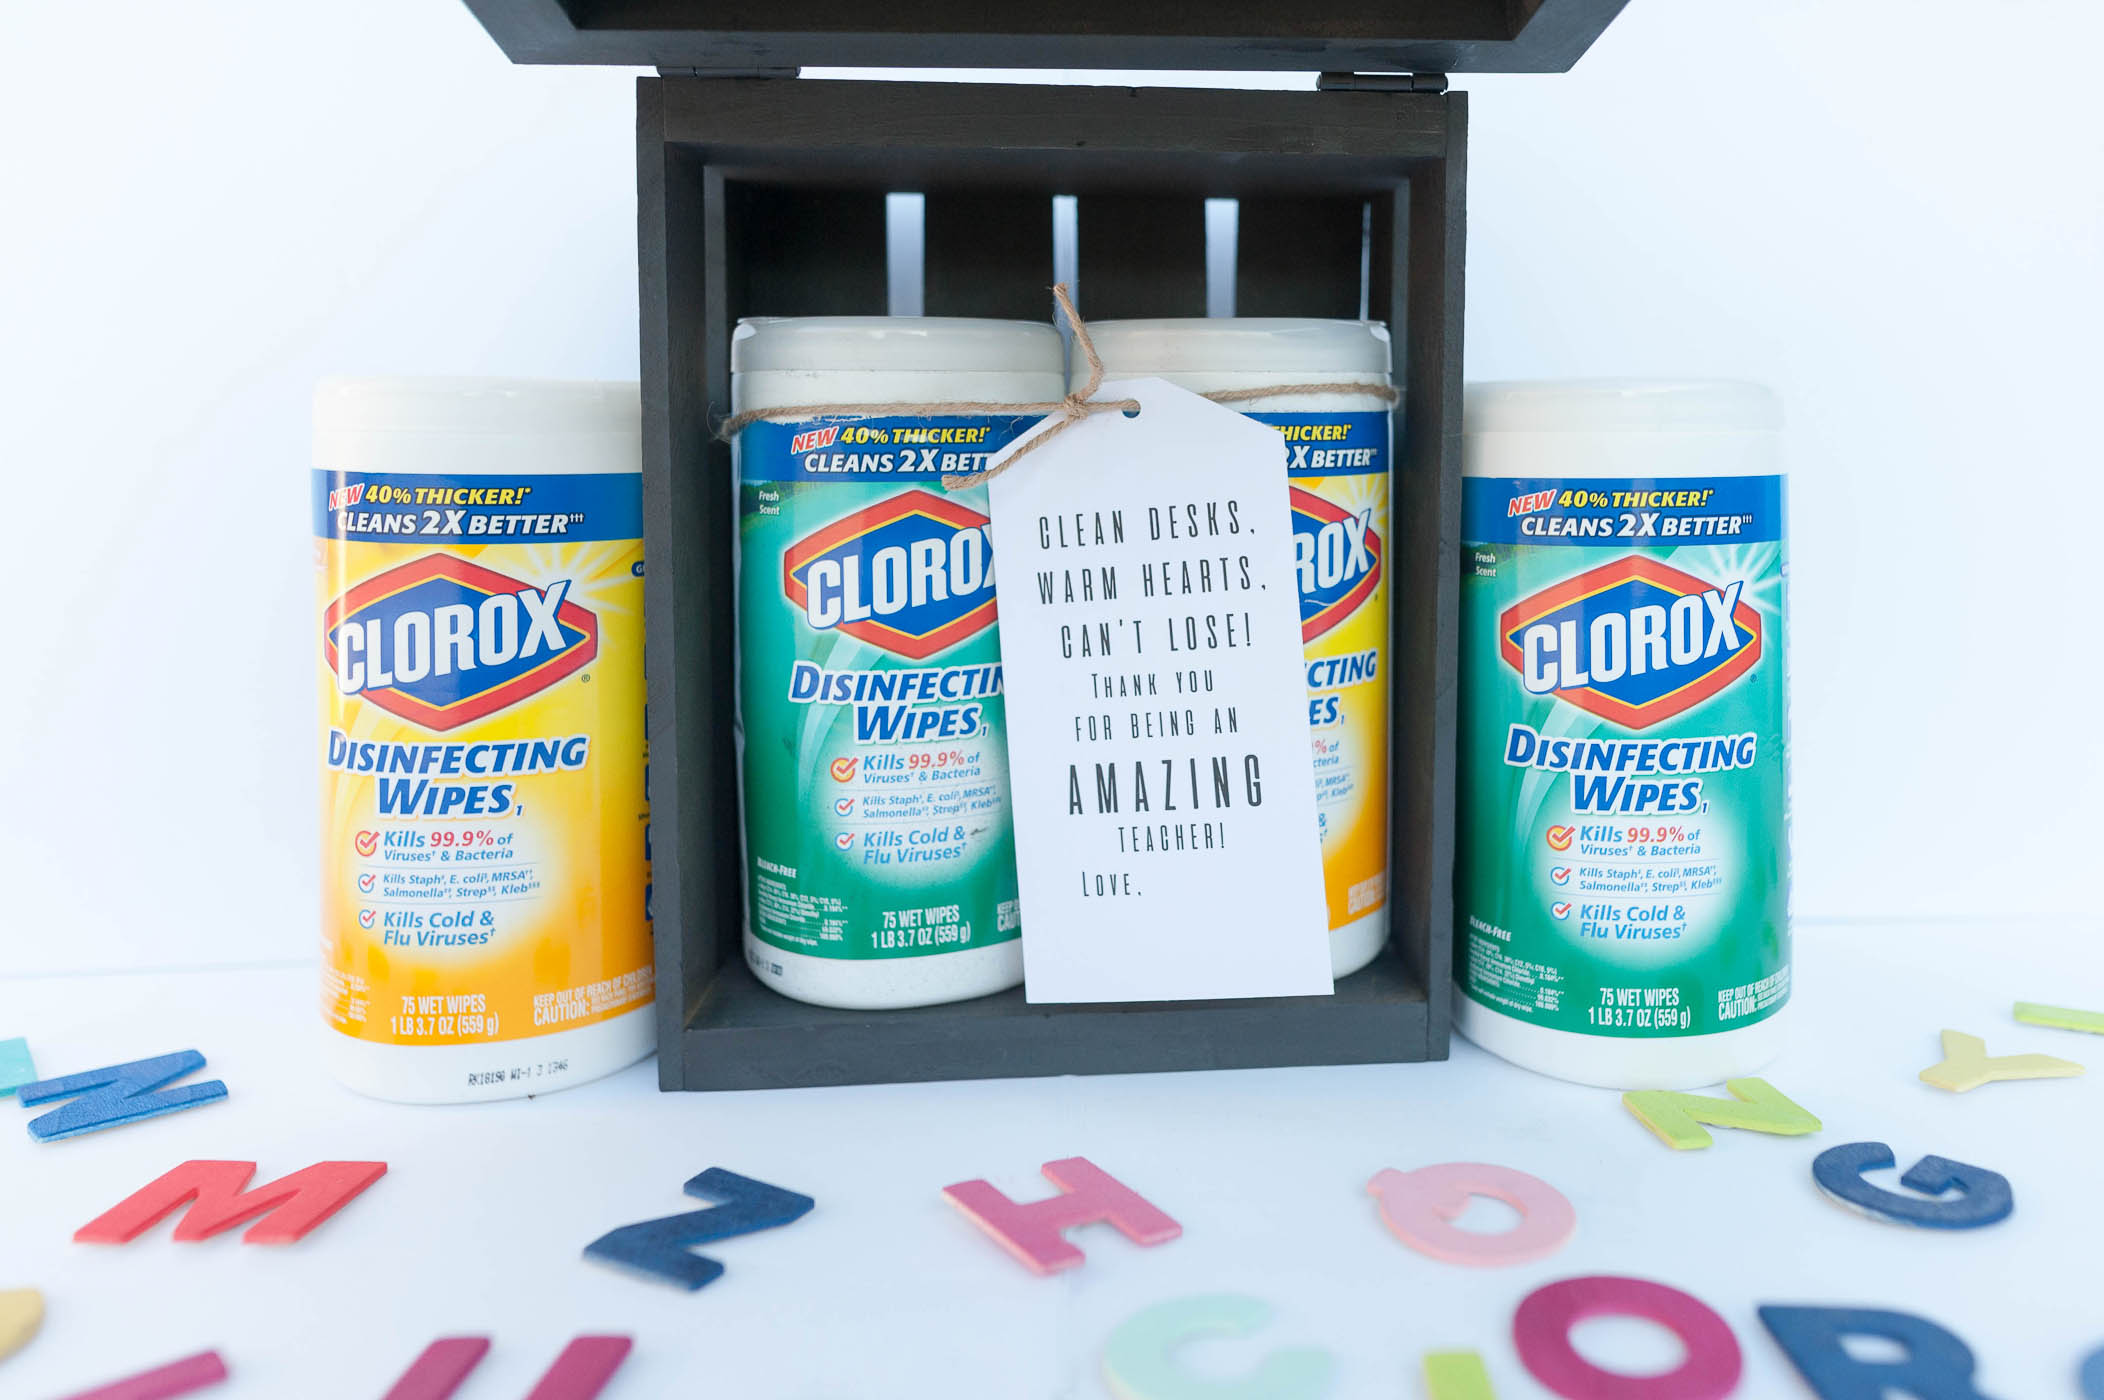
Step 9: Place Clorox wipes into the crate and close the lid.
Now the message possibilities are endless!
The Clorox wipes sit perfectly inside waiting for the next time they are needed!
Plus, I am going to give Creed’s teacher two extra rolls of wipes as replacements.
I made a quick printable tag to thank her for being an amazing teacher. You can download that free printable HERE.
I cannot wait to see her face when Creed gives it to her!
xoxo,
Brooke