This post is sponsored by Rust-Oleum. All opinions are 100% mine.
It is time for EPISODE 3!! If you haven’t read Episode 1 and Episode 2, don’t miss them!
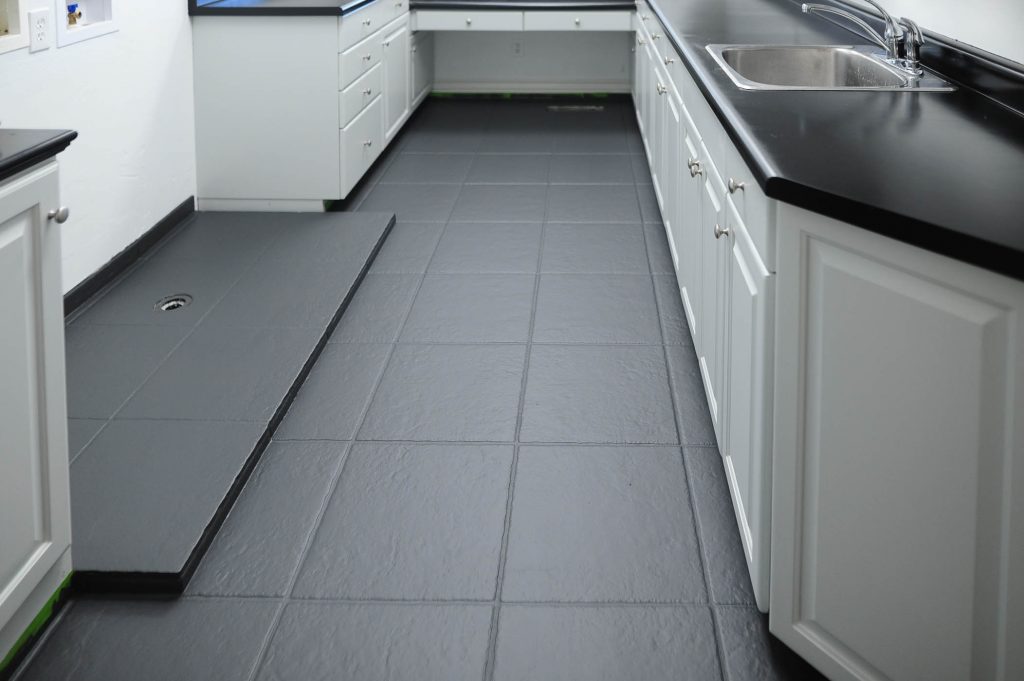
I cannot resist reminding us all what the room looked like when this transformation started. PLUS, did you know that this entire makeover cost less than $400? I love that! I know I haven’t discussed the cabinet transformation or the countertops yet, but I wanted to start on the floors in the series!
![]() After the the charcoal gray Rust-Oleum HOME Floor Coating base paint dried overnight, they looked incredible. In fact, I had a moment where I doubted whether or not I should paint a pattern onto them.
After the the charcoal gray Rust-Oleum HOME Floor Coating base paint dried overnight, they looked incredible. In fact, I had a moment where I doubted whether or not I should paint a pattern onto them.
I couldn’t get a pretty patterned tile out of my head, so I went for it.
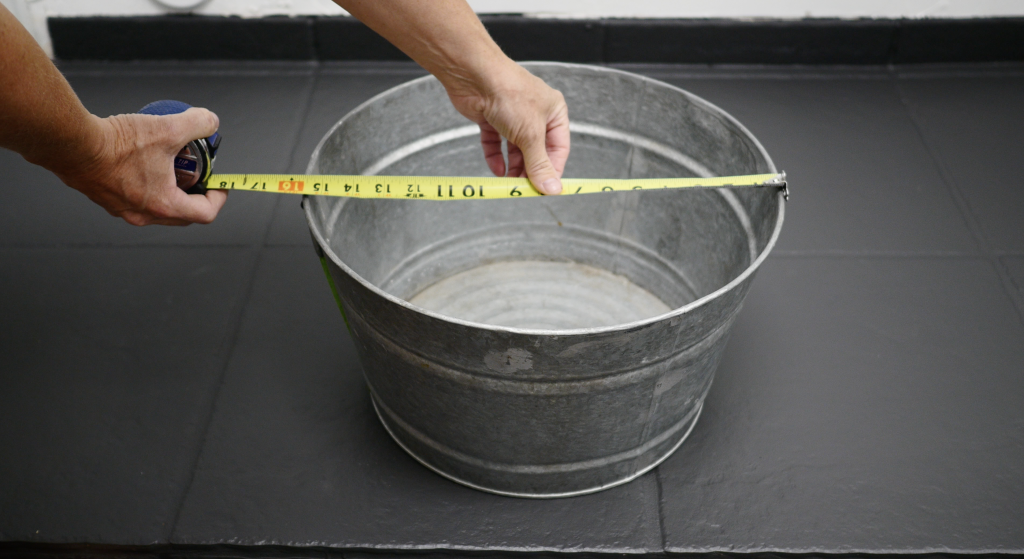
I had been playing around with the idea of making my own stencil, like I had in the past, but I wasn’t fully sold on that idea. So, I decided to use an old school idea and use a bucket for a pattern.
My tiles were exactly 16 inches square, so I went around my house and measured every plant pot, bucket, and container that was a circle until I found one that was the right size. 🙂
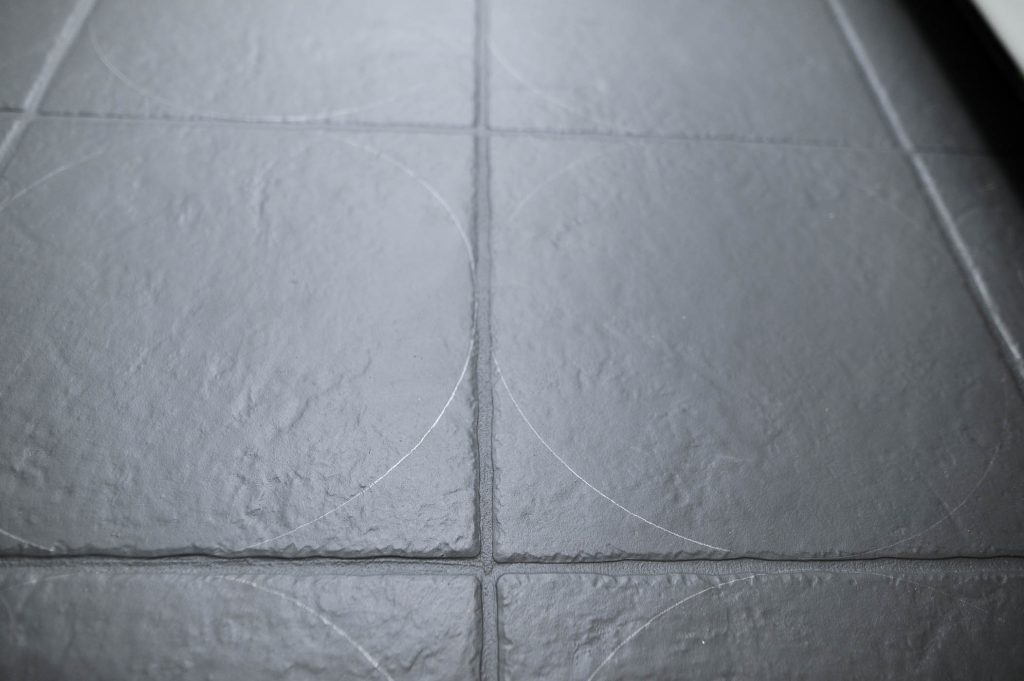
Next, I traced a circle onto every single tile in the room with a pencil.
![]()
In order to trace the pattern onto the small tiles around the outside of the room, I traced the circle onto a piece of poster board. This made it easy to create a smaller pattern by cutting the poster board to fit the tiles perfectly along the edges.
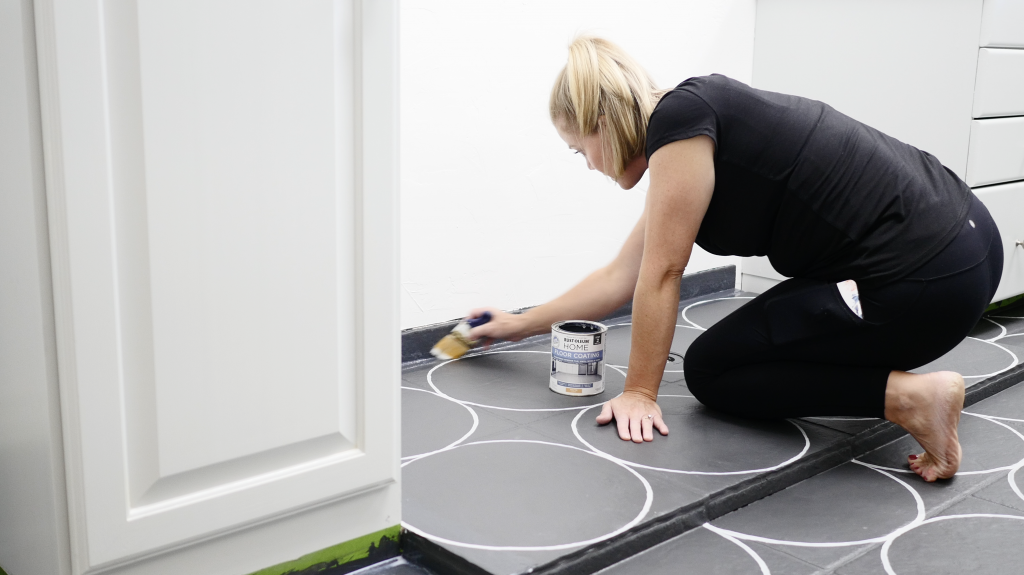
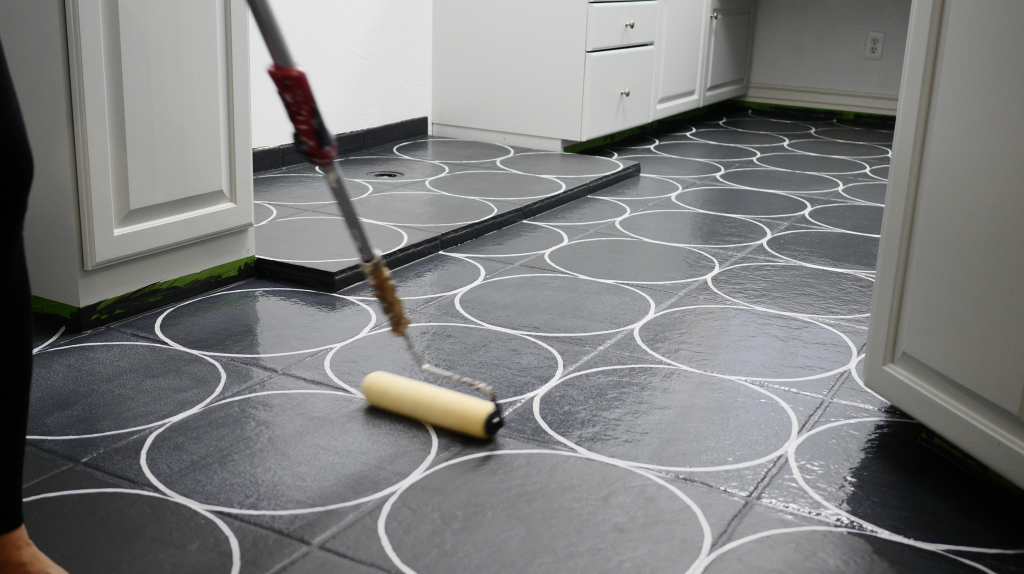
Next, I stirred up a quart of Rust-Oleum HOME Floor Coating in a color called “Smoke” and used a small paint brush to carefully paint all of the circles in the room.
![]()
The paint brush I used was about 1/4 inch wide.
![]()
I’m lucky that I have a pretty steady hand, but the circles are not perfect, and I absolutely love that. I love that they look hand painted too!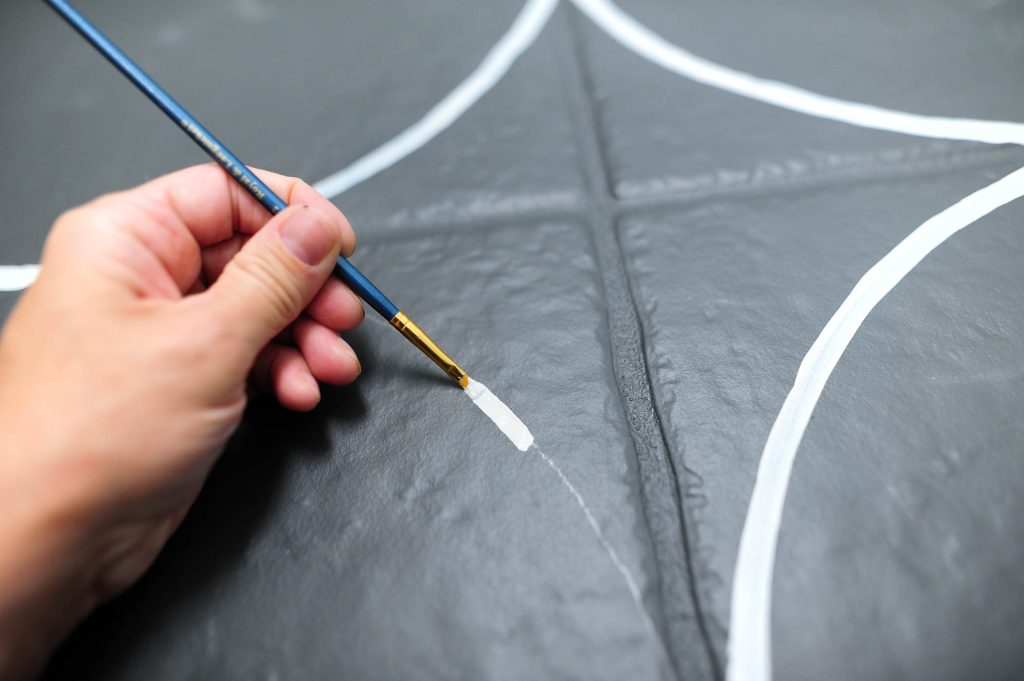
It only took me about 3 hours to paint the circles. I was pleasantly surprised how fast it went.
![]()
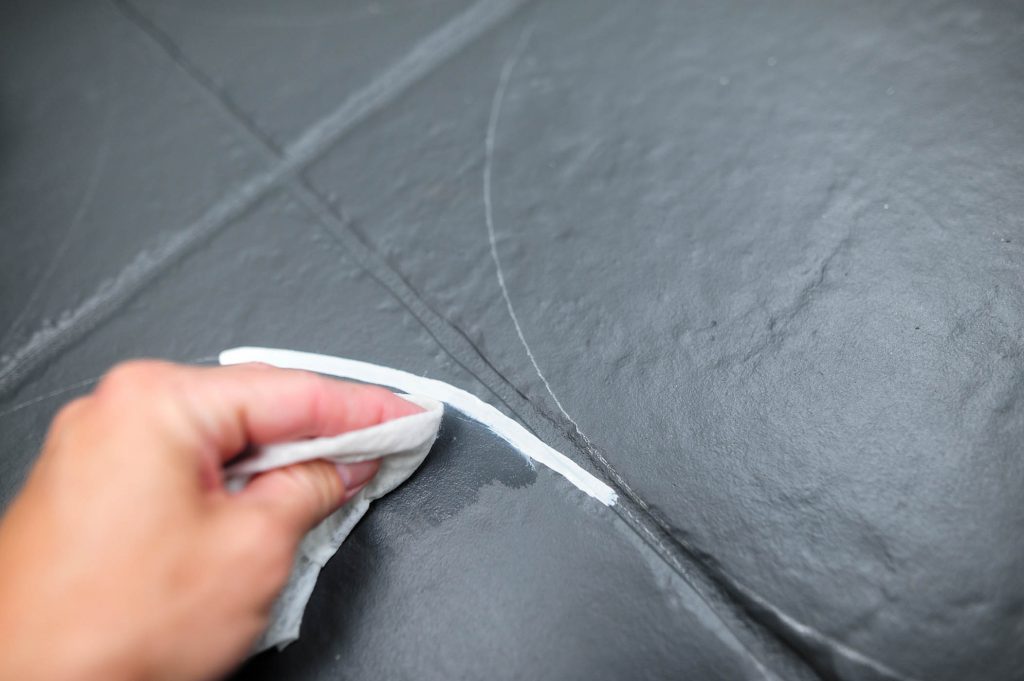
If I flubbed up too bad, I used a cleaning wipe to remove the paint while it was still wet and fixed it with the brush.
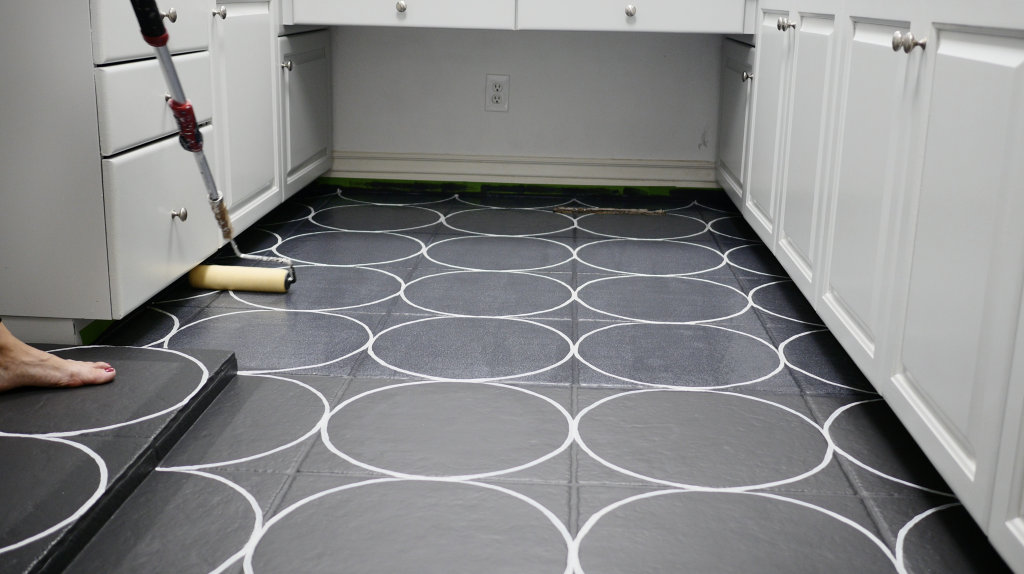
After the circles were painted, I waited for them to cure fully overnight before moving on to seal them. Plus at this point there was a lot of dust, hair, and little pieces of debris that had crept onto the floor. So, I used my small stick vacuum and carefully made sure to get every speck off the floor before I clear coated it with Rust-Oleum Floor Coating in Matte Clear.
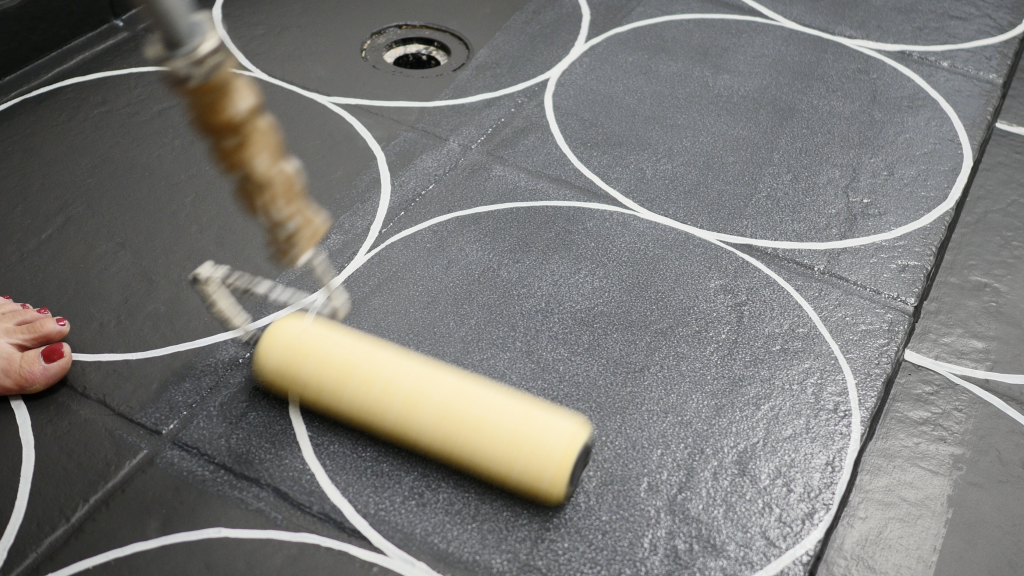
I used a high quality brush {I love my Wooster} to cut in around the edges of the room and then took a 3/8” nap roller and extendable paint pole to roll the clear coat along the entire floor.
I was sooooo worried at first, because the clear coat looked “textured” and “bubbly” when I was applying it. But, as the clear coat dried, it looked great. I call that project anxiety. When you spend so much time on a project and the worry starts to creep in. I’ve learned to not panic and see how it looks when it’s all dry.
A little bit of clear coat went a long way, and the application process went soooo quick.
The clear coat pooled a little in the grout lines, so I watched for that, removed when I saw it happen and tried hard to get the coverage even. I was worried that the overlapping lines would show, but when the clear coat dried, I couldn’t see them at all.

I decided to do two coats of the top coat to give it extra protection, but I let it dry a few hours in between the two coats. We were extra careful to only wear socks and walk carefully.
After the second clear coat, we let it dry for 24 hours before foot traffic.
![]()
At this point, I legit wanted to jump for joy. It looked AMAZING, and I couldn’t help but feel ecstatic about it.
Don’t forget, what the room looked like before:
![]()
My only complaint at this point was that the room was very “GRAY” and needed a little more color and personality.
![]()
But, I knew I could add a rug, some plants, and some styling would make a big difference.
![]()
That’s what we will be showing in the next episode!
Stay tuned! Thanks for following along!
xoxo,
Brooke
It’s looks amazing Brooke!! Very gutsy., which makes it even better!! Definitely keeping this project in my files!
Thanks so much for this! I will be doing this soon! Question…did you ever wonder if you needed to do two coats of the clear coat? I have decided that 4 gallons will cover the area I’m painting with a second coat but I’m wondering if I just need to buy 2 gal of the clear coat for one application.
Many thanks!
Two coats of clear coat would be a great idea. It’s been several years and I’m starting to get small chips now.
Looks FANTASTIC.
Looks great! How did you decide on a Matte topcoat as opposed to gloss?
Personal preference. I don’t like glossy floors.
How is the product holding up?
It’s doing AMAZING so far!
How heavy is the traffic in the room? How long have you had it painted?
We are a family of six and use the laundry room on a daily basis, but it’s not a large traffic area. Ours has been painted for two years and we are starting to see small chips. We could touch it up easily though.
I am just now seeing this on Pinterest. I must say it looks absolutely phenomenal!!!!! What a transition paint can make. It’s been a year since you said it was doing Amazing, just curious to know is it still holding up? I want to paint mine tile now! But, I want to see how well it is doing first. Thanks, and again you did an awesome job. All of your hard work definitely paid off.
It still looks pretty darn good in my opinion. We have a few small chips, but it’s still holding up!
Would you recommend this for entranceway and bathroom tiles? I’m concerned about the chips over time.
It’s definitely a short term fix. Ours have been painted in our laundry room since June 2020 and we are starting to see chips.
Can you use this paint for an outdoor project like my front porch?
I would use an outdoor paint for that.
Is this a good option for a concrete porch floor?
I would use a concrete paint for that.
I literally just painted my floor the same color. The top coat looked streaky so I did a second coat. This cost looks better but still see some steaks and spots. It’s still drying, I’m about 10 hrs in. Will this get better or does I do something wrong?
Your floors look amazing!
Ours looked streaky until it was completely dry. How do yours look now?