One of the most common questions I get asked about our projects is, “How’s it holding up?” You never know what is going to happen, you never know what is going to break or last, and life is all about learning lessons along the way, right!?! Hindsight is 20/20, and a lot of the projects I’ve done are holding up great, but there are a few that I would TOTALLY change.
Thank you to Liberty Mutual for sponsoring this post, and helping me kick off this series! All opinions are 100% mine. Every few years we get new insurance quotes to see how our policies are holding up and compare them to what’s out there. Liberty Mutual allows you to customize your coverage so you have the confidence that your coverages and discounts meet your individual needs. To get a quote from Liberty Mutual, click HERE, they may be able to save you money and better customize your coverage–those who bundled home and car insurance policies on average saved over $700! It never hurts to get a free quote, right!?!
Our new home is bringing new projects and a new canvas, but are you curious about our OLD projects? Are you curious if they have LASTED?!? Just like insurance, we hope this series will help protect you in the long run!
Here’s our new home, we just tore out three pine trees in the front yard!

In general, we can usually tell if a project will stand the test of time after a few months. Better yet, if a project can last a year, then I feel like it was done well, and it will probably make it. But, if it can last many many years, then I deem it a huge success. I pride myself in doing a ton of research and doing projects “right,” but that doesn’t mean that everything has held up perfectly.  Did you know All Things Thrifty has been around since 2009?? It’s true, so I think it’s time to start examining some of our past projects and honestly discussing what is holding up and what didn’t make it.
My hope with this new series is that it will help you in the long run to not spend the time doing a project that will not last. Because, we all know that if it’s not going to hold up, IT’S NOT WORTH THE WORK!
So, let’s start with our first set of projects to examine:
- King Wingback Headboard {Originally posted 2014}
- The Block Wall Mural {Originally posted 2010}
- In-Ground Trampoline {Originally posted 2011}
#1: DIY King Wingback Headboard
Original Picture from 2014:
We made our own headboard because wingback headboards are expensive! And this project has held up PERFECTLY! In the last 4 years, the headboard still looks brand new.

This picture was from an update to the bedroom in 2016.

Original Post:
Update: Picture Taken in our new house January 2018. And side note: It’s CRAZY how similar my new house looks to my old one! The layout of this room is VERY similar. 
I would definitely do this DIY project again with no changes to the process!
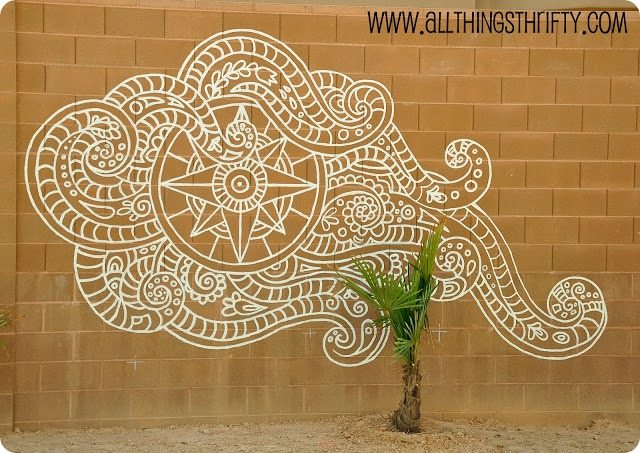
#2: Backyard Block Wall Mural
Original picture from 2010:
In 2010, we were finishing our backyard and our block wall got installed. It was 10 feet tall, so I decided to add a little pizzaz with paint. This project has held up AMAZINGLY, and is showing very little wear and tear. It has been 8 years since the original project.
Original Post:
Dress up your backyard fence/blockwall for less than $20.00!
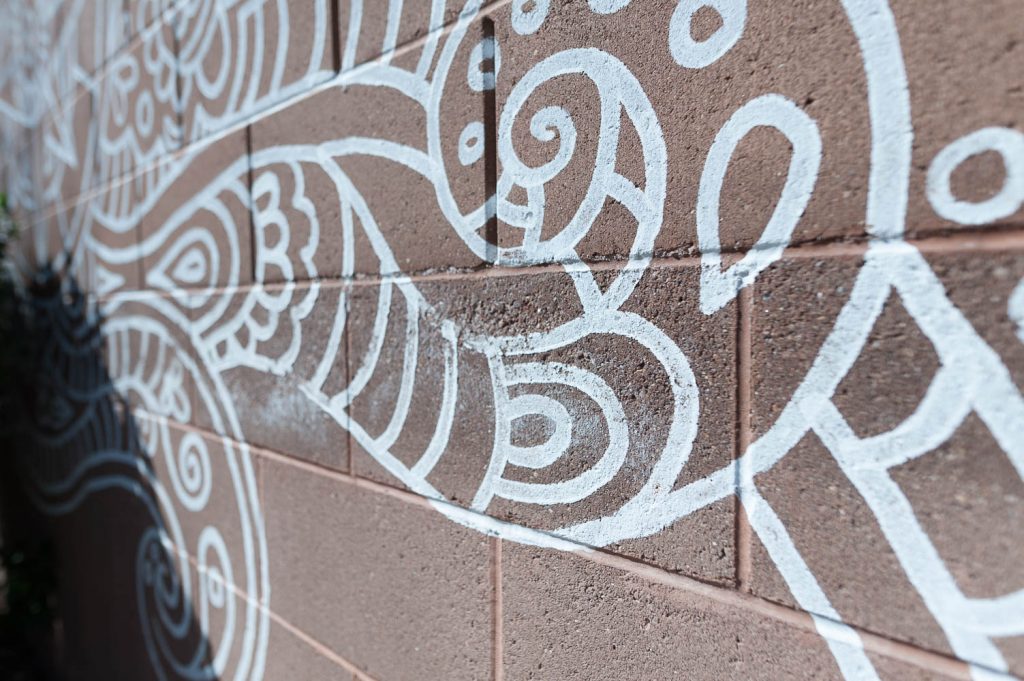
Updated photo taken March 2018:
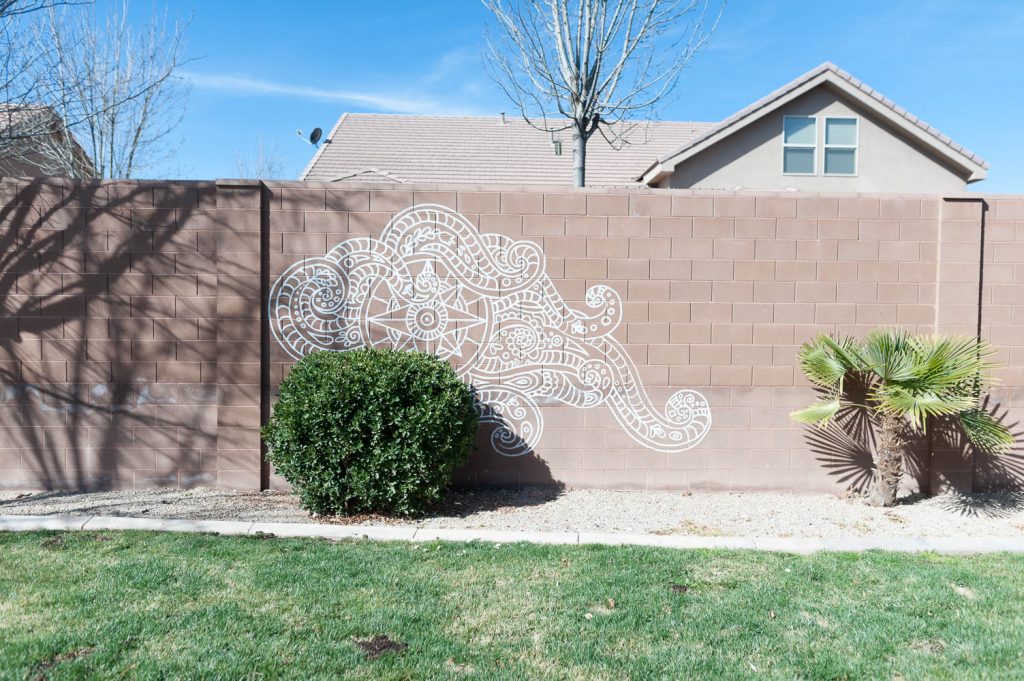
Small amount of block wall deterioration is causing the mural to fade in a small area.
I would definitely do this project again! I would use the same materials and process as I originally did.
#3: DIY In-ground Trampoline
Photo taken 2013:
One of our most popular DIY projects ever is our DIY In-ground Trampoline post. Since 2013, we have flooded the backyard three times {on accident of course}. We had an above the ground pool that was nearby, and we kept forgetting to turn the hose off when we would fill the pool. As a result, we filled the hole to the brim with water. Even though we flooded the trampoline, the structure and design has held up PERFECTLY.

Original Post:
Updated pictures taken March 2018:
![]()
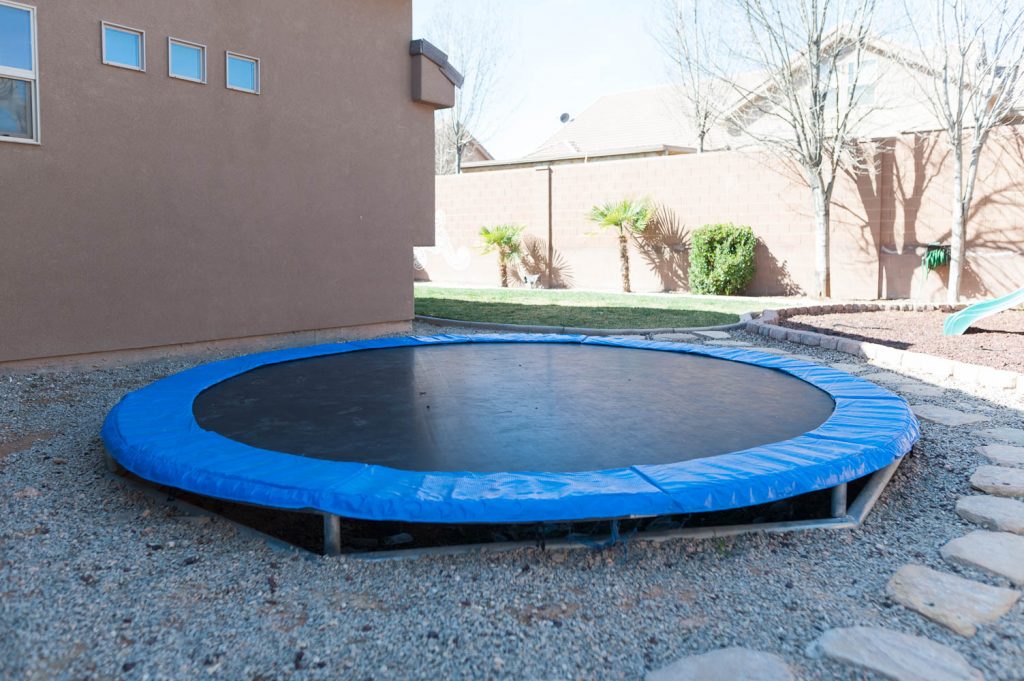
The only thing I would do differently has nothing to do with the design. But, for maintenance, I would remove the springs and mat once a year and spray for bugs, weeds, and clean out underneath it. Turns out my kids thought it was the PERFECT place to put their garbage, so it got pretty full of debris.
Other than yearly maintenance of the hole, I would not change the process of this project at all!
I hope you have enjoyed a look into three of our projects to see how they are holding up! Don’t you wish you could see the future and how something turns out 5 years from now!?! That’s a great reason why we should always be covered with home and auto insurance because you NEVER KNOW WHAT IS GOING TO HAPPEN!
Thanks again to my friends at Liberty Mutual for sponsoring this post to kick of our new series. To find out if they can customize your coverage to save you some money on your insurance, get a free quote HERE.
![]()
Thanks for reading, and we look forward to showing more projects from our new house soon! If you missed our introduction to our new house, you can find part 1 HERE.
xoxo,
Brooke
Thanks for sharing! I love this series and can’t wait to read more!