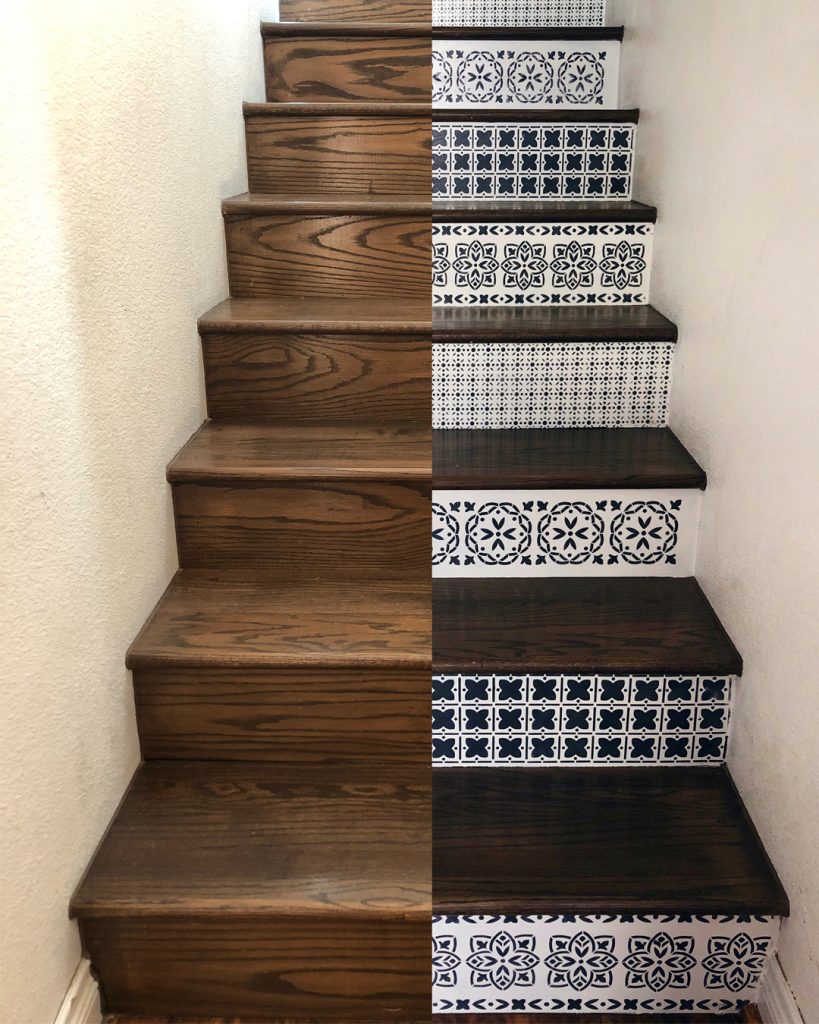
A friend recently reached out to ask if we’d help her makeover her tile table using our recent stair makeover as inspiration.
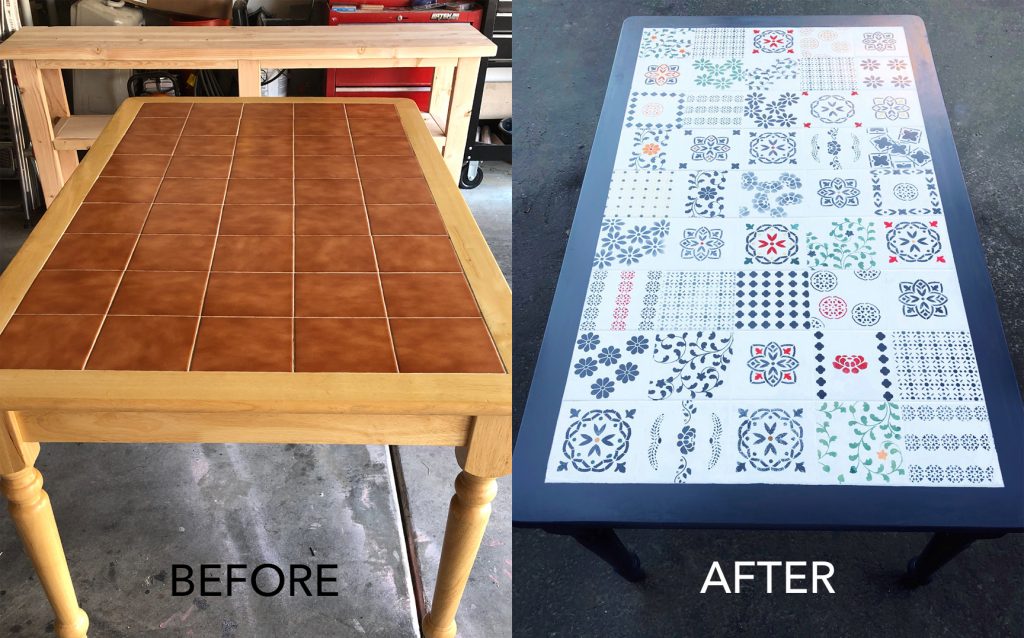
Chalk painting tile is no problem, but I hadn’t seen an actual tile table in decades, so I wasn’t quite sure what we were up against, until she sent over this picture:
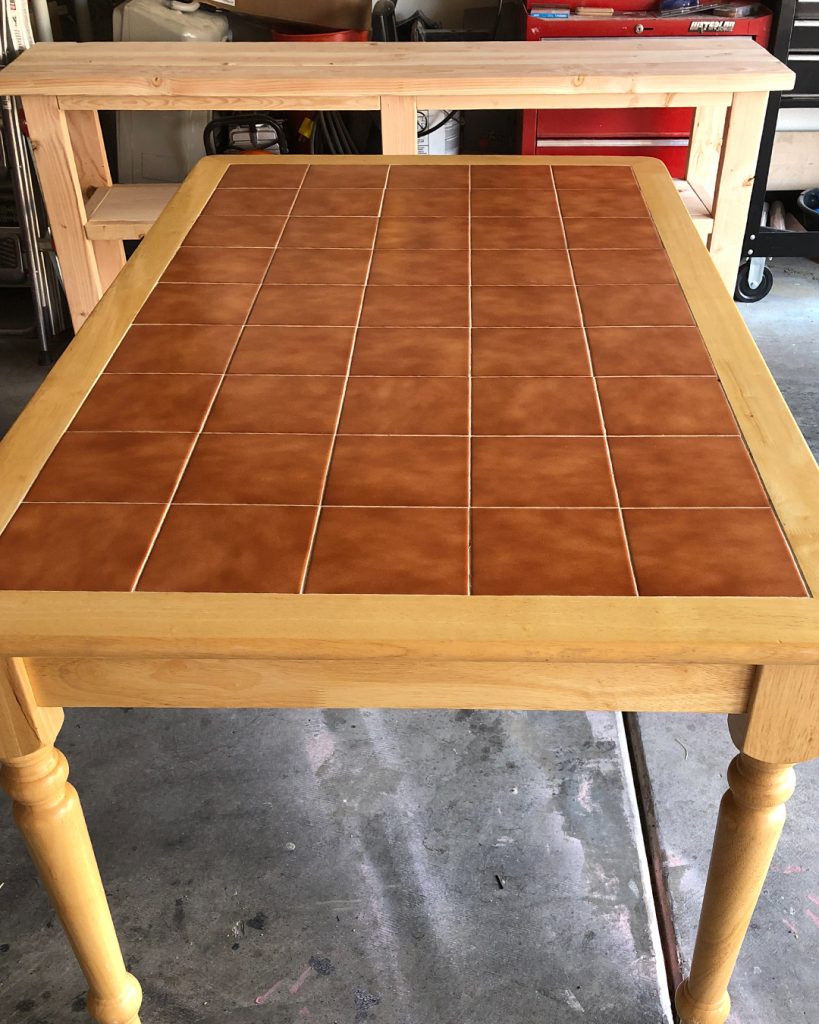
The good news was, ANYTHING we did to it would be better than the boring, dated, lifeless state is was currently in!
Our friend chose what stencils she wanted as well as the colors, then she and Kacey got to work.
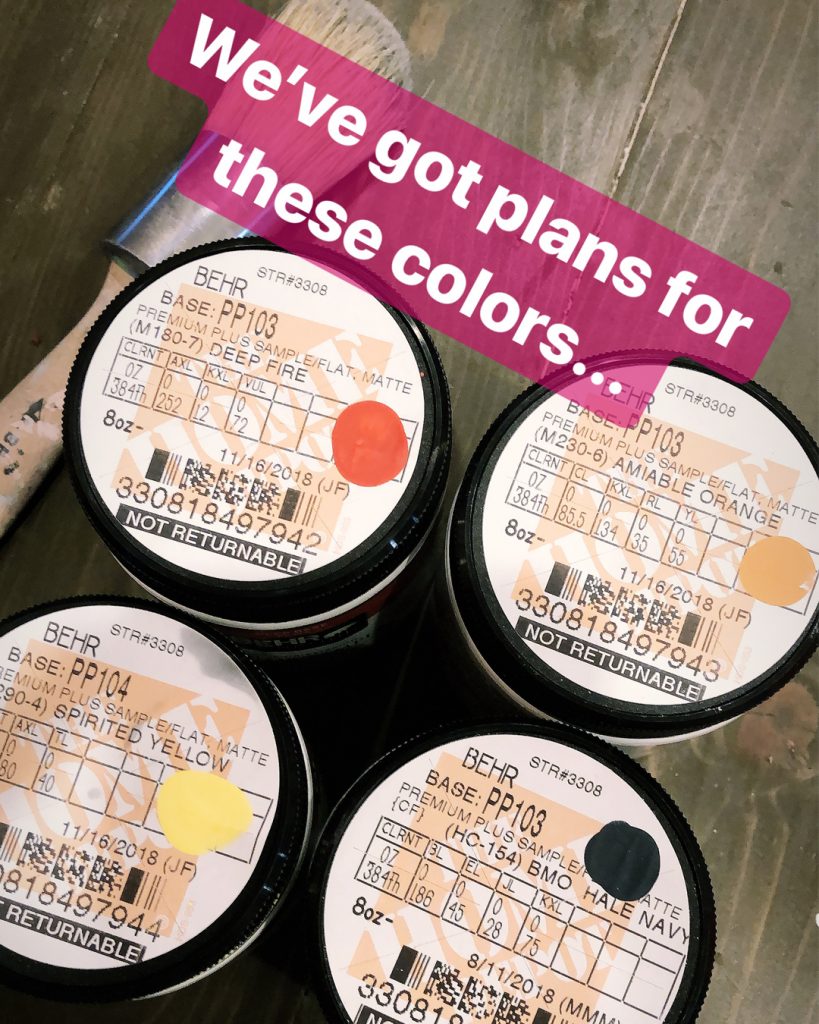 First, they mixed each color of paint with BB Frösch Chalk Paint Powder to make chalk paint that would easily bond with the tile. They also used white paint and navy paint that we had on hand from the floor makeover.
Next, they cleaned the table with Pine-sol and taped of the edge of the tile insert. If the original tile has already been white, they would have just began stenciling, but the brown tile had to go, so they first painted the entire tile insert white. Although they used a brush, this step could easily be done with a roller.
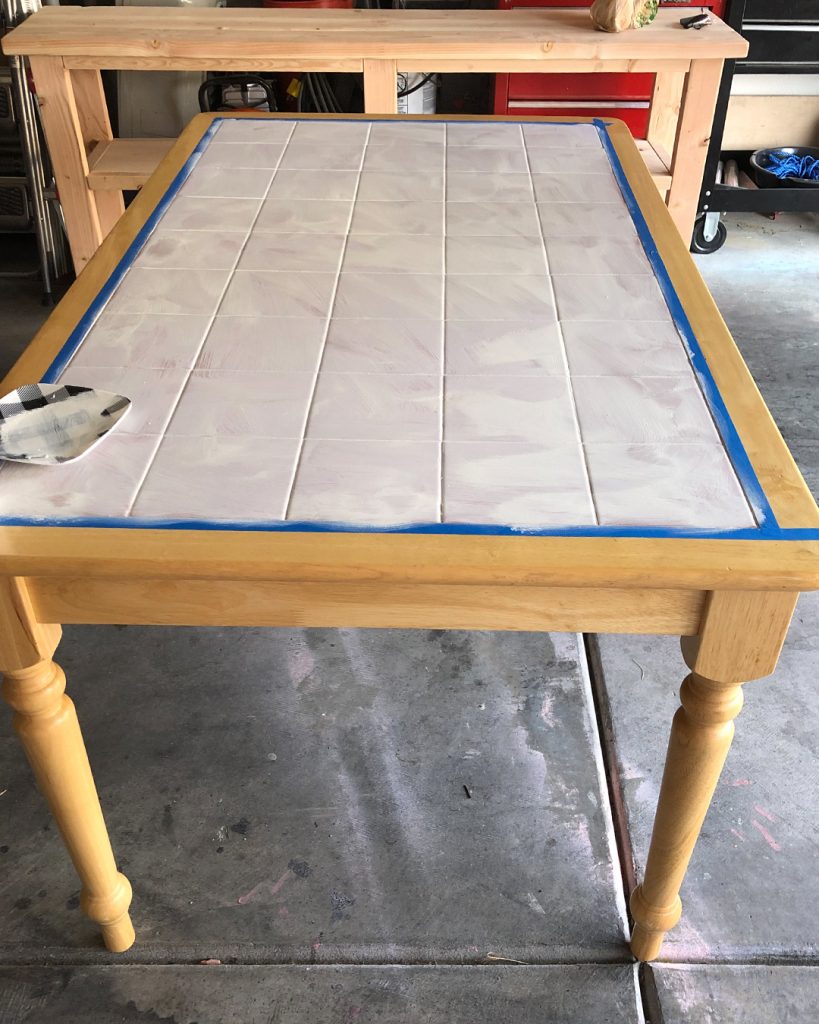
Notice the first coat is fairly thin. When painting tile, or any less-porous surface, I recommend a few things to help with bonding:
- Add extra powder to your paint
- Paint the first coat thin—it’s a bonding coat that gives the second coat something to stick to. A thick first coat will not only take longer to dry and cure, it will be harder for the second coat to level into, which makes it harder to achieve a nice, smooth finish.
- Allow the first coat to fully dry AND cure. Drying takes only minutes, but curing could take up to 24 hours.
- When painting the second coat, DON’T OVERWORK YOUR BRUSH! Because a second coat introduces moisture, the first coat could more easily lift, especially if you over-work your brush. If the first coat does happen to lift a little, stop there, allow the area to dry, smooth with sandpaper, then try again.
After two coats of white, the tile was ready to stencil. We used various left-over stencils from previous projects and alternated the colors for a completely random pattern.
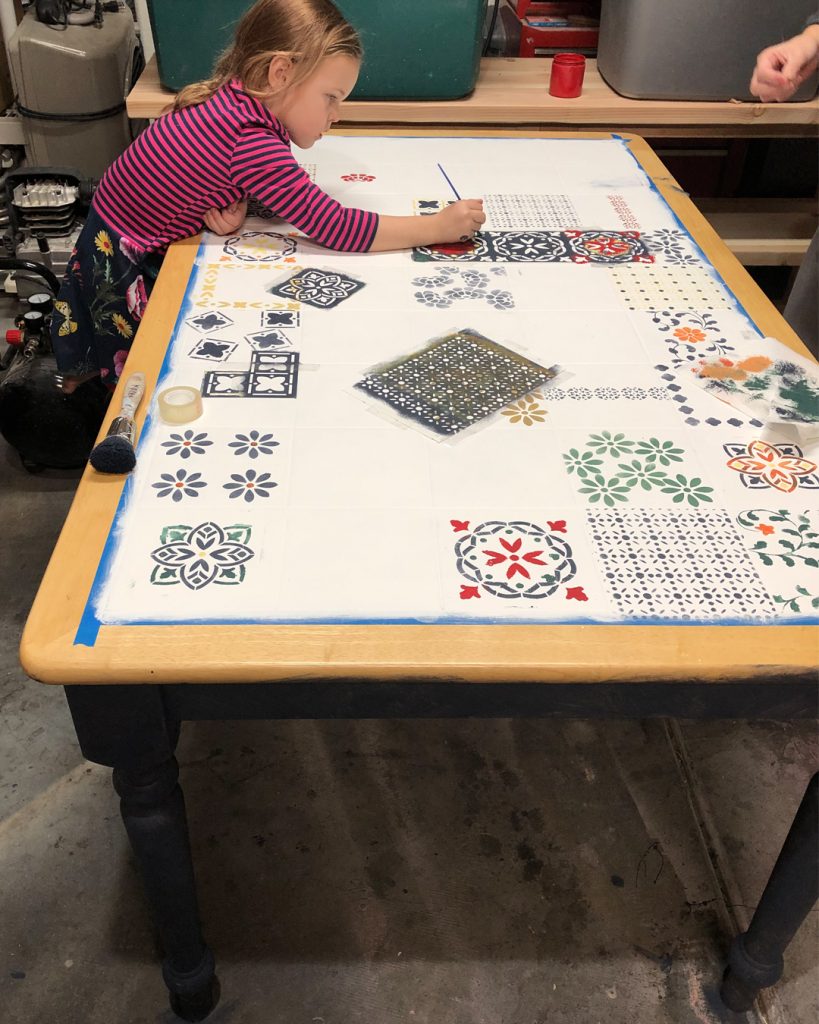
Blaire even helped! Isn’t it awesome that chalk painting is something everyone can get involved in? For tips on avoiding bleed when stenciling check out these stenciling posts: chalk painted linoleum floor, chalk-painted tile tutorial.
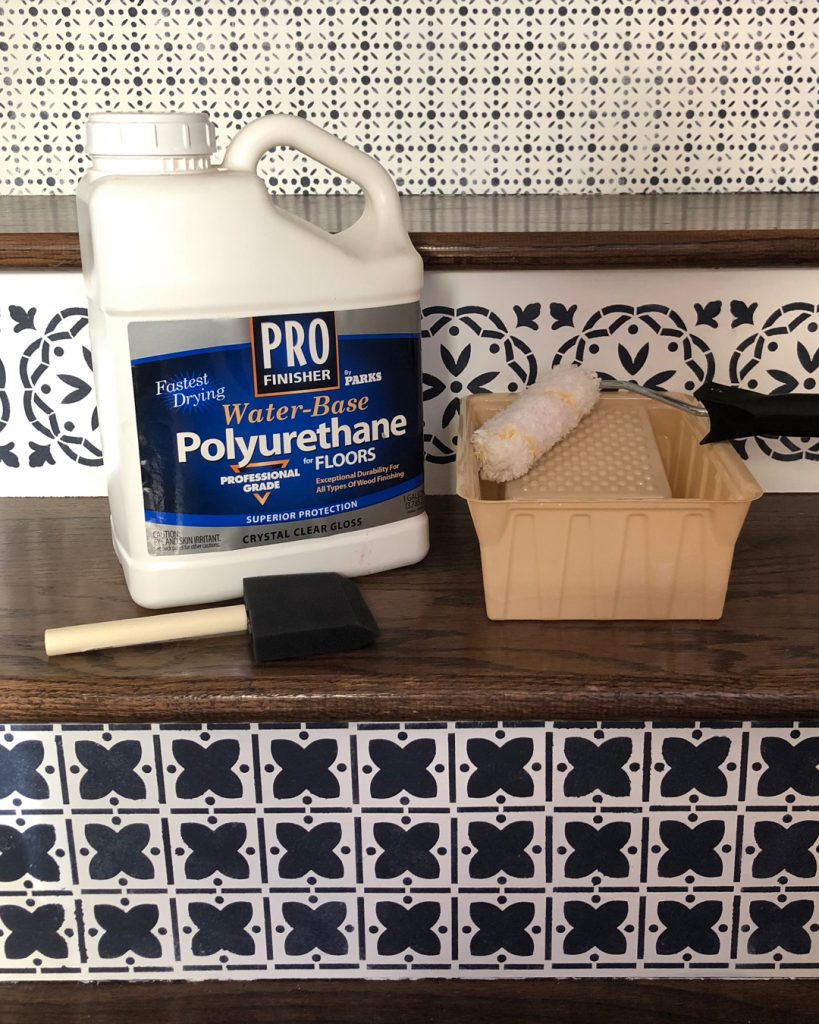
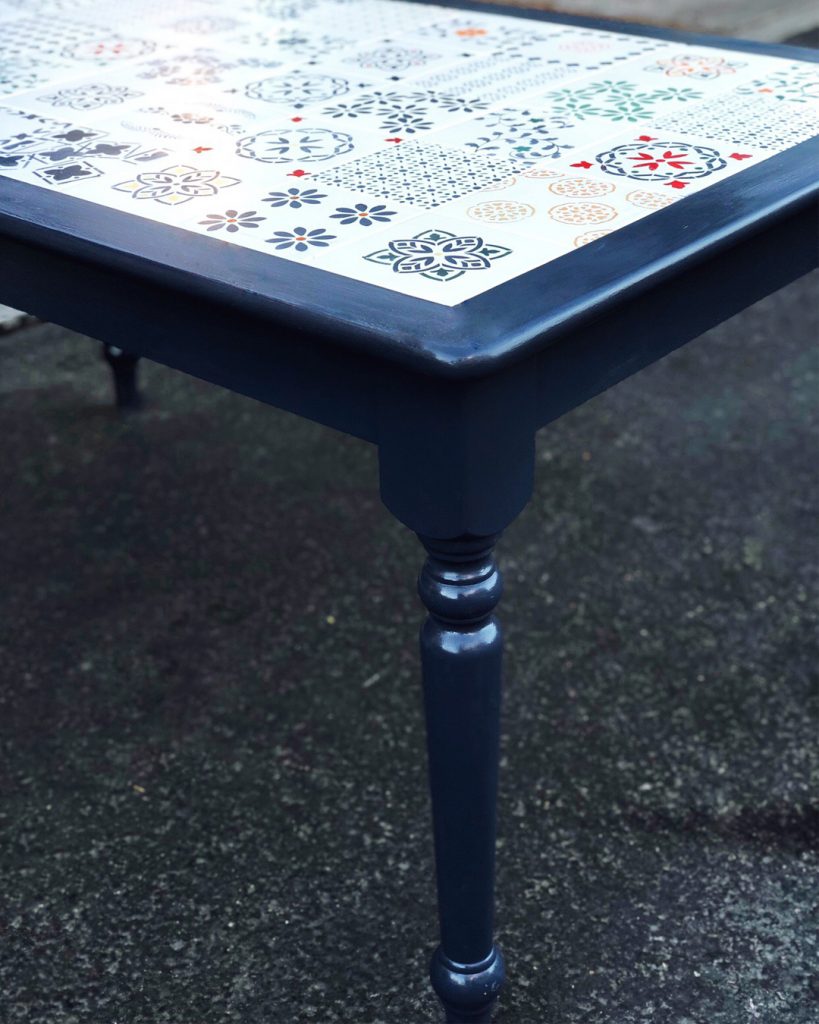
Once all the tiles were stenciled, the rest of the table was painted navy, and the whole table was sealed with the same water-based poly we used for the floor project and the stair project. We have a TON of this stuff, so you can expect to see it on future projects!
Although the skirt and legs could have easily been waxed for a softer appearance, it was easiest to just seal the whole table at once.
If you don’t love super shiny, just select a matte poly instead of a glossy one. The key is making sure whatever poly you use is water-based. I don’t recommend sealing painted tile with wax. Poly is a little more challenging to apply, but it holds up better on tile.

I can’t say I’d be on the hunt for a table with a tile insert, but if you find one for cheap at a thrift store, or you’ve been handed one down from Grandma, this update solution is a WIN!
Find more affordable chalk paint inspiration at bbfrosch.com. Follow BB Frösch on Instagram, Pinterest and Facebook.
Nice, what is the name and brand of the blue paint color on the legs . I like it…Millie from… http:\\frugaliciouschick.blogspot.com
I love this! Sadly my mum’s 1980s tile table disappeared back in the mists of time. But I love your finished one and would love to make something similar…
Tx
Can you tell me what you mean by waxing the outer area and legs!! I have a tile table and want to do this!!!
The painted tile should be sealed with poly. The painted portions of the table other than the tile (the wood part of the top as well as the legs) were sealed with BB Frösch Premium Finishing Wax for protection. I prefer the ease of application, look and feel of finishing wax on painted wood over the look and feel of poly on painted wood.
This is very informative to me. I have a small breaskfast tiled table with a beautiful pedestal base, which is the perfect color (White washed white).
Thank you for the tips and information
I’m totally copying you. I love it!
Hi, I just read this diy. I purchased the very exact same table at a used store. I am in the process of remaking it. Sadly I did not know I could paint the tile before I removed them. Oh well! After I retile I will be stenciling . Thanks for the tips.
I have the exact same table and have been wanting to paint it and keep it since it was handed down by my grandmother. Thank you so much for sharing this.