I have a lot of people who have asked me how to make window valances, so today I’ll show you how! Putting a window valance at the top of your curtains is a great way to add more color and pizazz to your room, and of course it does not need to cost a lot of money.
1 4 foot X 8 foot sheet of MDF costs around $20.00 but we did not use the entire sheet as you can see by the picture below. We wanted our valance to be fairly large, so we cut the MDF to be 15 inches wide and because of the size of the window we were building it for, it had to be 9 feet long. We used about 1/3 of the MDF sheet so this cost around $7.00.
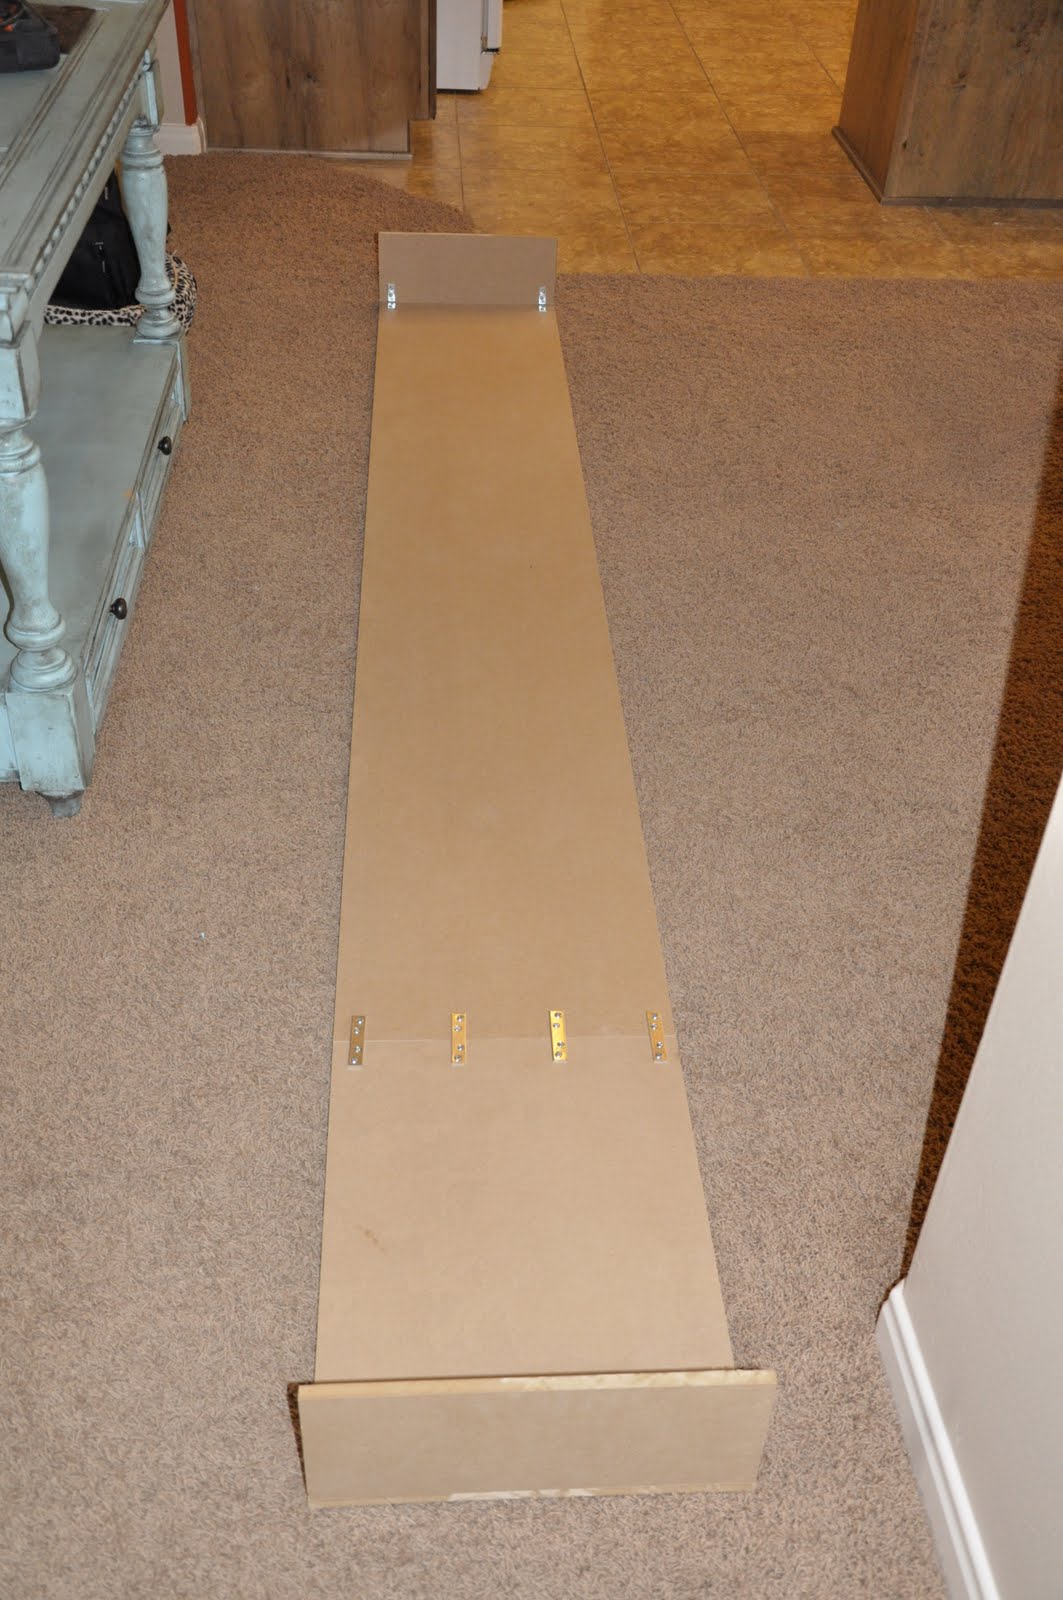
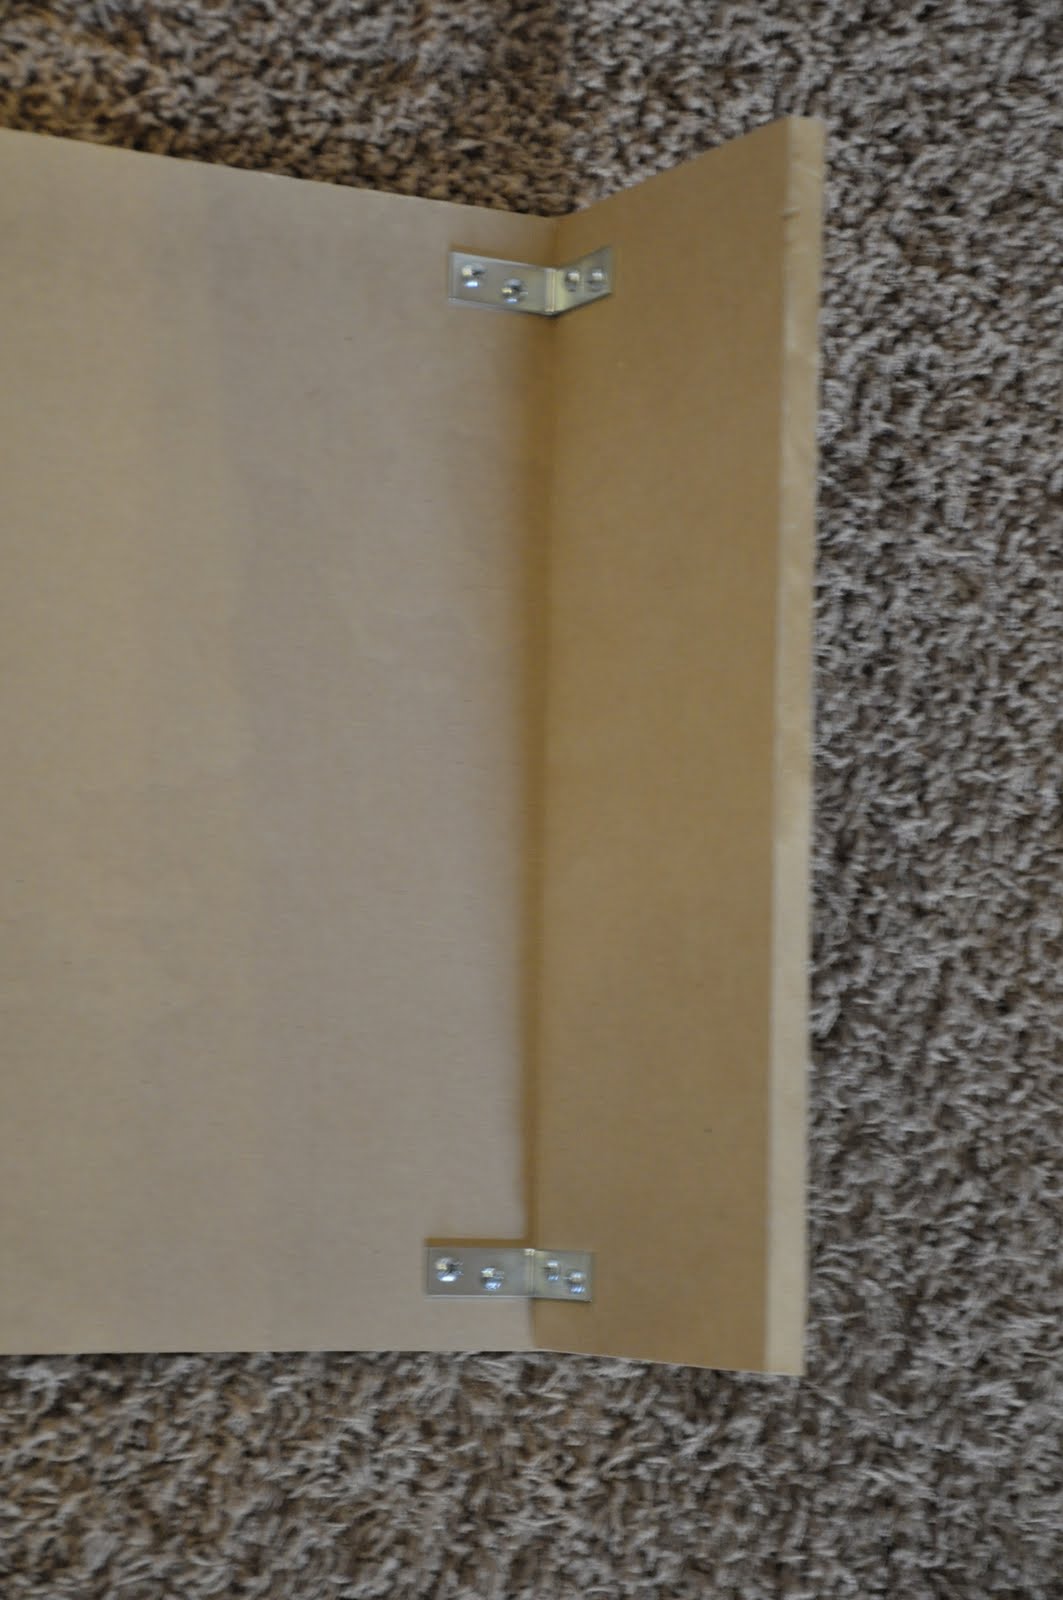
Since the MDF sheet was only 8 feet long, my cute hubby configured a way to make the MDF longer by hooking it together with hardware.
 We then used “L” brackets to attach 5 inches of MDF to each side to help it stick far enough off the wall for the curtain rod and curtains to have plenty of room. The total cost of hardware was around $3.00.
I wanted the valance to be unique, so I decided to use paintable wall paper that you can find at your local Lowes store. The wall paper comes in large rolls, and you can buy all sorts of patterns. This particular roll of wall paper cost me $16.00. The roll was 25 feet of wall paper, and we probably used 11 feet of it. This cost right around $7.00 worth of wall paper.
We followed the instructions on the packaging of the wall paper and went at it.
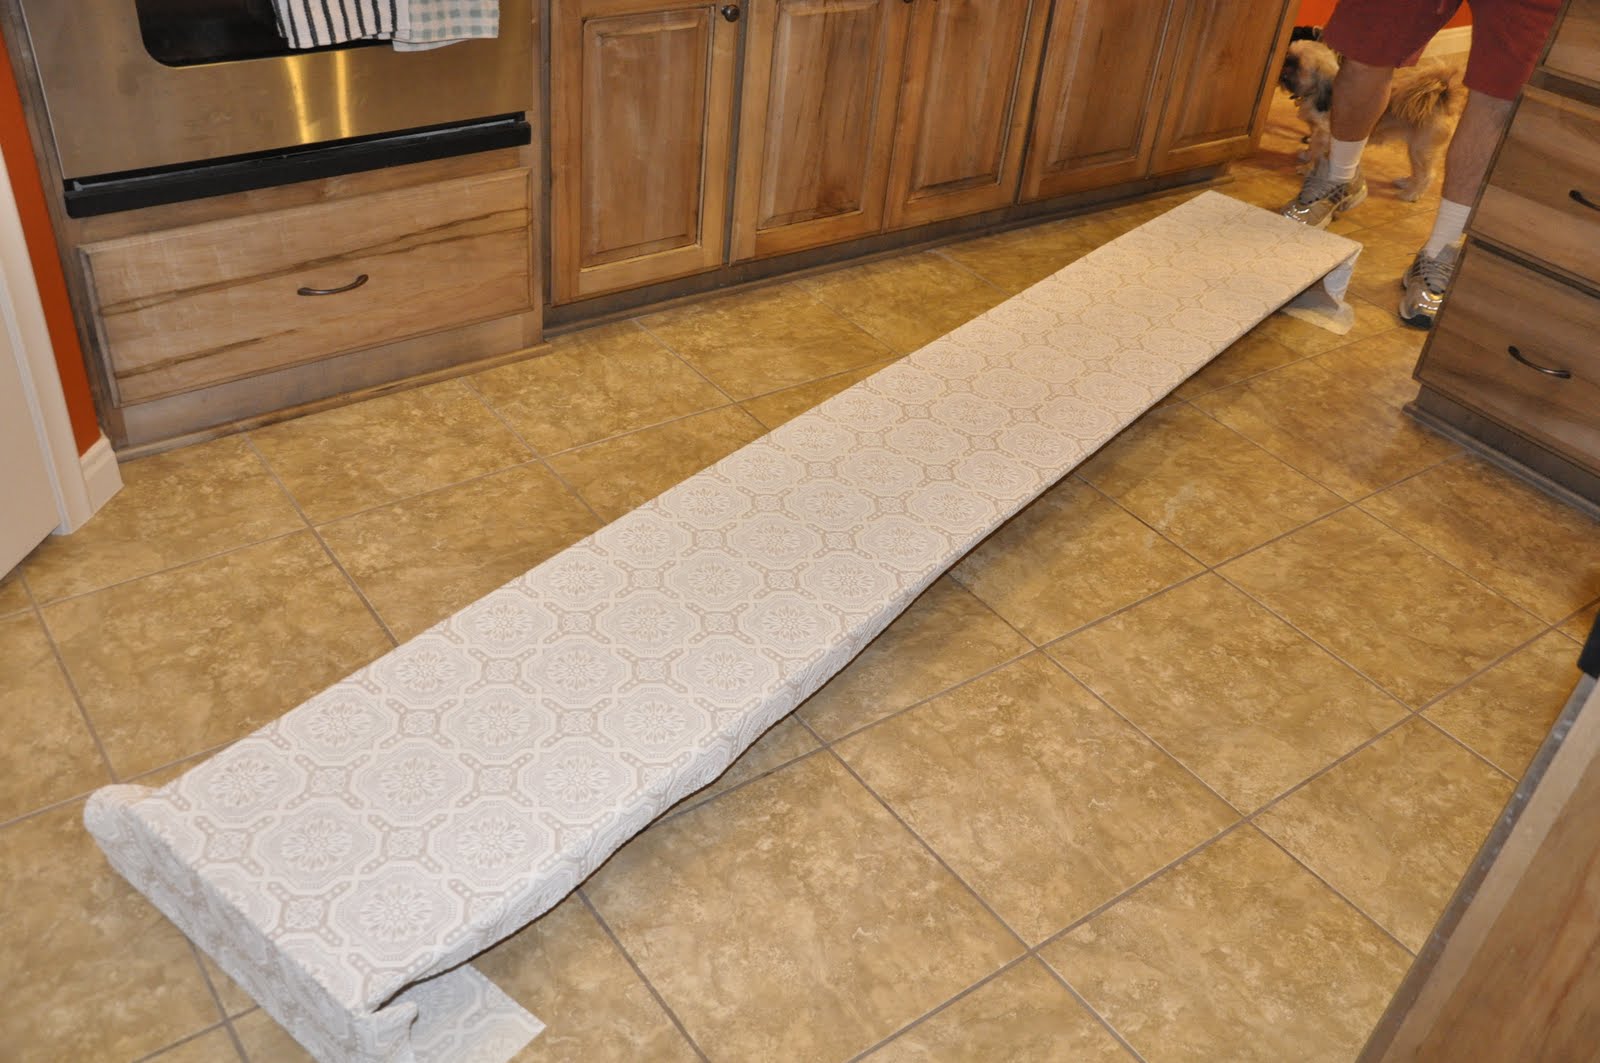
Then I stapled the wall paper in place on the back of the valance to hold it into place for good.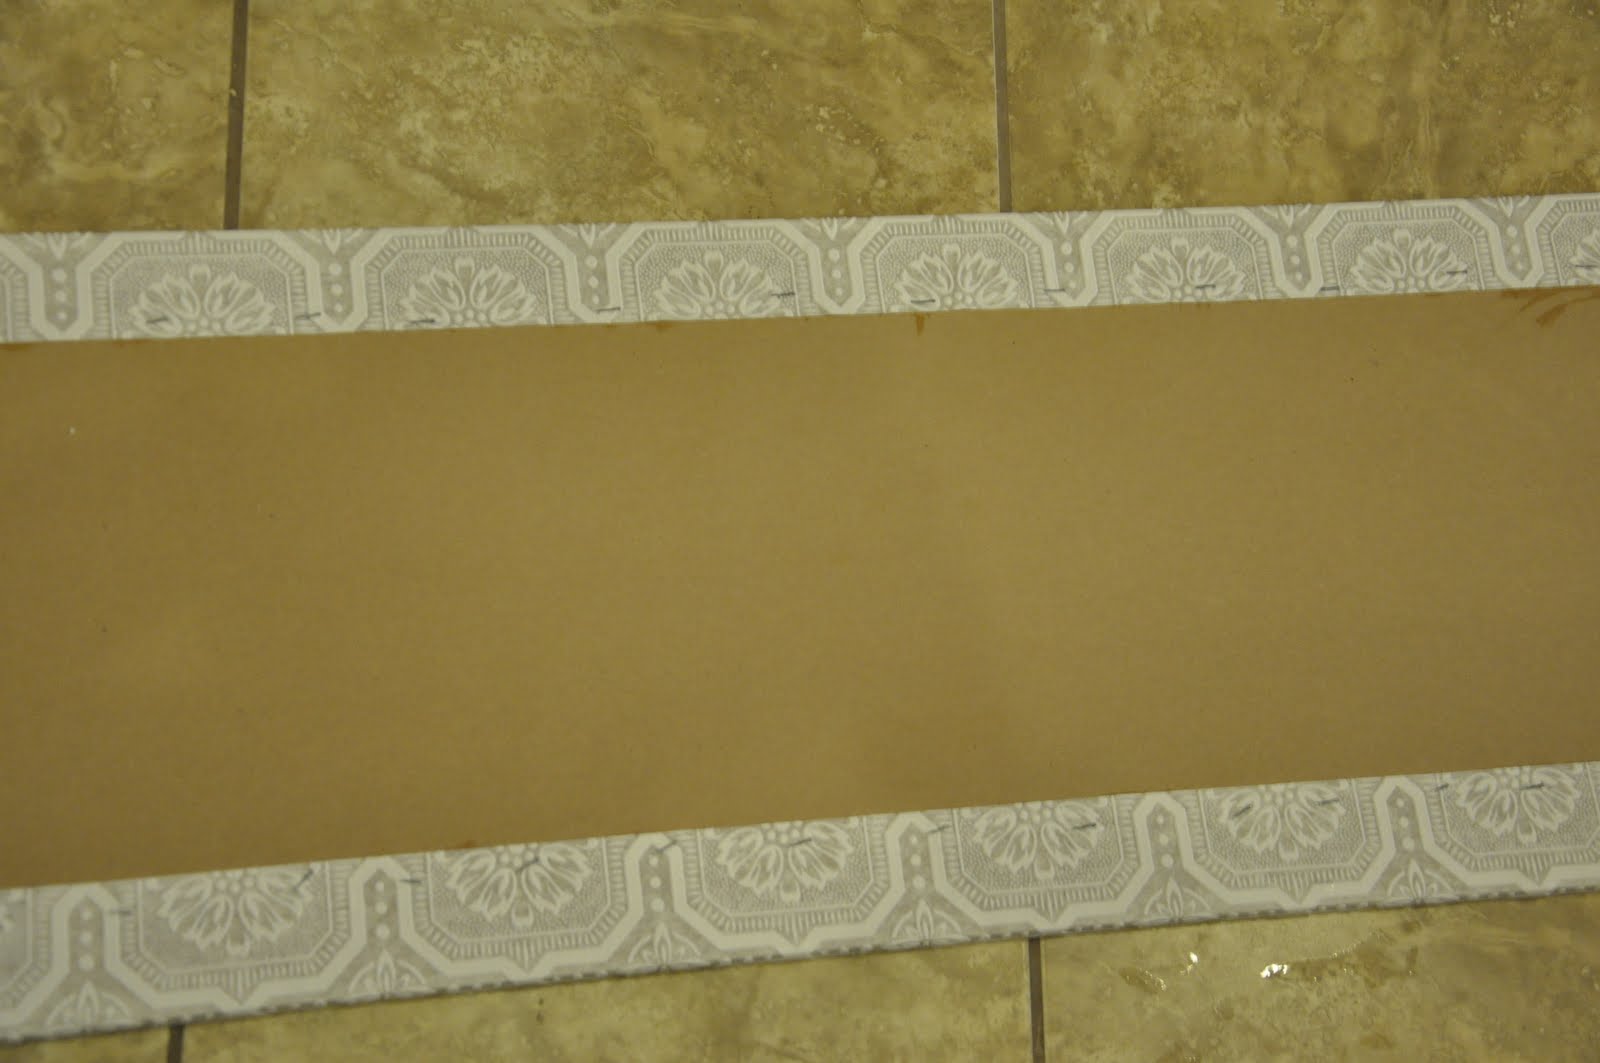 IMPORTANT: Let the valance dry over night before painting it.
I also didn’t get a picture of the hubsters putting on the crown molding, but to customize the valance, he added a strip of crown across the top. I loved the look it created. Crown molding costs $1.20 a foot, and we needed 10 feet for this project. The cost for the crown molding was $12.00.
Next, I painted it brown. (with paint I already had sitting around) and I know you will all be SHOCKED by this, but I did NOT spray paint this! 🙂 I rolled it on.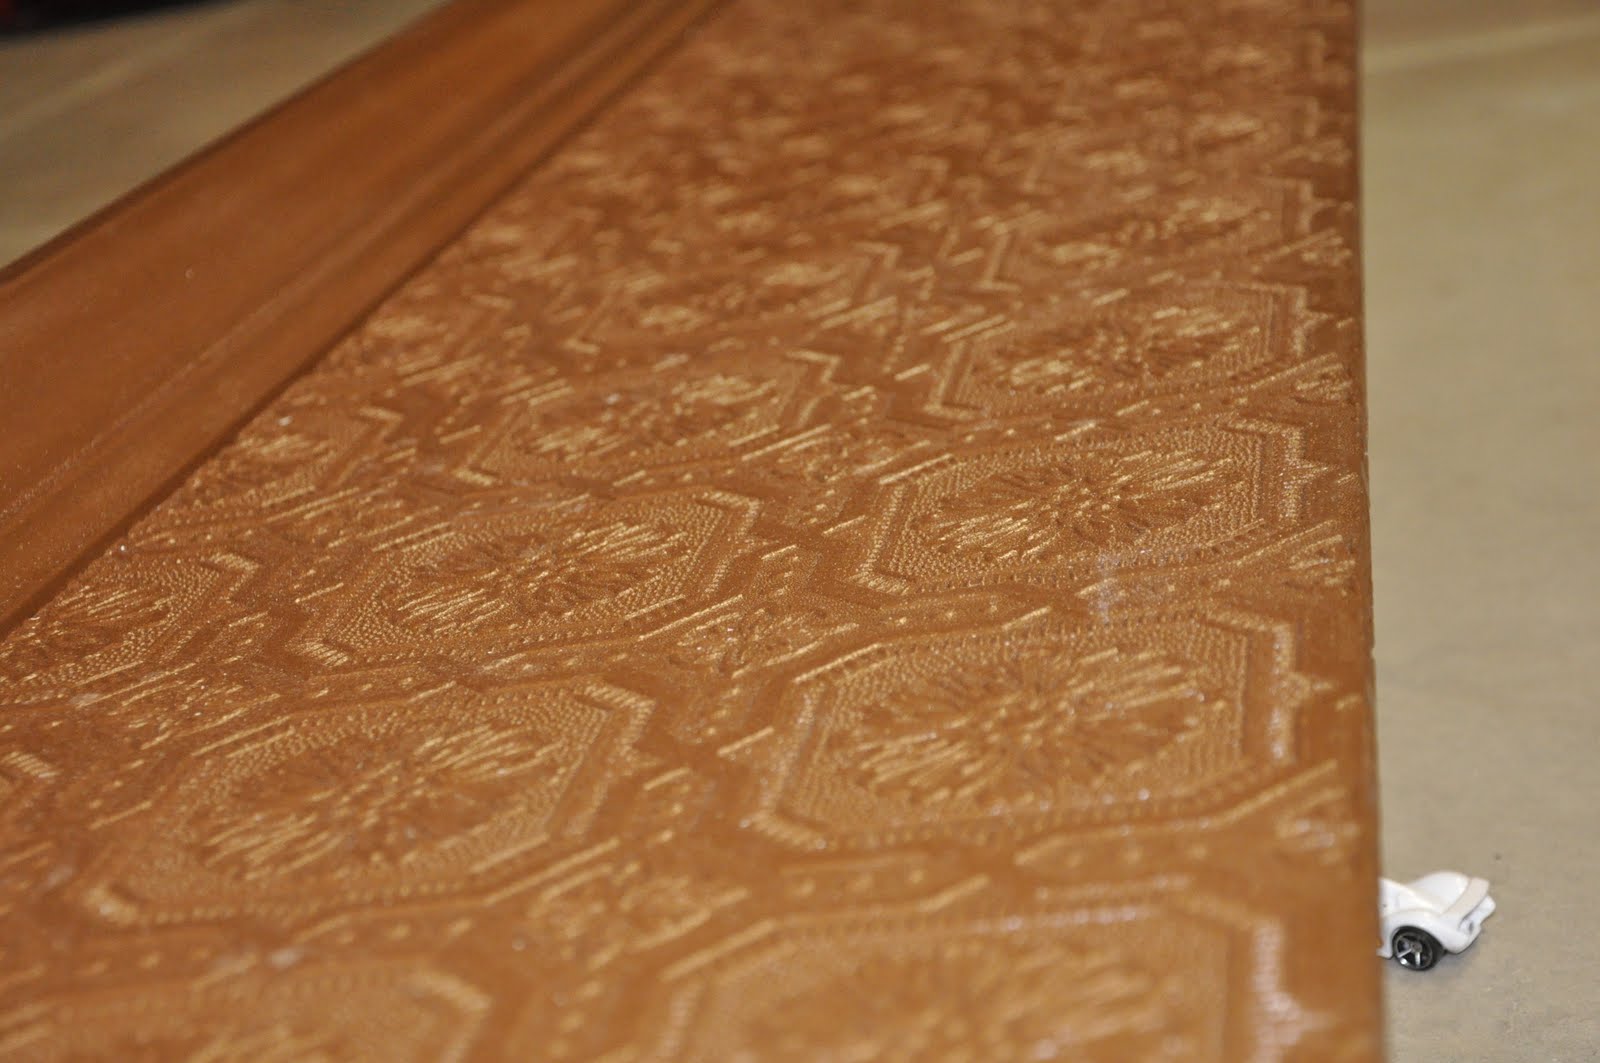 Then, I glazed it black. I wanted the brown to be deep and rich. Glazing it created just the look I was going for. It almost looks like leather. Love it.
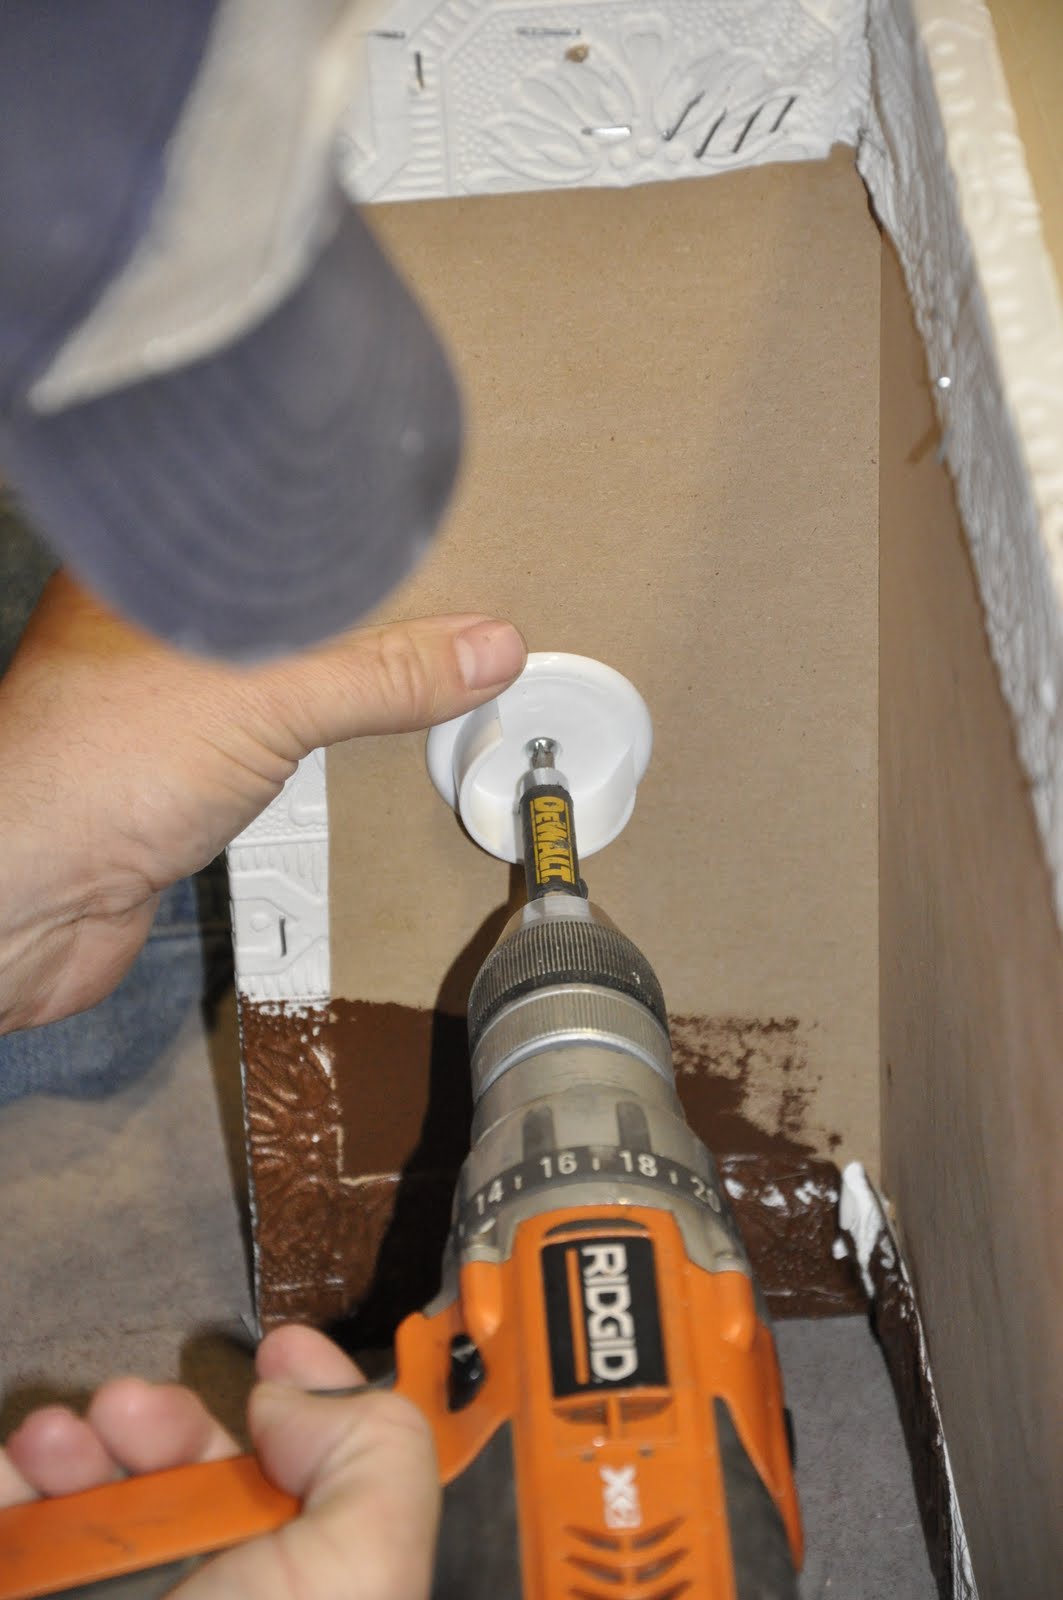
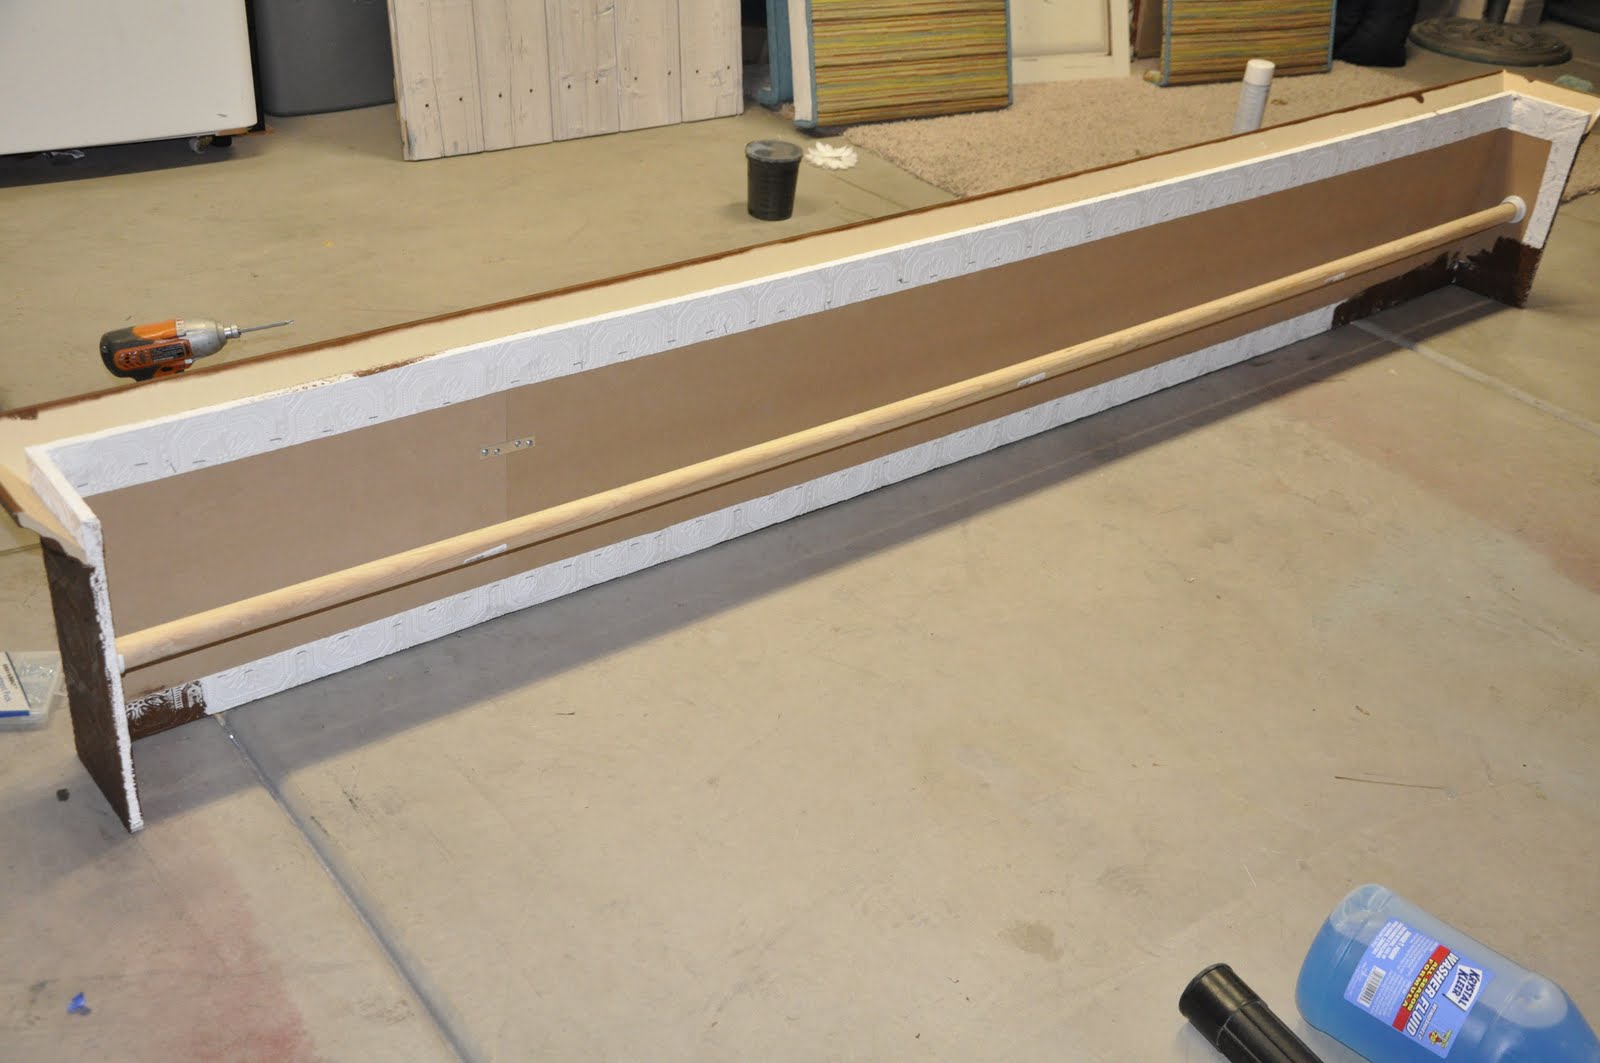
 Then we (when I say we, I mean he) installed the hardware for the curtain rod across the backside of the valance. We used a wooden dowel for the rod.
 Here she is all ready to be hung.
 Here she is all done. I love how it turned out, and the great thing is…you can make it your own by painting it whatever color will work in your house!
 Total cost of valance: $29.00.
Sidenote: I also made the curtains with $1.00 a yard fabric from Home Fabrics. So, they were super cheap too!
Here is another picture of the entire space. I wish you could all see this in person, the pictures just aren’t doing it any justice.
You did such a BEAUTIFUL job! Thanks for sharing! 🙂
Fantastic!
LOVE the idea of using a texture wall paper instead of fabric which can be so old-fashioned sometimes. This is so pretty!
BLooDy BRilliAnT!
I am SO EXCITED to see this post!!! I have been wanting to make a valence, but didnt know where to start. Thank you for sharing! P.S. Love your rug! We have the same one!
looks great!
How did you attach the valence to the wall?
it must be pretty heavy (it looks like you used 1/2 inch)
BEAUTIFUL!!!
Wow! That looks great! You should come decorate my house. You have quite the talent.
That looks AWESOME! I may just have to do it sometime myself!
Cute! I wondered what they looked like up close! I wouldn't have thought to use the wallpaper. I just padded and upholstered mine. Which reminds me, I still want Dave to make one for our bedroom.
WOW!!! This turned you so stinking good! I totally want to do this!!
~Morgan
Meet Virginia Crafts
Meet Virginia's Etsy Shop
love this! have you done a curtain tutorial? i need one!!
Love it! I am also wondering how you attached it to the wall…..this might be on my to do list for our bedroom…or our dinning room…or our living room 😉
That is a very cool cornice. I love the architectural detail pieces like that add. Nice job, ladies.
I am also wondering how you attached it to the wall????
I LOVE THIS! I just recently found your site and I just have to say you ladies are amazingly talented! The only way I would like it better is it my house looked like yours!
gorgeous! off to check out that paintable wallpaper!
this turned out amazing! great job!
Love!
It looks royal! Good job, well done.
I just found you through Be Different…Act Normal. I love your valnce, your blog, everything! I am now following you!!!
There is no end to the great ideas of how to use paintable wallpaper. I found some for $3 at the Goodwill and bought it knowing I would see a great post on how to use it. This is a definite possibility. I love the finished product.
Thanks for the inspiration.
Traci
Impressive. I just put some of this pressed aluminum up in my mom's kitchen but I like you idea of how to use it. Wow, another project to add to my long long list. of to dos. :0
Pamela
I have loved watching this room transform! It is utterly beautiful!
How did you hang your darling valance to the wall?
Great news my lovely readers! Check out:
https://allthingsthrifty.com/2010/04/tutorial-how-to-hang-window-valance.html
You will find instructions on how to hang the valance. 🙂
wow I love this! It's gorgeous!
This is awesome!! Thanks so much for the idea!! Can you tell me where you got your cute, cute rug?? I love it, too!! Thanks!
I just discovered your blog and I decided that we should be best friends. In fact, I think you should come hang out at my house. We can diet coke (my favorite)and you can tell me everything you would do to make my house as cute as yours. You are truly amazing!
hi! one more question…how long was the dowel rod you used and WHERE did you get it? we need an 81" long one…so we glued/taped two dowel rods together. won't stay up. falls down every night and is on the floor when we wake up in the morn. really don't wanna spend $$$ on a curtain rod! thanks!
-sierra
sierra.keaster@gmail.com
Thank you so much for posting the "how to hang" dilemma. One more thing, what type of glaze did you use? I think I bought the wrong kind because it just isn't going on right. Please let me know as soon as you have a minute. Thanks!
mattandlindy@gmail.com
Hi, I love this website! My husband and I made a valance like this a few years ago. Ours was bit smaller cuz we used border sized wallpaper and used a small molding on the edge to finish it off.
Thanks for sharing! Blessings!
How did your hubby do the corners on the crown molding? Did he use a miter saw?
Thanks, Savannah
I LOVE this window Valance!!! You are AMAZING! What color brown paint did you use? Mine isn't coming out the dark leather color like yours. When you add the glaze/black paint mixture, do you then wipe some of it off? Thanks!
This is awesome! I can't wait to do this.
Side note: I think the 2nd paragraph should read: "One 4 foot x 8 foot sheet. . ." 😉
I could not figure out why you were having to splice a 14' board to make a 10' one.
Wow! That looks so nice and professional!!
Adding that thing into your window can help support curtains. It's really a great idea and it adds to the design as well.
roller shutters perth
I would also like to know what color brown you used and how you did the glaze to achieve that deep, rich brown color. That is the color that I need for our living room. Please let me know when you have a moment. Thank you!
I searched Pinterest for rust curtains & found your tutorial. Just wanted to let you know that I made this AND LOVE IT!!! OK, well my husband & his friend did all the carpentry stuff, but I applied the wallpaper & painted. {I didn't glaze, because I've never done it before & didn't want to screw it up! I used Oil Rubbed Bronze paint.} Anyways, I did a post about my new living room decor, if you'd like to see how it turned out! Thank you so much for posting this!!
http://www.amuslovesbutch.com/2012/01/living-room.html
Seriously Incredible!! Where did you get your wallpaper?
We just finished making one of these, and we love it! What a fabulous idea! My hubby and I painted it brown, and are considering glazing it. We just like how you can see the texture so much in your pictures, and I'm guessing the glaze helps with that. How did you apply the glaze? We have some, but aren't sure the best way to apply it to get the results you did.
How did you attach this to the wall? I would like to do something similar for a bed valance above my bed but need some ideas on how to attach it to a slatted ceiling:/
https://allthingsthrifty.com/2010/04/tutorial-how-to-hang-window-valance.html
If you would like to know how to hang the window valance, check the post above
I would paint the valance orange
so cool!
http://www.ericabelliocreations.blogspot.com
@Dana
And for anyone else interested…
The paint-able wallpaper was purchased at Lowe's! Good Luck!
I haven't used glaze myself before either. What kind did you use and is there a special technique to get the look you were going for? It turned out beautiful!
Hmcclain93@yahoo.com
Amazing! I've never used a glaze but I've been wanting a project to try it out. Can you tell me what kind you used and if there is any special technique to get the look you were after.
I really liked your project but can you please clarify the exact name and company for the brown paint ( looks orangey copper in the photo) and the glaze. I see that someone has asked this before but it hasn’t been answered. Would love to do this for my house but I need details
I don’t have the color information anymore. I wish I had a better answer for you!
Hi, how do you hang it? It is absolutely lovely and I want to try it : )
Alice: Here is the post on how to hang the window valance: https://allthingsthrifty.com/2010/04/tutorial-how-to-hang-window-valance.html
Brooke – what type of glaze did you use to get the finished look? We are trying to copy your idea for our living room.
Check out this post about glazing: https://allthingsthrifty.com/2010/03/glazing-furniture-101.html