The inspiration:
Our backyard is definitely in the “work in progress” category. We have planted trees, and my husband has built me an amazing swing set, but our projects are only beginning. We just finished one that I have to share! A few months ago I was watching the DIY network. You are probably not surprised that I LOVE the DIY network. 🙂
Well, I was watching a Turf Wars episode because my backyard design was up in the air, and I was hoping for some inspiration. I was in AWE at this amazing idea that I had never heard of. The backyard designer painted something on the fence. I LOVED it.
When our block wall was complete, I was overwhelmed at how tall it was. In fact, we have nicknamed it “the tower” around here. The reason why it is so enormous, is because our backyard neighbor’s (who are great, by the way) lot sits much higher than ours. So, the bottom portion of the block wall is a retaining wall. The wall is around 10 feet tall.
When you walk out my back door, the first thing you see is this GINORMICA wall, and this bothers me. So, with the trusty help of the hubsters…we went to work painting the Turf Wars design onto our wall.
Items you need for this project:
An (old school) overhead projector 🙂
A printable transparancy
A few small high-quality paintbrushes
Outdoor latex KILZ paint in the color of your choice
A ladder
Step 1: Choose a design, and decide where you want your design to go. We used the exact same design that was on the DIY network. We simply printed it off onto a clear transparency. If you look closely in the picture below, the artist put guides for the projector that came in handy. Since this project took us several nights in a row to complete, it was a great way to keep our projector in the same spot. We marked these guides with chalk.
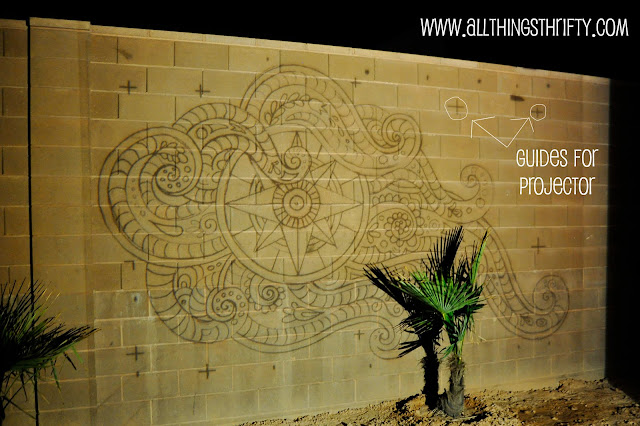
We found the design with a Google search. 🙂

Picture source (Munkey Mind)
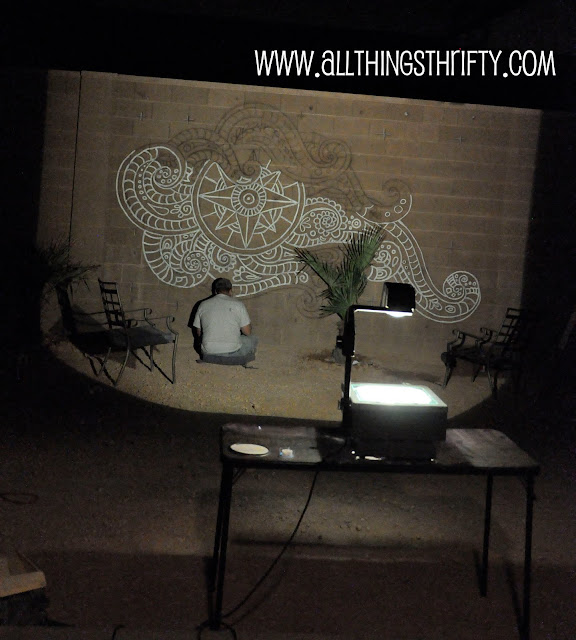
Step 2. Set up your projector and make sure it is in focus. You need to set it up in a place that is level. It is easy to bump the projector, and every bump causes the design to be nudged off target. Hint: tape your transparency onto your projector. If your projector gets bumped, use the guides to get it in the exact same spot again.
Step 3: Begin painting. We learned from the get-go that painting a porous surface like a block wall is pretty challenging. It was difficult to get the lines to be smooth. After some practice we got pretty good at it, and from several steps back you cannot even see the difference.
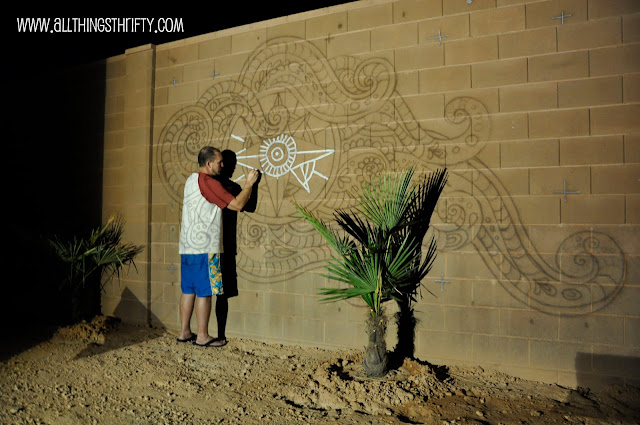
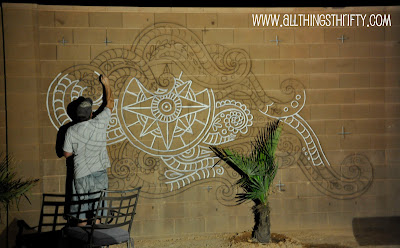
We could not see the design during the day, so we painted at night. We didn’t have any idea how long this would take us…but like most of our favorite projects…this one took a lot of time and patience!
Here is a better picture at how far back the projector was. At some point during the project we painted sitting down.
We painted standing up! Here is my friend Jen helping out!
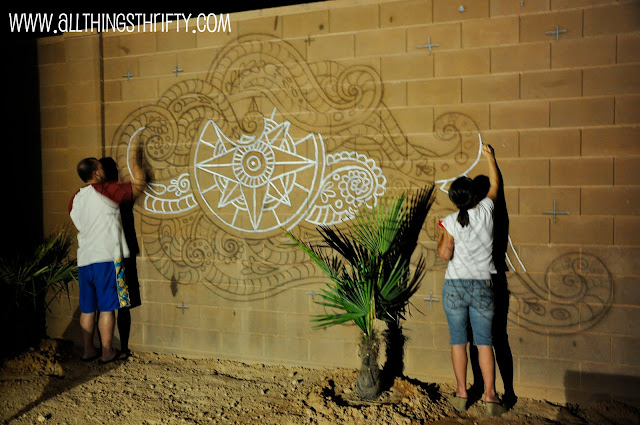
We painted, and painted, and painted!
On the third night, we finally needed ladders to reach the top.
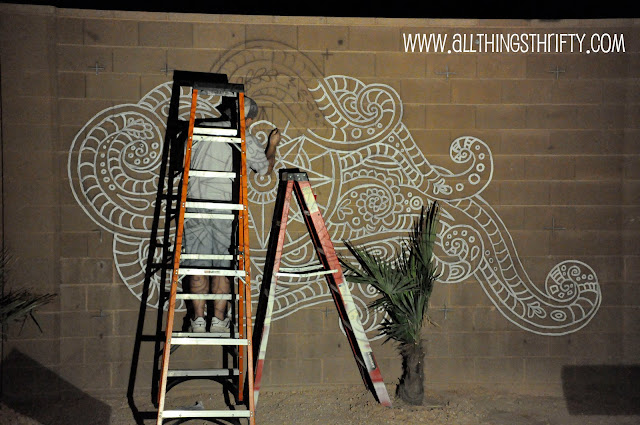
Here is Dan getting ready to paint the last line. It was definitely camera worthy!

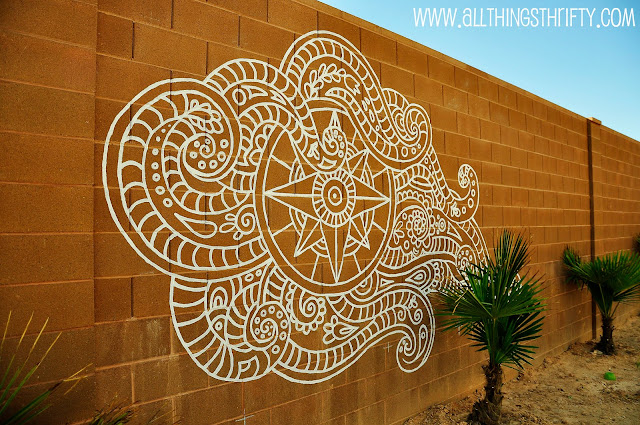
And here is the completed project during the day! We are quite proud at how great it looks. The design ended up being 14 feet wide and nearly 9 feet tall.
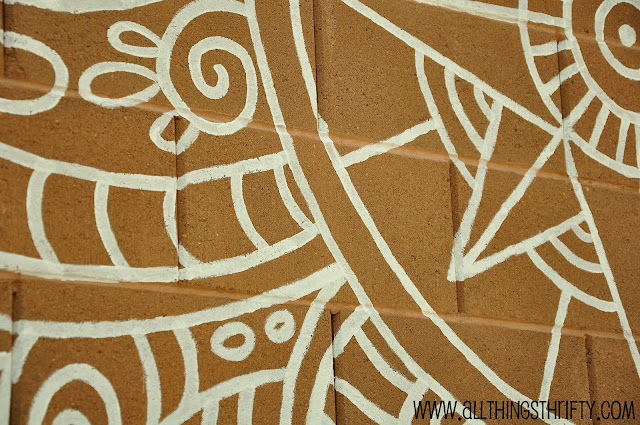
As you can see, the lines are not perfect, and painting in the crevices was a challenge. We did our best to keep the lines straight.
Now, I just need a nap to catch up on some lost sleep. 🙂

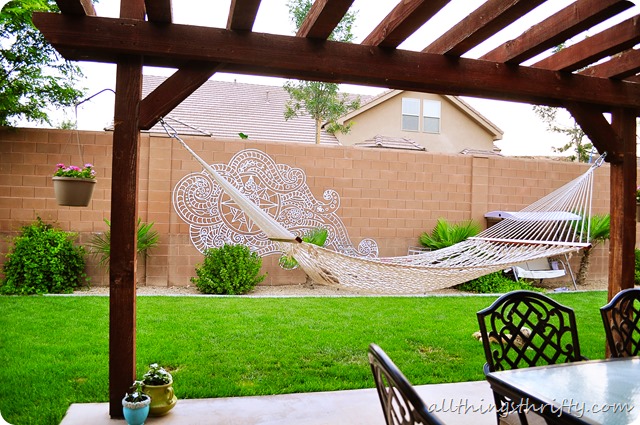
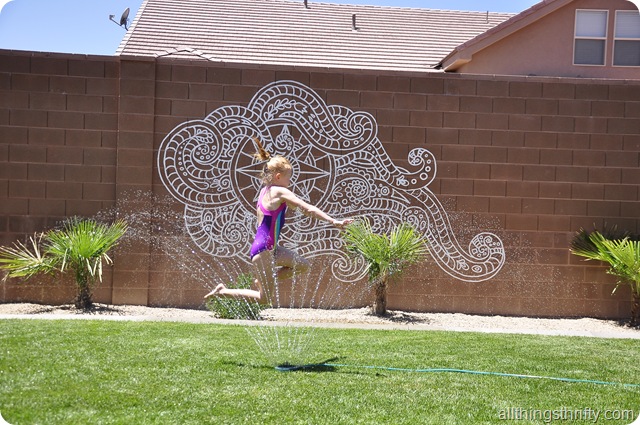
Some of our neighbors think it looks like a tribal tattoo. I agree, and I love it. It makes the focal point I was going for. So, instead of noticing how HUGE the wall is, people notice how great the painting looks! Mission completed!
The greatest part of all of this!?!? It was basically FREE because we had the paint from a previous project!! Now that’s what I call THRIFTY!
What a great idea and a fabulous execution!!
That is awesome! It makes me wish I had a great big brick wall to paint. 🙂
Love, love, love it!! I really like that design you picked out.
very cool.
i totally saw that episode!
how about a mermaid for your yard too 🙂
love! Did you have a projector on hand or did you borrow/rent it? 🙂
I am so impressed!! This is super cool. It is so striking! You (and hubby) did a great job. 🙂
love it! when i worked in a display dept for a dept store, we used projectors all the time! they are under-rated!
It looks great!!
This looks AMAZING!!! I LOVE IT!! It is nothing like I pictured from you describing it on the phone… haha, but it looks even BETTER than I imagined!!! Way to go, Brooke & Dan!! You never cease to amaze me!
That looks awesome! I bet it looks even better in person! That actually is a great idea especially for the block-walls. Brett's mom has a big one in her backyard and doesn't like it. I'm sure she would've loved this idea, but now she has grapes that run down. Love it!
Awesomeness! Love it!
This is a great idea! I love the look!
That looks fabulous! I can only imagine how long that took you guys!
Stunning! What a clever (and thrifty!) way to turn a problem,er a "challenge", into an asset.
I absolutely love it! Funny how the best projects require the most patience. 🙂
Holy Moley! You are too amazing girl! I love love love this!
~Morgan
Come check out my Fashion Link Party Weekend Wear every Wednesday!!!
MEET VIRGINIA!
It looks awesome! I love the projector idea…would never have thought doing it that way!
Amazing! You never cease to amaze.
Dan deserves an award for the best husband ever. I start a project and Wes just wishes me luck. That looks awesome. It's got me thinking about my wood fence. hmm…
Wow, that looks way cool! I gotta see it in person! 😉 Ya think Dan would mind if we painted one on our back wall!? Haha.
LOVE your stuff
just curious…..
do you believe in painting something black???
i am dying to repaint a kitchen table and hutch black and wanted to see what you used and if you can glaze over black?
love the colors you choose, but have you done a project in black?
i went all the way back to January in search of one!!
and by the way you are awesome and i hope my furniture will turn out half as good as yours!
cindi
cindidecampos@hotmail.com
That is awesome! what a great idea.
Beautiful!
Freakin' awesome!
This is wonderful! Makes me wish I had a big wall.
That is one GIANT wall! I love how ambitious you guys are. The design looks amazing! 🙂
What a unique and fantabulous idea! Congrats on being creative and thrifty!
I've painted a couple murals on cement block… it is NOT fun and takes so much paint! I feel your pain! The finished project looks great though!
Kristin
http://www.StudioZArt.com
Awesome job! We have the same situation, surrounded by block wall and we are on the "low side" too. We solved part of our problem by putting in planters along one side and the back wall, they take up about three feet of space. We also painted a mural, love yours though. 😉
seriously this is amazing! plus, you are so brave — i would be so nervous to do this… but it looks so awesome!
Whoa… I love it! Thanks so much for the fabulous idea, I'll be linking. And I really wished I lived next door! =)
Hey I want that on my living room wall! Looks great!
GORGEOUS!!! I did this in the daycare where I worked and painted mural on all the walls. Also painting on cement block walls. Not an easy task. But you really made it look classy!!
This is awesome…great…..such a great idea…waoooo
VERY nice!! What an great way to make a huge brick wall amazing!
suzy
This is so cool. I *Love* the design! Did a fantastic job painting on such a tricky surface.
Completely cool and beautiful! I would love to try this – but don't know if I have the skillz. What a gorgeous makeover!
Wow! I've been wanting to get my hands on an overhead projector too!
Love your project and I'm going to link to it right now on my blog linking party, and would love to see you there too with some more projects! all the best, Sara
Love Love Love this idea… Am definitely going to keep in in mind for our new house and landscaping…
Looks great! I am going to save this idea for my own backyard one day!
I really love this. I don't have a place to do something like it but I love your idea.
Wow! This looks fantastic!!!
xox Vanessa
very cool. thanks for sharing
You inspired me to to something in my backyard! Thought you would enjoy a look. Thanks for the inspiration!
i love this- what dedication
I absolutely love this design and idea!
I thought the in ground trampoline was pure genius!
And you’re right… he is a hunk. Good get! 🙂
Love it! When you’re ready for a change, you can color it in!
Wow! this looks amazing I love it! You guys did a great job.