Over the last year or so, I have learned a lot about upholstery. I thought that a few things that I have learned may help some of you DIYers out there, so here you go!
1. You must use a fabric that is thick enough to pull hard. Does it need to be upholstery fabric specifically? No. I have upholstered a few items in canvas and it worked great. Thin cotton fabric will not work, trust me. It is not tough enough.
2. You need another “partner in crime” to help you while doing upholstery. There are two main reasons for this: 1-you need two sets of hands, one to pull the fabric tight, and the other one to staple it into place. 2-It is much more fun to upholster a chair if you can laugh with a friend while you are doing it. 😉
3. You need to adopt a “roll with the punches” type of attitude to do upholstery. I’m working on this one. Luckily the gals I have upholstered with are very much like this and it rubs off. Upholstering can be challenging, and right out annoying at times because it is tough. AND every single chair I have ever done has had different challenges, so you just have to deal with those challenges as they come.
4. Don’t buy expensive fabric for two reasons: 1- If you spend over $10.00 a yard on your fabric, you risk spending the same on your chair as you could buy from the furniture store. Logically this does not make sense to me because upholstery takes time (A LOT of it). So, make sure that it is worth it in the end. Finding inexpensive fabric can be tough so check out Home Fabrics if you have never been there. (The online store isn’t nearly as good as the actual store). 2. If you mess up and have to buy more fabric, it won’t break your bank. 🙂
5. In the same breath as the above tip, I have to tell you that you need to find a fabric that you LOVE. I am not contradicting the above statement. So, you may have to be patient and shop the sales in order to get an affordable fabric that you love for your upholstery job. I learned this the hard way. I saw a fabric, that was on MAJOR sale and bought it. It had the right colors, but I did NOT love it. I simply tried to sacrifice design for price. What was the result? I upholstered the chair TWICE because I was not happy with the end result. Believe me, you do not want to do this. Upholstering is challenging enough, and if you are like me, you need to have the motivation of the transformation to keep you going.
6. Sometimes you just have to just DO IT. A few chairs that I have done have posed problems that I was unsure of how to solve. All the projects that I have done have been put together differently. I have come to the conclusion that upholstery can be done in MANY techniques, and over-thinking the “HOW” will not get you anywhere. So, if you try one technique and it doesn’t work, then you can try another technique.
7. Pull the fabric TIGHT. If you don’t, your chair will look like you upholstered it. My goal is to make a chair look store bought.
8. If possible use an air compressor with an air staple gun. This has saved me hours and hours, and it has helped save my hands from being VERY sore from squeezing a regular staple gun. After you do it this way, you will never go back to the hand-held staple guns.
9. If your upholstery job includes tufting, you need to do the tufting first and THEN pull the fabric tight. You need to pull the buttons through, secure them tightly and then pull the fabric tight. The first reason to do this is to make sure that you can pull the buttons to create the tufted look, and if the fabric is already tight, you won’t be able to pull the buttons tight enough. The second reason for this is make sure that the fabric is tight enough when the tufting is finished.
10. Buy extra fabric (1-2 yards if your budget allows). The wingback chair that I just completed with my friend Leslie reminded me how important this tip is.
Doing a step by step, comprehensive upholstery tutorial may be out of my league; however, I have found a great wingback tutorial over at Creative Mavin that shows some great illustrations on how to reupholster. I was very impressed by her step by step instructions, and of course I LOVED the fabric she chose (it is the same fabric I have on my ottoman).
I have thought about doing a step by step tutorial on how to reupholster, but have come to the conclusion that it would be extremely tough for many reasons. The main one is that EVERY single chair that you upholster will be different. I have yet to replicate the same techniques twice. I mean it when I say in my reupholstery 101 post that you have to pay attention to how the chair was put together when you take it apart. It helps to take mental notes. 🙂
This bad boy was a nightmare. Ha ha. We had to re-do the arms several times because of the curvature on the arms.

The process started by taking off the original fabric carefully.
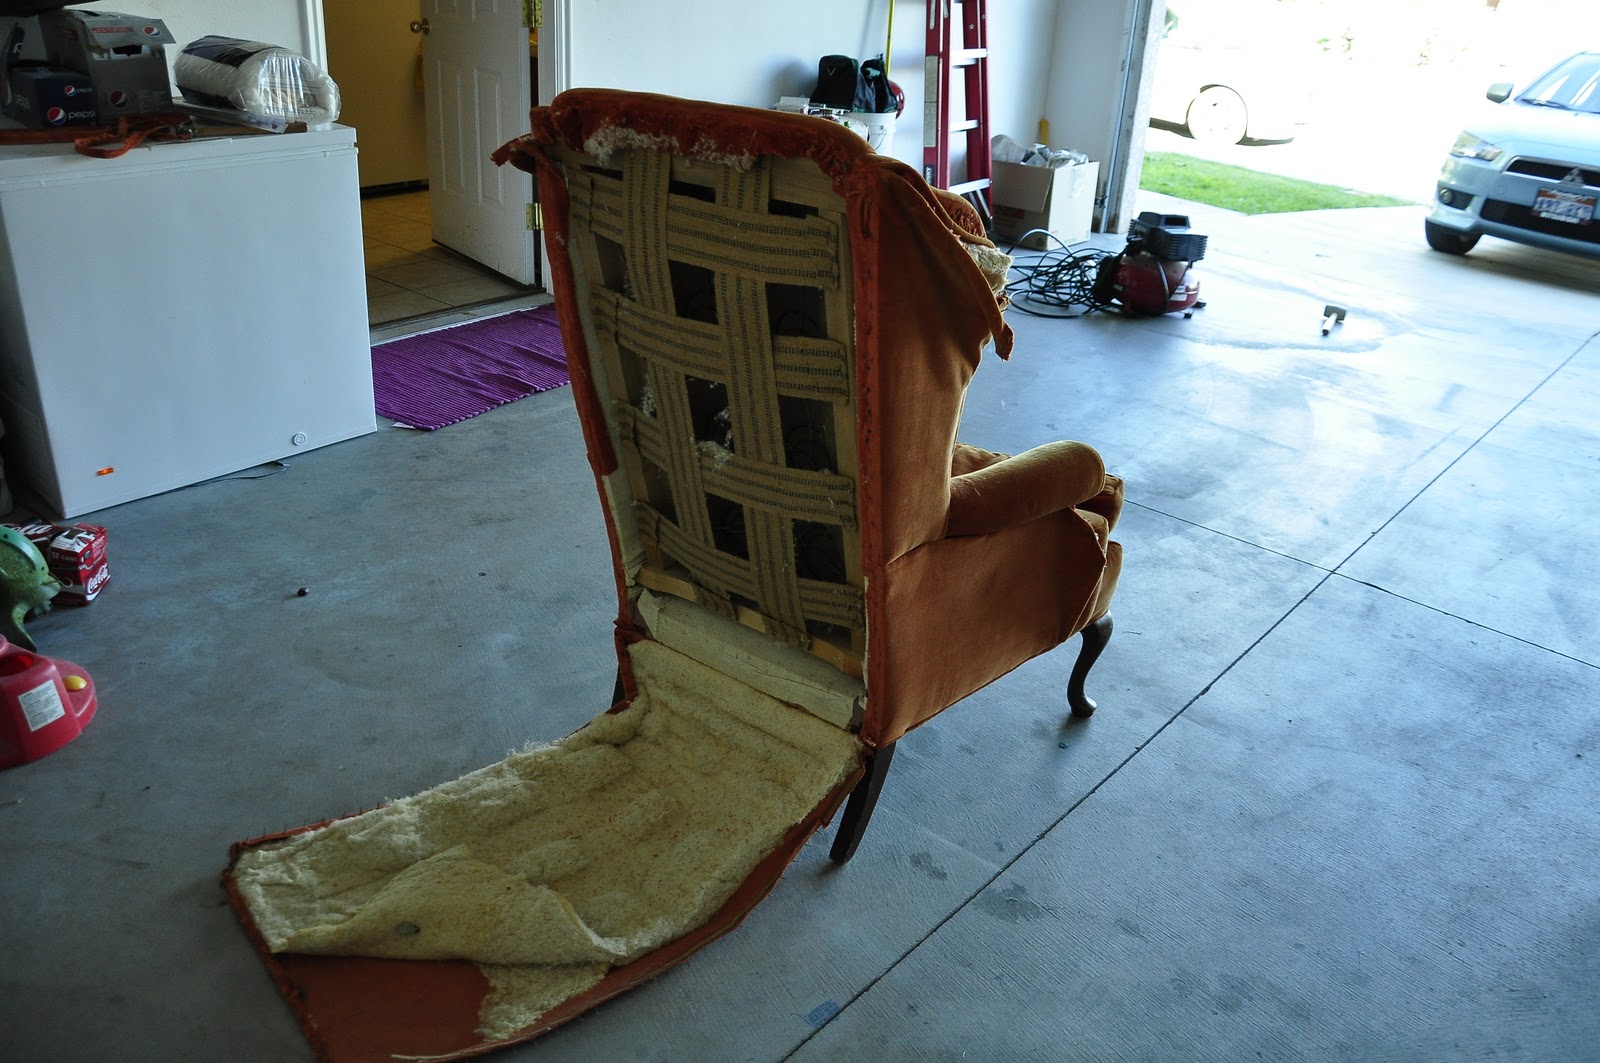
We were careful to save each piece to use as a pattern.

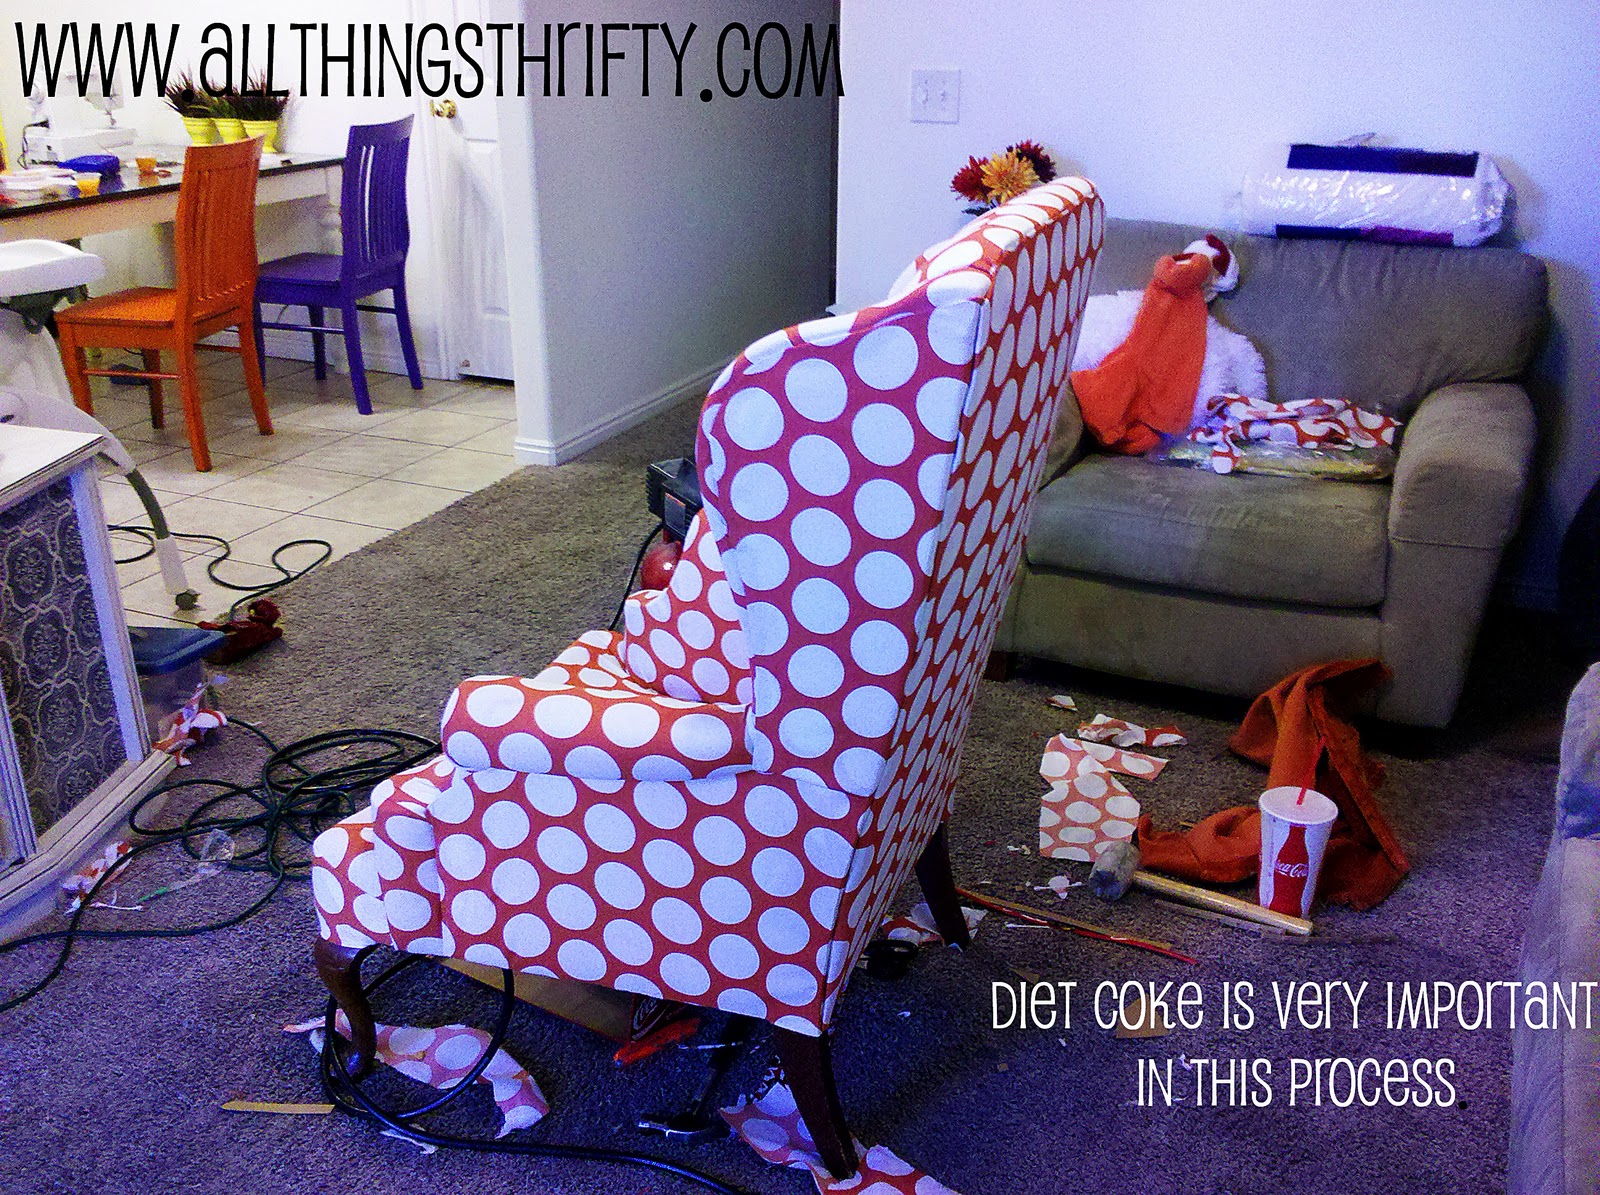
As you can see by the ground, it is a MESSY process. Leslie and I had a great time laughing and working.
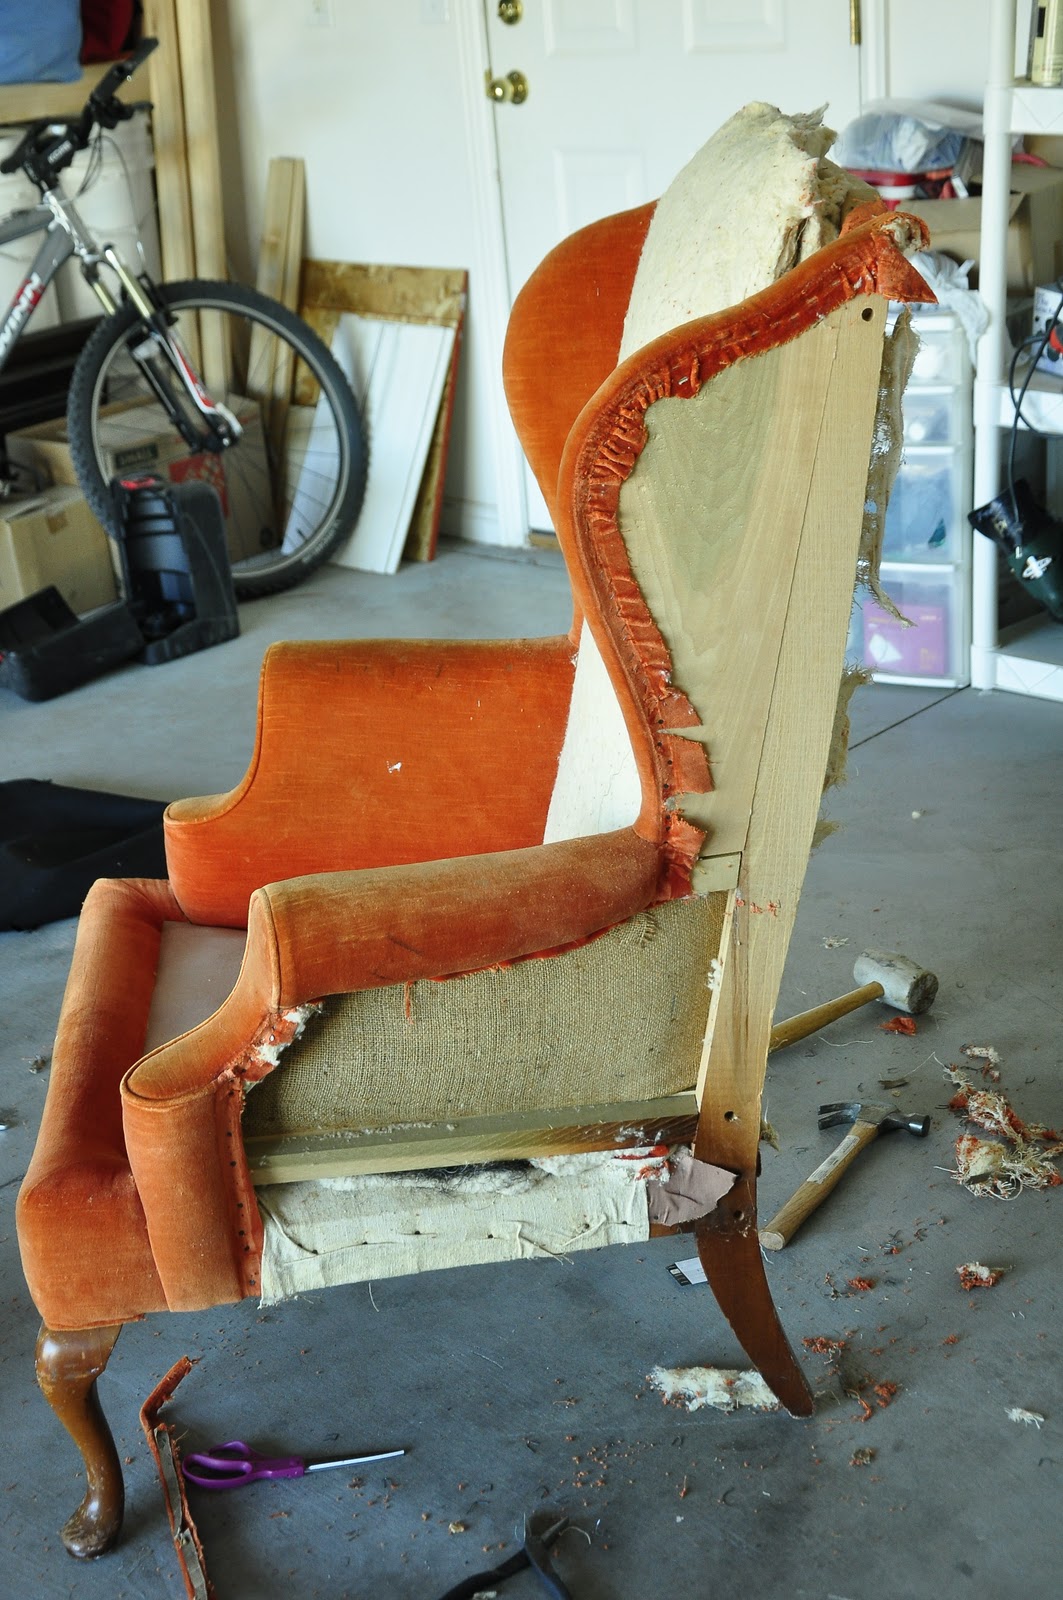
The chair was very well put together, which made it hard for us to take it apart! It took several hours to get all the staples out from the original upholstery job.
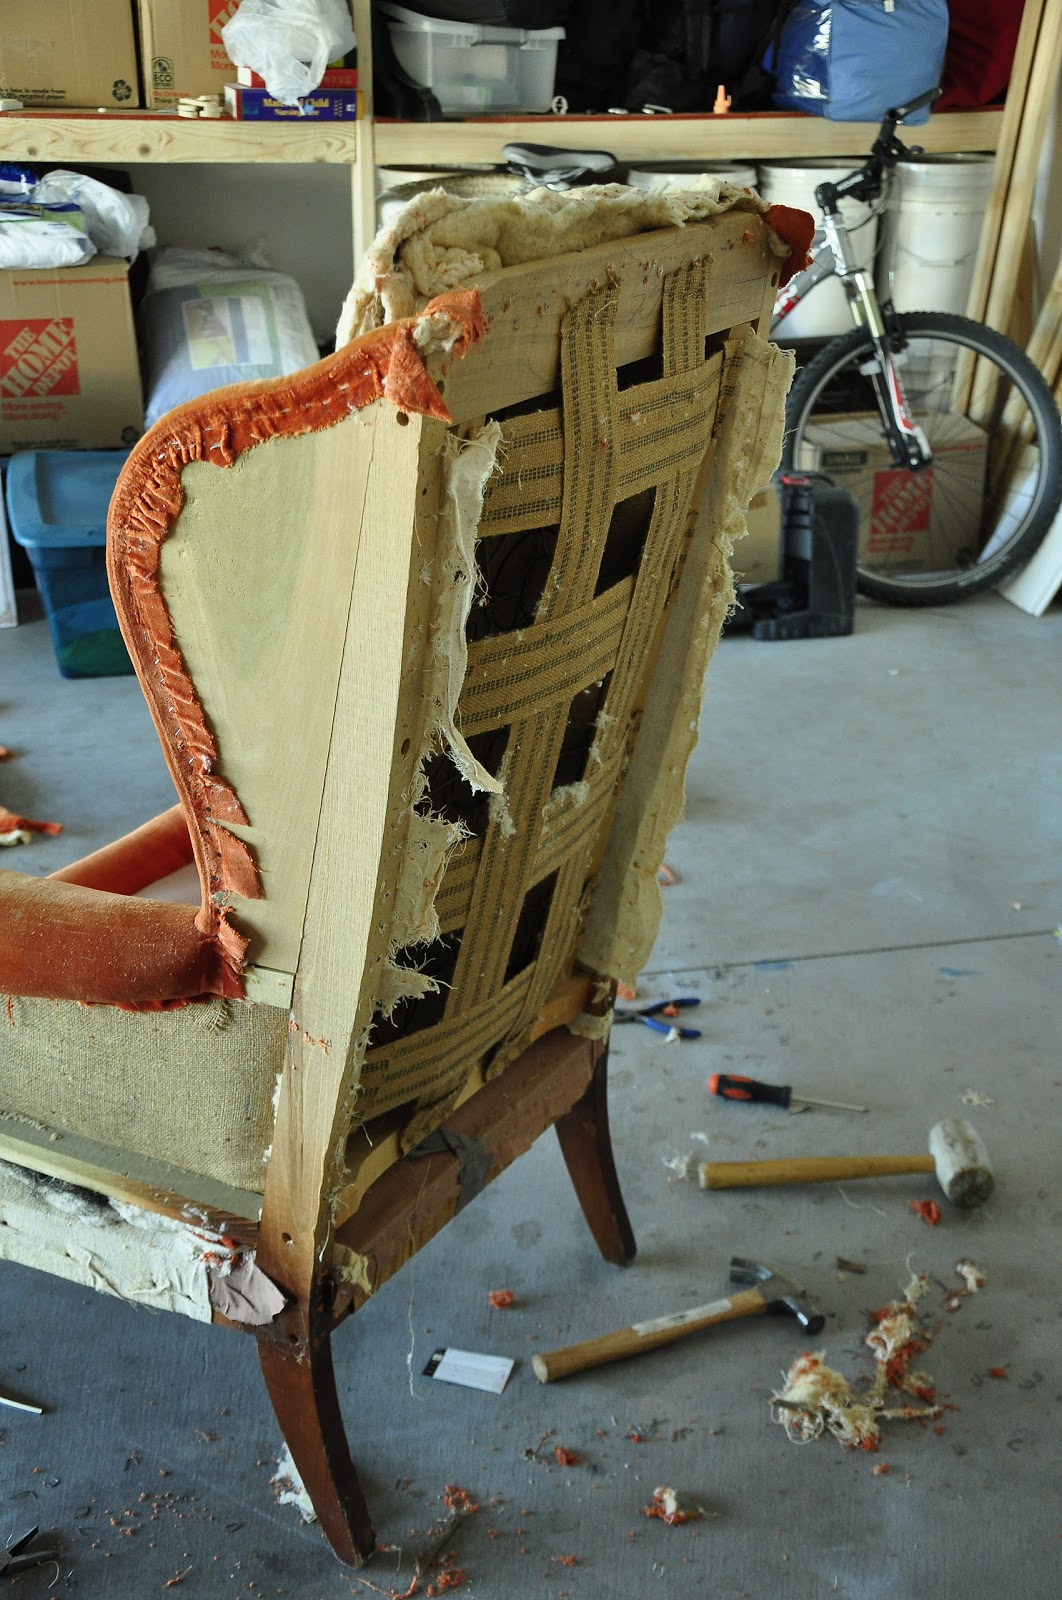
Let the upholstery begin!
Excuse my pictures…I haven’t taken good ones with my nice camera yet, so these are from my phone. 🙂 Sometimes patience isn’t my strongest suit.
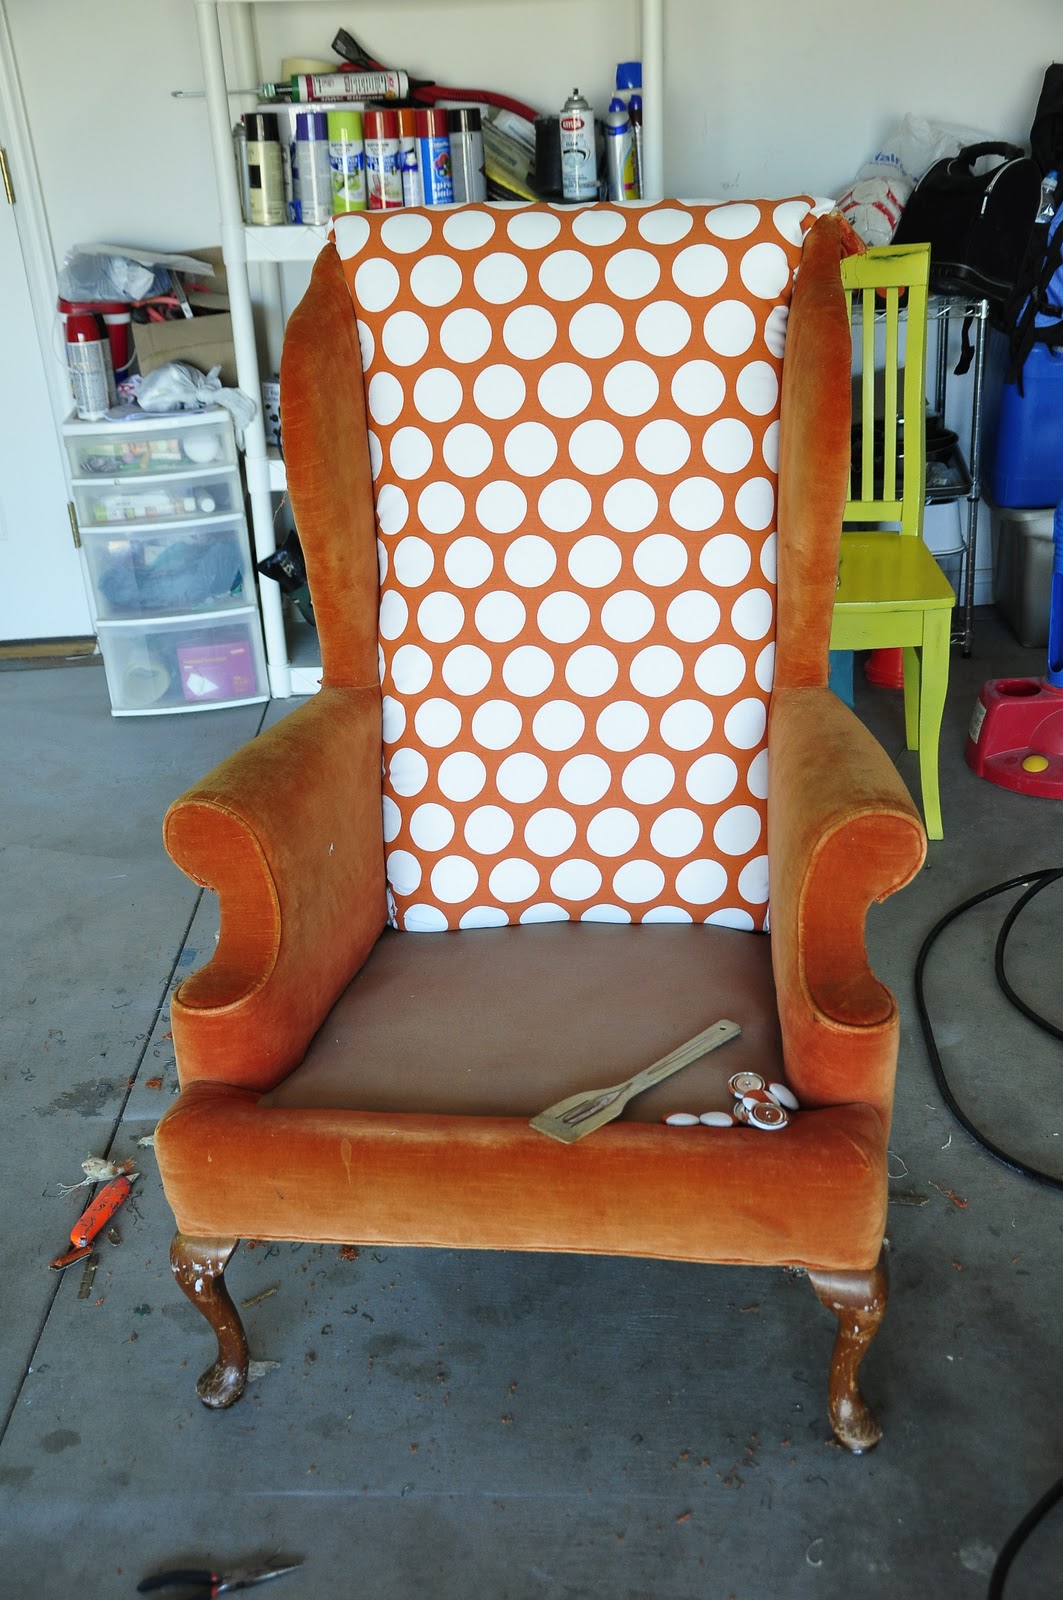
As you can see, upholstering can make a BIG mess, and diet coke is a major part in the process for me and my friends!
Doesn’t the chair look absolutely FABULOUS!?! I love the fabric that she chose. We got it from Home Fabrics in Vegas. 🙂
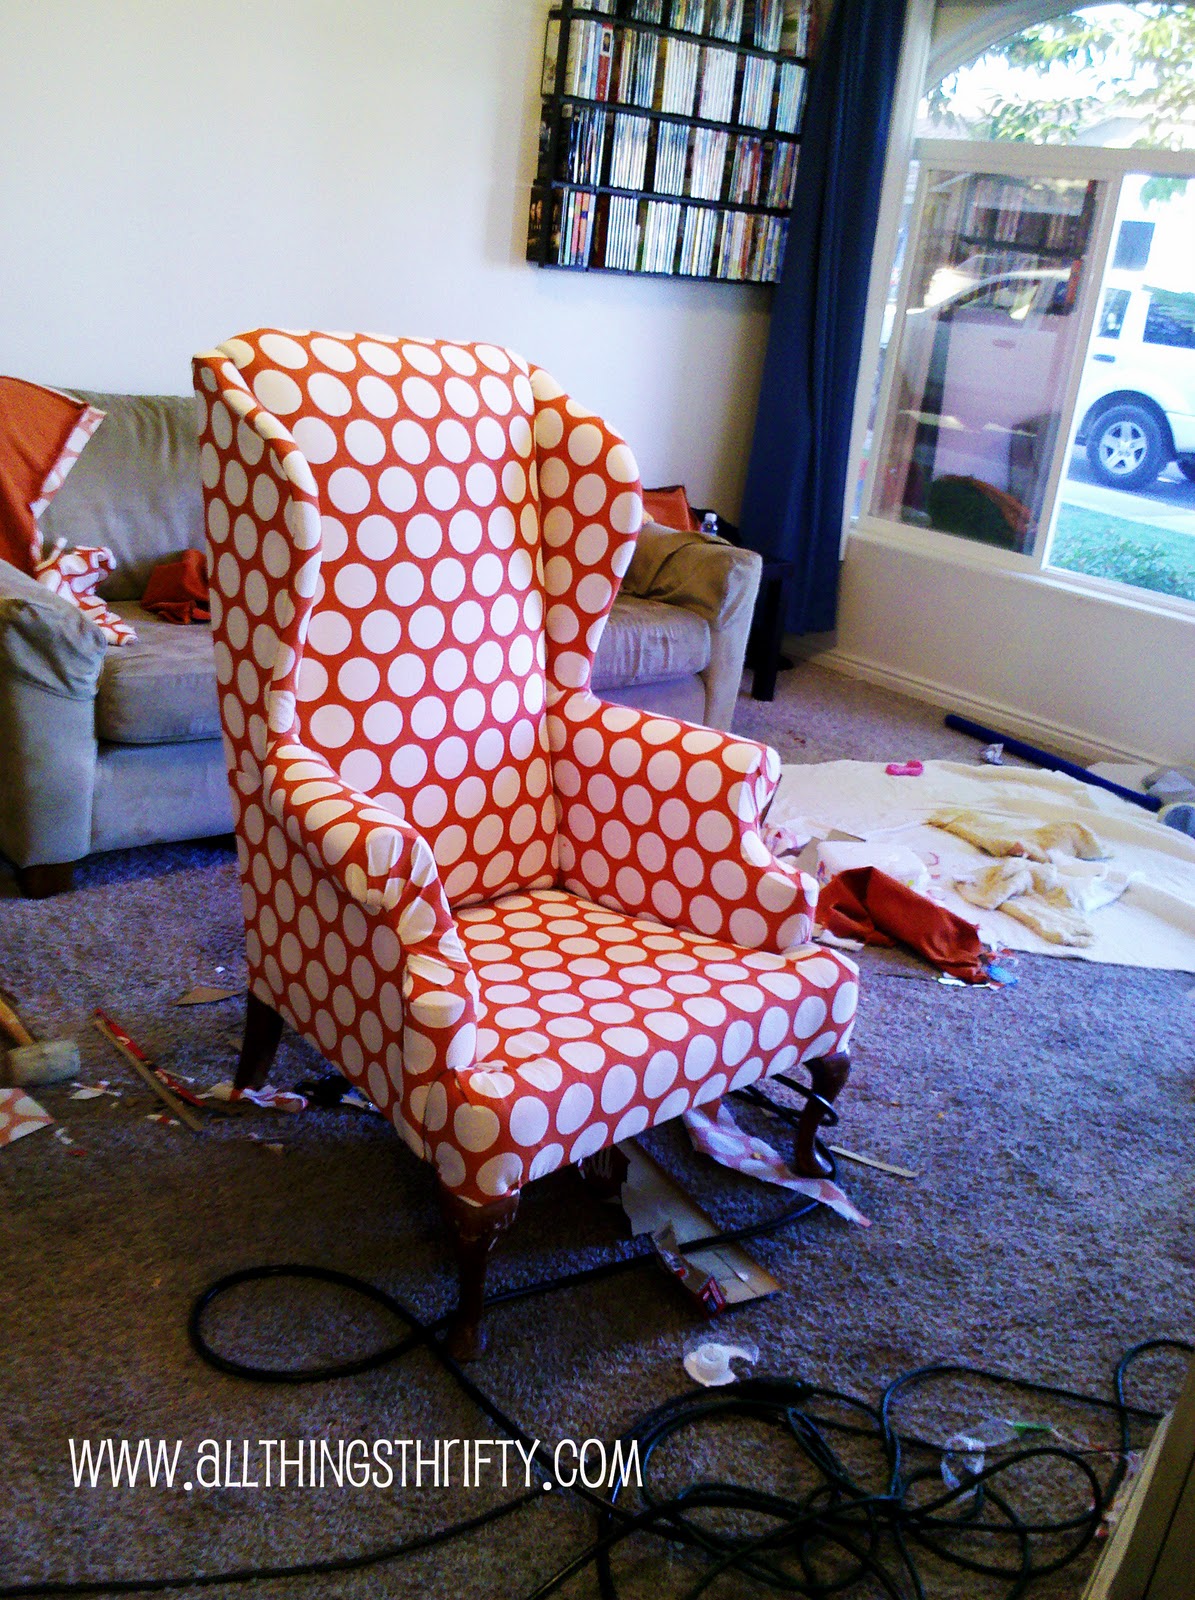

You may have noticed that the cushion is not in these pictures…stay tuned for a picture with the entire finished product soon. I just couldn’t wait!
Here is another reminder of the before and after!

Thanks for the tips. I've only upholstered one chair and a few seats, but I could have used these tips. I'll definitely check out the source you recommended. We have just a few fabric stores in our area and they sell mainly traditional fabrics.
These tips are brilliant.The pictures so true.I have just Reupholstered my sofa, a large 4 seater one.Originally I was going to make loose covers but the fabric I got was a thick top quality velvet.It wasnt suitable for covers and the idea of stripping the sofa down was exciting,the image of it in fantastic new fabric gave me the drive to do it. The staples were horrendous trillions of them.Hard work.It took me three and a half days to strip the old material off and to recover it.I had already done the cushions and seat cushions,so in all it must have took a week.Carefully is the way to go,learning a lot along the way.My project was totally worth the work I and my husband put into it.He helped me with the stripping and the stapling and lifting.Ive never done anything so challenging and finding a fabric supplier on line giving free samples was a real gem.Im proud of the job Ive done, so worth it and the results are fantastic.
Brooke! You are freaking amazing! I have two chairs that were given to me that I am trying/procrastinating/scared to cover myself! I keep thinking I will do it… and you keep doing more! One day, I'll be as cool as you! 🙂
it looks amazing! i love it! so wish i could find a piece like that. So once you do the front first, how do you attach the outside sides and back???
Those giant polka dots are so fabulous!!!
PERFECTION
What a great post!! I can't wait to start on a chair project.
http://www.bargaincornerdesigns.blogspot.com
I'm siting here with my 4 year old, and he was watching the chair reveal with me. He said he likes it because is looks like a lady bug. 🙂 Great job on the chair brook! super cute. http://www.thrifty101.blogspot.com
I LOVE IT!!!!! You just can't find stuff that cool at regular furniture stores. So Fabulous.
In looking at the pictures I'm just wondering if you took of the old fabric on the arms of the chair or did you just reupholster over them? I'm in the process of doing a chair right now and am just curious if you took all the old material off or just pieces. And if you just took pieces off, what was your reasoning for it? Thanks and it's a really cool chair!
I just made pillows from the same orange fabric! So fun! I love your tips- I've done a few upholstery projects, and it really is something that you have to just do and try in order to figure it out. Thanks for the pointers!
When I was doing a wing chair I thought about the same things. The extra fabric helps so much especially when you get in binds like screwing up. I love the fabric! reminds me of mine.
I think the best part of re-upholstery is seeing how things are put together and figuring out how it goes back. I continue to enjoy taking things apart and putting back together because the end result is so rewarding!
thank you first, I live in Orlando and had no idea there was a Home Fabrics here! I have done a little upholstery and have come to the conclusion that upholsterers earn every penny they charge and more. You are so right about needing 2 people, it is a labor intensive job!
Carol
lota work
Chair envy! GAH!!! Gorgeous. Can't wait to see it with the cushion. As if it can get better.
Fantastic choice on the fabric! I can see how this would be a challenging piece! You did a fabulous job. If I may leave an additional tip… don't be afraid to check out curtain panels and shower curtain panels. These make great upholstery fabrics and come in some fun patterns and colors!
I love it!!! I have been looking for a chair for our guest bedroom, and the ones with arms have been intimidating me!!!
Question – how did you do the wing part? You have seams… did you sew? How do you make all the lines look like that?!?
I have 2 of that exact chair & fabric that are in good condition (but still ugly not matching my decor) and a third that is a different fabric that is nasty. I have had fabric to redo the third chair for 3 months now and I am scared to death. I guess I need to a find a partner who will do it with me and pull me through the scary parts. Hmmm….
Im almost finished with my wing back chair, but I had a really hard time getting my fabric tight on the arms also. I struggled with getting it tucked tight in the crack of the back. Its almost done though but it doesnt look near as good as yours :/Good Job!
oh man I love this. i have a bench, that i want to re do. totally scared to try. i have NEVER dared attempt something like that. but after seeing this i'm invisioning just how cute it could be….
And congrats on the baby. Is there anything better then a newborn?! 😉
you have done a great job i have a chair waiting to be refinished i'll probably have to wait till spring because i have a patio instead of a garage but i can always take your tips i really love the fabric
Your chair looks amazing! Thanks for this post, especially the tip about using a stapler attachment on an air compressor. I have reupholstered a few items, & even done a short course on upholstery. I have a few big projects that I keep putting off because I'm a bit scared of them! Your post has inspired me to get back in there..
Loooove how it turned out! What an awesome combination of color and print! I wish I had this chair!!!!!
PS. Exactly how did you manage to maneuver through this project while being pregnant?!? Double wow.
I want one!!! I have pillows in the opposite color layout, white with orange polka dots. Great job, I can't believe you managed that while pregnant. Bravo to you and your partner-in-crime.
I am new to the blog and I am certainly floored. You make it seem so easy. I will certainly have to re read and go through the entire blog.
Mr. Goodwill Hunting
http://g-w-hunting.blogspot.com
I'm trying to figure out how to measure this odd size sectional that I own so I can buy enough fabric. Can you help?
wow wish I could do this but very afraid to even start. Noone to help me is another problem I have two chairs I would love to redo. You do beautiful work so very talented Love your site!!!!!!
Brooke you are amazing as always! I can't wait to show you the end result of my French Wingback Chair…
littlemisspennywenny@blogspot.com
I CAN'T wait until you post more! I currently have a fully taken apart wing back chair in my front room and have only put back on one piece! I am so intimidated by it. Thanks for the tips and maybe this will get me going on it again! Oh and I need to find a friend.
Fabulous…just found you, how had I not found you before?! Love your style, got here via 320* Sycamore today. Janell
If you click on Brooke's "Reupholstering" tab on the right, there is chart to help you to know how much fabric to buy.
Lori
AMAZING!
I hope you've enjoyed you're Wing Back as much as we've enjoyed ours!
That chair is adorable! I am in the process of taking apart a wingback chair that was reupholstered about 20 years ago. I have already spent 7+ hours pulling out staples and I'm not even half way done! It's hard work but I have the vision so I'm not giving up!
Thanks for your advice and encouragement!
Great tips! Thanks! I have just found you, and am suddenly on a mission to find old things and make them beautiful. Sadly, it's winder up here in Canada so can't get outside to spraypaint or anything. But watch out next summer!
Thanks for the great blog!
I so want to be brave enough to do this! I had a long convo about wanting to do this myself with my cousins (who also wanted to do it too) on Thanksgiving. LOVE the polka dot fabric.
Wow, what a transformation. I love the new fabric.
Holy cow! How adorable. I love your fabric choice. {My mom used to call it "polky dot.} Both our orange chairs were featured on an upholstery post at blogsbabble.com. I'm crazy about the way yours turned out, so I hopped over to tell you.
Warmly, Michelle
You are brave….not to self…..gotta try this for sure! Love the fabric selection!
I just bought a chair like this to recover. Yours is fabulous! I am sad to report that the original tutorial is gone. Any chance you have it saved somewhere and can share it? The whole Creative Maven website is gong!
too funny.. the first thing that I noticed..WAS THE DIET COKE… omgoodness.. I thought I lost your blog… I loooove your painted pieces, well , all of your work. thanks for sharing:)
I am struggling with finding the right fabric. Everything I like is expensive! Where I live (midwest), there is only JoAnn’s, Michael’s, and Hancock fabrics. I can’t find a single thing that fits the “less than $10 a yard” and “you gotta love it” criteria. Help!
Emily,
I’m sorry you are having trouble. Have you tried any online fabrics from fabric.com? Or maybe some premier prints fabric? I wish you lived by a Home Fabrics, the fabric there is great and can be as low as $5.99. Where are you located?
Just another idea…..I reupholstered a wingback using heavy curtain panels that I found on clearance. Also used them to make a dust ruffle & throw pillows for my bed which pulled the whole room together. :o)
What tools to I need to get started? My first. project is a wing back chair.
Jean, Here is a list of tools that I use: https://allthingsthrifty.com/2013/01/10-essential-tools-needed-for-upholstery.html
going to try and use painters drop cloth and tea stain it in places then stencil on the front.
i have an old over stuffed chair i think it will work for the mancave.
I understand that you must be a novice. I’m sorry to say that I do not agree with any of
your tips. First of all upholstering a piece of furniture is not that difficult if you know
how to use your hand properly without straining yourself and still get the fabric in place nice and tight
to make it look professional. Secondly, inexpensive fabrics are priced as such because they are
either seconds or discontinued. Another words patterns are uneven and hard to work with. You
say it is cheaper to buy a new piece if you’re spending to much money on supplies and upholstery.
I disagree. A good piece of furniture with coil springs, doubled doweled and made out of good wood
(alder, poplar, burch, ect., ect,) is definitely worth recovering because to replace this pieces now would
run you at least $3,000.00 for a chair an $10,000.00 for a sofa. Sure you can buy sofa for $1,000.00 or
$2,000.00 but it can never be upholstered properly. It is a piece of junk (particle bd, or press bd that don’t
hold the staples. Also just because a piece has alot of staples doesn’t necessary mean that it was well
made. More staples don’t necessarily hold better. One last thing, your wingback chair looks nice but please
don’t use the old fabric as a sample. If the person before you (a student, a self taught upholsterer) did it
wrong you’re going to make the same mistakes. Practice cutting everything square or rectangle and learn
to make your own cuts. You seem like a smart lady who could do well in this field once you get the hang of it.
OK so you happen to be a professional,but the lady who did this chair doesnt claim to be, and her tips are a good starting point, I the same as her took the old fabric off my sofa and used it for a pattern. If youve never attempted anything like this before it can seem daunting. I feel much more confident now to recover my armchair. I was disgusted that the professional upholsterers who made my sofa used paper piping cord its no wonder that though it was garaunteed for 10 years it only lasted 6,after nine years it was so shabby I was ready to bin it, it was only the fact that I couldnt afford another extortionate priced brand new sofa that I attempted to do it myself.
try marking onto face of furniture with black magic marker where sewing starts and ends and lines across seams.copy old patterns and rely on your mind to change pattern if neccesary. Great ideas everybody.
Wow. Thank you! Just, Thank you for putting this together. My husband and I have been refinishing wooden furniture for a couple years as a hobby, and he recently found 2 gorgeous but badly beaten antique chairs. I was about to put them on the curb for someone else with reupholstering experience, when I decided to give them a shot and started doing some research. This article and its comments pretty much answered every question I had about tackling my first project. Keep the good stuff coming!
Sarah @ http://www.marriageisnotforwimps.blogspot.com
Great article, very inspiring. I have covered and/or upholstered sofas, chairs, etc. I have two old, beautiful, teal (ugh!) Bergere Chairs and an ottoman. Loved your tutorial on creating double welting* (see note below). These chairs have a tight deck and covered backs with a center wood piece. Still trying to figure out how to cover back behind the wood and how to attack the deck (under cushion) and front bottom panel. I’m timid about taking the chair apart in that area in case I blow it. I’m using the chairs in L.R. now. So I need ‘deck & face’ instructions and back panel, any books or online tutorial? Got two bids today to recover these – $450. ea.chair. Ugh! JoAnn & Hancock Fabrics – 50% off sales, fabulous.
I know how to create a continuous welt cover loop. Do you have a tutorial* Great time saver. I could create one but have never done anything on line myself. Have camera, will travel.
I have an old Queen Anne chair that belonged to my mother. She has passed and its been 8 years and I can’t throw it out, because I want to restore it! I need to know how do you get the back material to stay tight? What I mean by back is the back part that your back would touch is sitting in it. I wouldn’t mind some pointers on the cushion either as I am not a very good sewer……if there is anyone who can help me Please leave me a message because this is something that is driving me nuts! I can’t throw out my Mom’s chair so please any help would be so appreciated….Thanks in advance .
I agree that using an air compressor with your staple gun can make the job a lot easier when it comes to upholstery. I can see how this could save you time as well as some pain. I will make sure to remember this if I get the chance to do something like this myself or whomever I hire.
Wow, I had no idea that the upholstery of furniture could make such a huge difference! I also have never heard the tip to not go with expensive fabric when doing your own upholstery. I’ve heard that custom upholstery is a good way to go when you buy new furniture.
I love your comment that you should find a fabric that you absolutely love. That makes so much sense. I think that you should remember that there are a lot of fabric stores and you don’t have to stick with a specific one just because your mom like it or something.
Great tips! Thanks! I have just found you, and am suddenly on a mission to find old things and make them beautiful. If you need more information about sofa upholstery then please visit sofakingdubai.
I like that this article points out that I need another person to help me while doing upholstery. I have a pair of brand new wood cross back chairs for my dining area that I just purchased last week that needs an additional hand since I know I cannot do it by myself. It’s a good thing I can ask my brother to help me with this. Thanks!
https://kenwoodfurnishings.com/products/kenwood-lancaster-series-stackable-early-american-wood-cross-back-chair-with-cushion
Thanks for your sharing. You may need C Ring Staples or Air Staple Gun to to the work.
C Ring Staples are used for fastening materials, such as metal or wood. They’re made from heavy-duty steel wire and are classified into three different types, collated for pneumatic hog ring guns, loose-packed for hog ring pliers, and flat. https://www.rydhardwarefastening.com/product