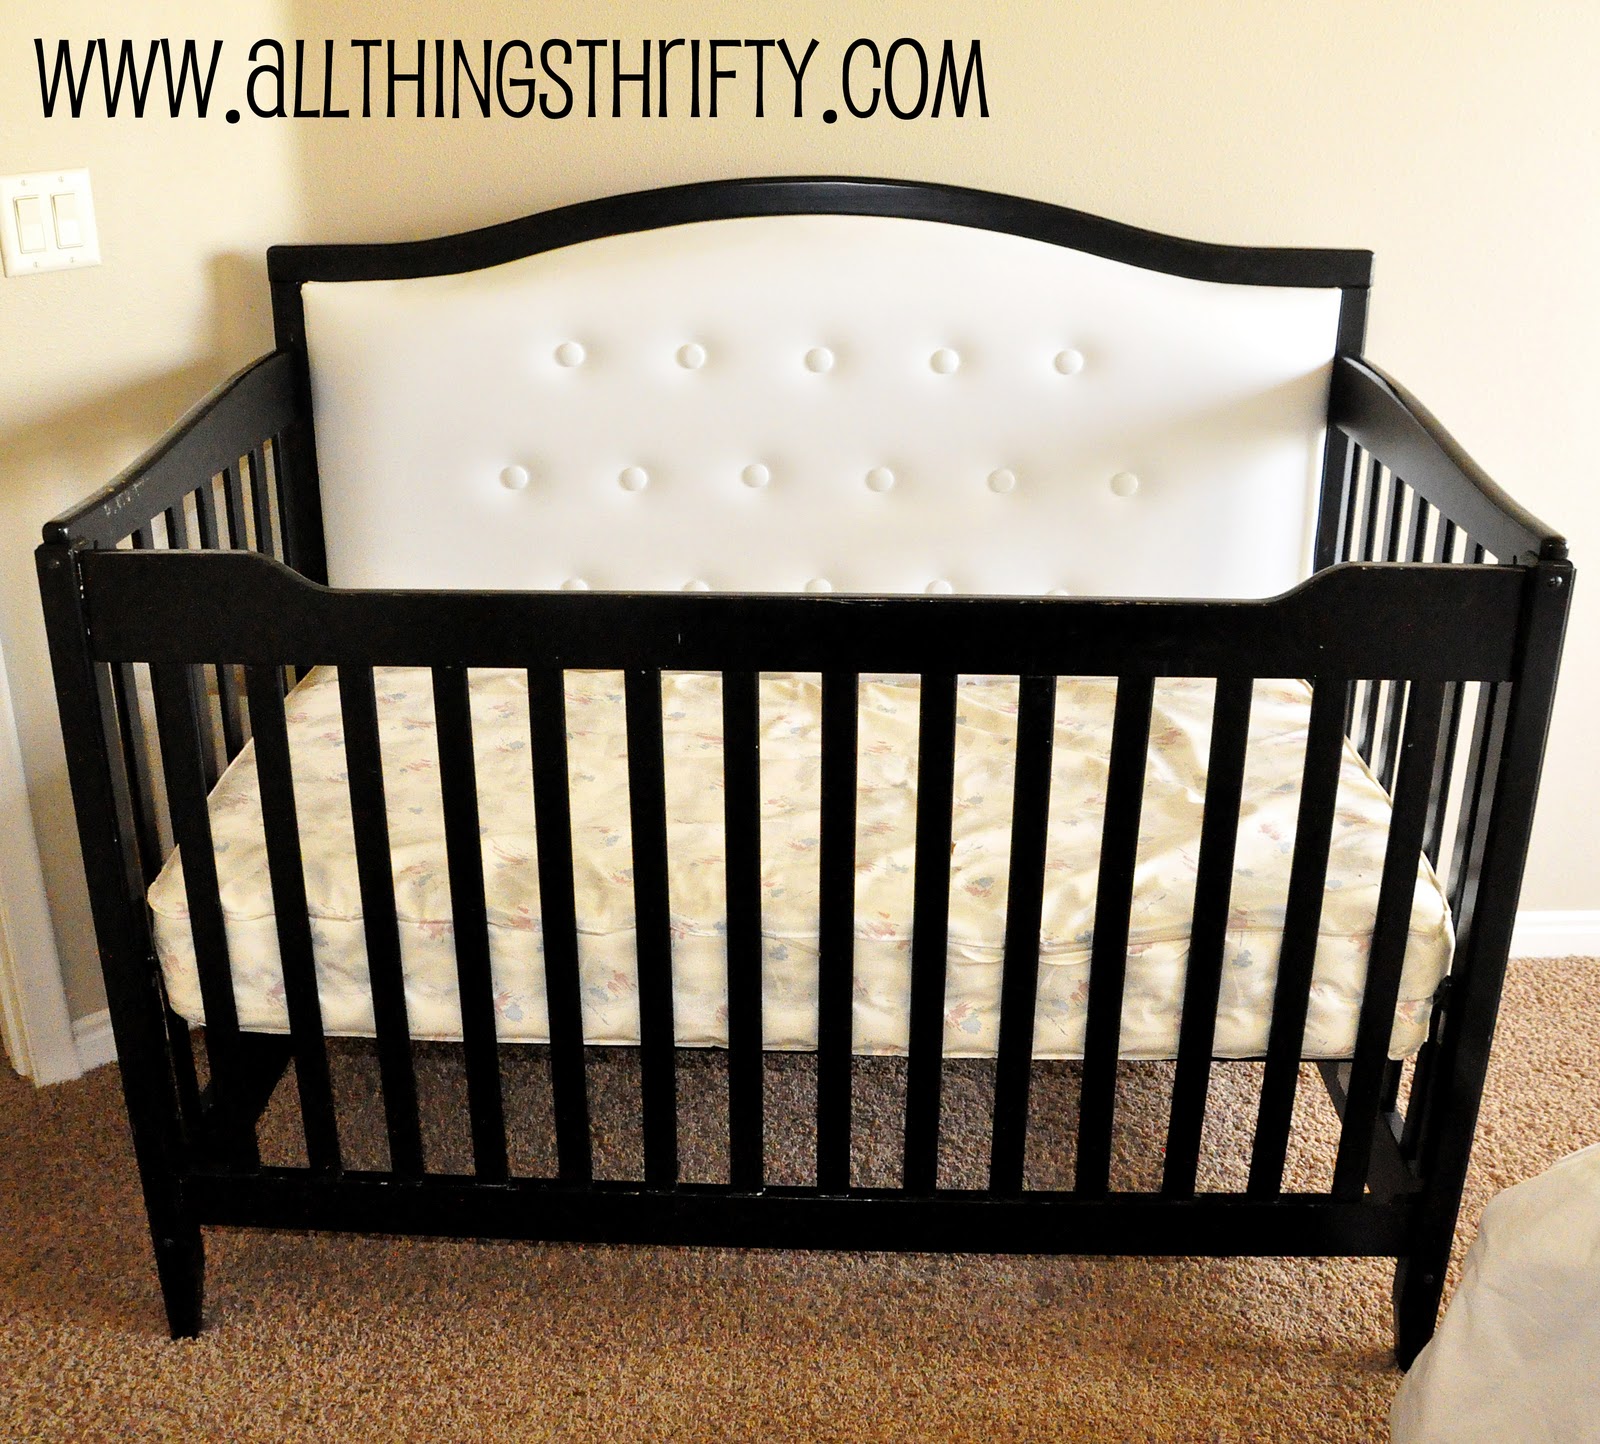
After the hubby and I devised a plan for creating our tufted crib, we went to work. If you forgot what our crib looked like “before” here is a reminder. 🙂

Items needed for this project:
1/2 sheet of 1/2 inch MDF
Fabric of your choice, we used white pleather/vinyl. We wanted to be able to wipe it off easily and leather was too expensive.
Foam (we used 3 inch memory foam that was given to us from my brother for FREE)
Fabric/Tufting buttons (you must get buttons that the force is pulled from the FRONT piece of the buttons. This way, the baby will not be able to pull the button top off.) I got mine at JoAnn’s Fabrics. Do not buy the Wal-Mart buttons, they pull apart very easily.
Tufting needles
Jigsaw
Speedbor drill bit (approx 1 1/4 inch size)
Heavy Duty Drill
Staple gun
Screws
Step 1: Measure your crib so you know the dimensions. We decided to build our tufted piece on the inside of the back portion of our crib. This design would allow some of the black existing crib to show along the edge of the tufting. It created a “framed look” around the tufting in the end.
Step 2: Have the guys at Home Depot or Lowes cut your MDF to fit length wise across your crib. It is MUCH easier for them to cut the MDF because they have an enormous saw that cuts perfectly straight lines.Our cut needed to be 51 1/4 inches wide.
Step 3: Create a pattern. You need to mimic the style of the crib in order to cut your MDF perfectly. My crib has a rounded top, so we laid the crib onto several pieces of card stock that I had taped together.
I carefully traced the curve onto the paper to create our pattern.We did this by putting the paper beneath the crib and tracing it with a pencil.

We cut it out with scissors…

And then laid it into the crib to make sure it fit snug.

Step 4: Trace your pattern onto the MDF with a pencil.


If your pattern was done well, it should fit perfectly.

We also needed small notches cut out of the bottom to fit where the crib hardware attaches.

Step 6: Mark your MDF with tufting marks.You want to make sure that your measurements are precise. I used a hatched fabric marking pattern that I bought at JoAnn’s. We marked every six inches since we were unsure of how many tufts we would want. Click on the image to enlarge for a better picture of what I’m talking about.

We used a sharpie marker that bled straight onto the MDF purposely.

Step 7: Drill holes where you have marked. Dan used his drill and a speedbor drill bit to drill the holes into the MDF board.

Step 8: Lay the MDF onto your foam and trace it using a sharpie marker. We used a Queen sized mattress topper that my brother gave us. Like I mentioned above, the foam is memory foam. It worked great because it does not create a “squishy” surface.


Step 10: Lay your foam and MDF onto your chosen fabric and upholster it using a staple gun. If you need a tutorial on how to do this, go HERE to a previous post.

Make sure the edges are tight before securing it in place with a staple gun.

The fabric must be pulled as tight as possible. You need at least two people to achieve this. One person needs to pull (with all their might) while the other one staples along the edges.

Step 11: Make sure your upholstered insert fits.

Step 12: Cover your buttons with your desired fabric. The buttons have two pieces, the front piece and the back piece. We used 80 pound fish line to secure the buttons to the crib. The loop that the fish line is threaded through is part of the front piece of the button. I bought these buttons purposely to ensure that my baby could not pull the button apart.

Step 13: Begin the tufting process. The holes that you already cut in the MDF serve as the guides to where tufting can take place. If you missed the first tutorial on how to do tufting, check out instructions HERE from a previous post.


Continue tufting until you have the desired amount of tufted buttons.
Step 14: Attach the new piece to the crib. We used screws that went directly through the slats of the back of the crib into the MDF. I figured that if I ever wanted to remove the upholstered piece, all I would need to do is fill the holes with putty and touch them up with black paint. 🙂
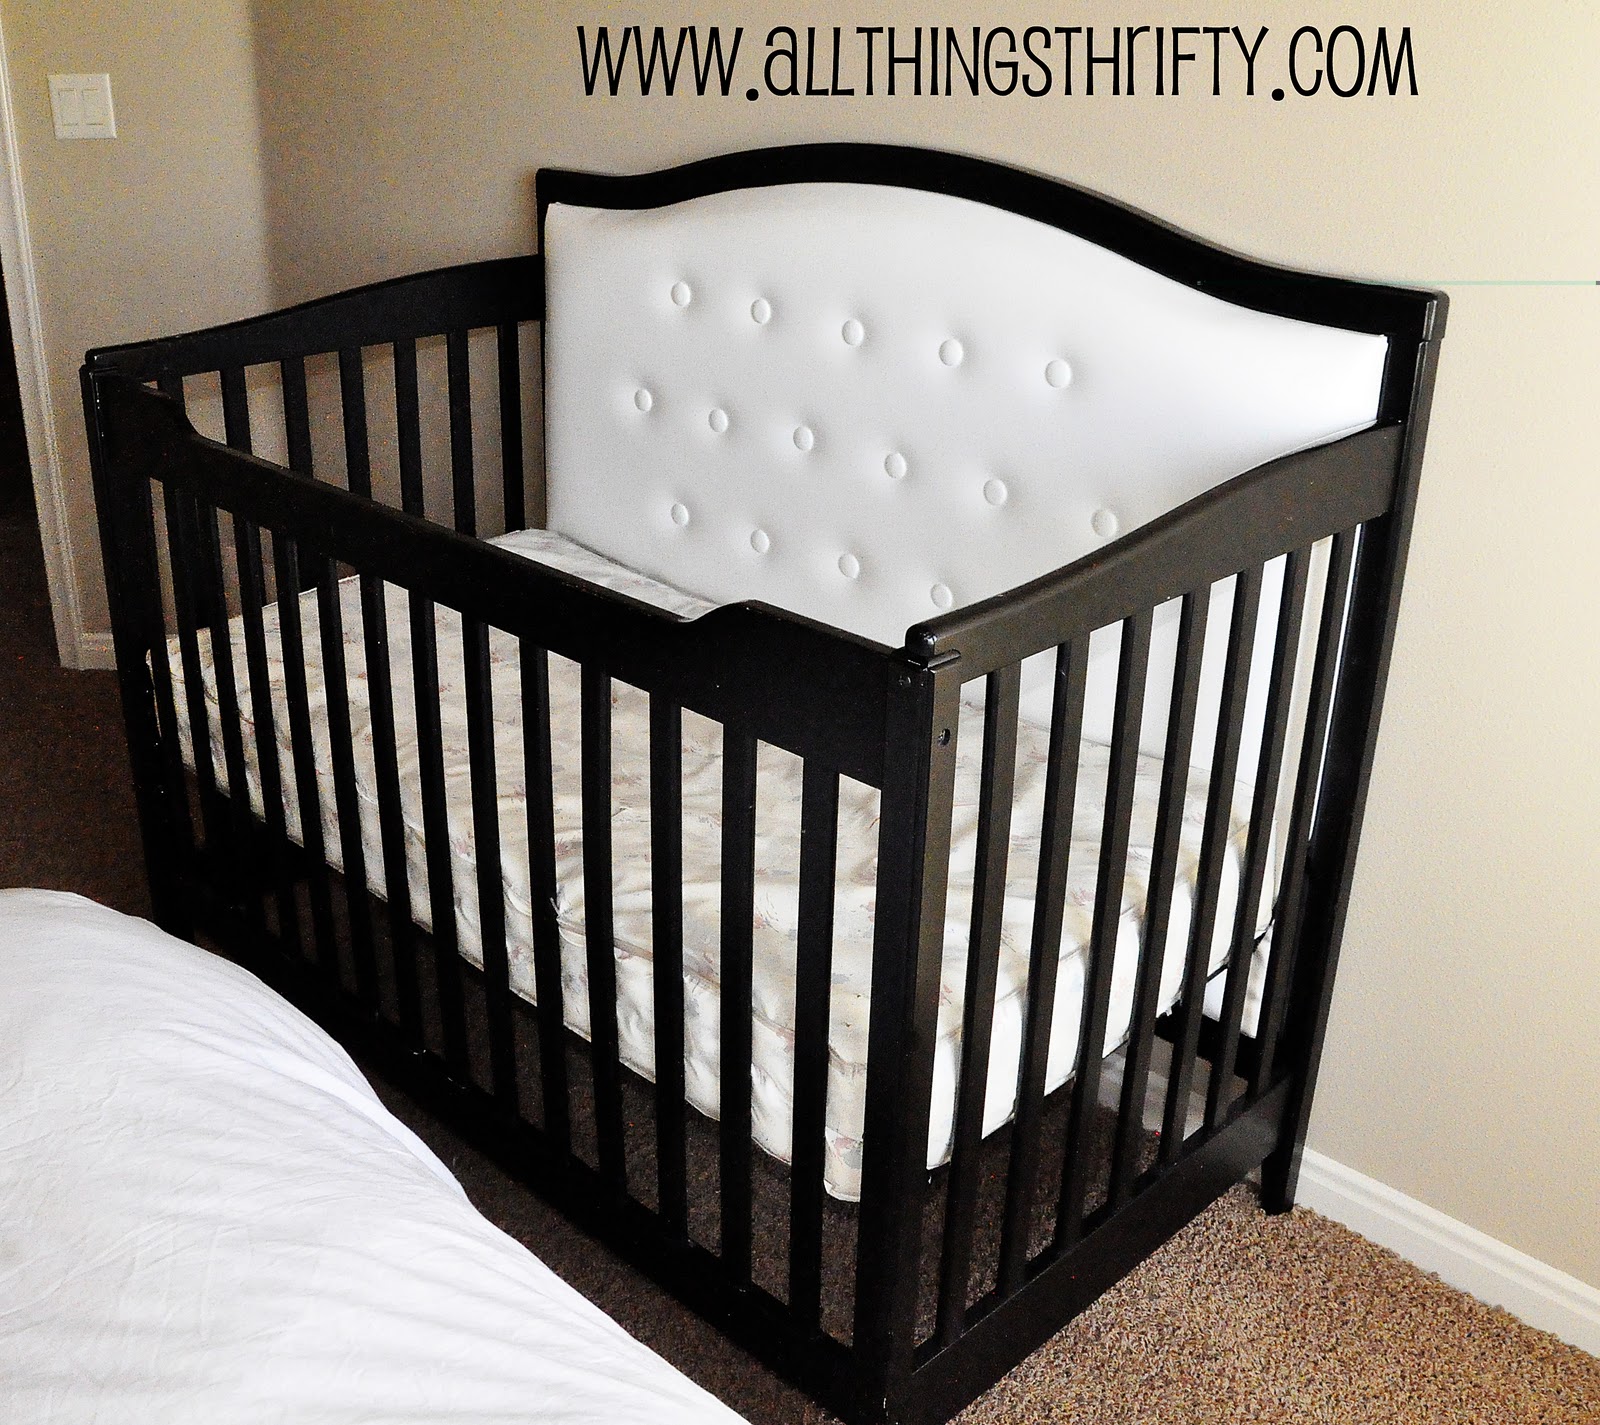
The crib turned out great AND it will be a full size head and foot board eventually since the crib is a convertible style.
Just pretend our ghetto crib mattress is not part of these pictures. 😉 I should have bought a new crib sheet because all the crib sheets I could find were stained badly from our first three kiddos. I opted for the ghetto mattress for the photos.

The best part about transforming this crib?
The cost:
1/2 sheet 1/2 inch mdf= $12.00
Fabric= 1.66 yards of fabric (with 40% off coupon)= approx $15.00
Foam=Free from my brother
Fabric Buttons= $12.00
80 pound Fish line= $1.50
TOTAL: only $40.50!
Sidenote: I got an ear full of opinions when I posted the preview of this crib. Please know that as a mother of 3 (almost 4) I would never consider putting my baby into a crib that I thought was unsafe. I would appreciate it if you have a concern, please send it to my e-mail (allthingsthrifty at gmail dot com) and don’t attack me publicly. I am not “all knowing” but I do believe there is an appropriate channel to communicate criticism. I hope you agree.
Forgive my randomness, but I had to give a shout out to my sister Natalie who will be on Studio Five Utah’s KSL Channel 5 at 11:00 tomorrow Friday Jan. 14th representing All Things Thrifty for me. She is wonderful and will do great in my absence. (Baby due date soon=Brooke can’t travel). I love my sister and she ROCKS for doing this. Don’t forget to check her out tomorrow!
I LOVE it!!
WOW! Now that is beautiful. I love it and kinda want to do that to my own headboard.
that's so awesome!! such a great idea and transformation!
Holy cow! That is awesome! It seriously looks like something someone would spend a ton of money on. Beautifully done and thank you so much for sharing!
This is beautiful! Love that you did it so inexpensively!
Oh wow! What an amazing and CHEAP transformation!
Love this tutorial. Well I love all your tutorials, but this turned out so amazing!
omg! this blows my mind!
This is absolutely adorable and so creative! Way to be different, I love that about your blog! I hate having what everyone else has!
This crib is amazing!!!! I love what you have done, ignore any criticism…they are just jealous of how FABULOUS this looks. Congrats!!! Good luck in the coming weeks!!!!
I so, so love it and am wanting to redo my baby girl's like it. SO stinking cute. To all those people out there who criticized you, well…I'll be nice and stop there 🙂 Good work and good luck with number 4
I have been reading your blog for several months and I always think you ROCK! But this – this takes the cake – I FREAKING LOVE it!!! So gorgeous! You are amazing! Thanks for sharing your talent with all of us in the blog world!
OK first of all- WOW- amazing, awesome- beautiful- it looks like you bought it at potterybarn or some kind of expensive furniture store. Second- pahahahah, Ok when you put your paragraph about people giving you critisicm, OH MY GOSH- some people are so stupid. I have had 3 different occasions/topics that people have given me their "words of wisdom" and I couldn't believe it. One person told me I needed to pray more, I guess I was supposed to be publicly posting how often I prayed. Brother. Some people are such idiots. And like someone said from above- I think jealousy is a HUGE factor- you can build, make, create anything you want, who doesn't want to be you?! And the handy husband that comes along with you! ha. Chalk it all up to jealousy. I'm so sorry you had to read that. Even though you know they're stupid, it still hurts. Good luck on new baby!!!!!
OH my holy freakin crap! I just read the last post's comments. WOW. They were so rude! I can't believe some of those comments! I love how they all took it upon themselves to educate you on things you obviously already knew, and things you had already taken care of. Oh my gosh- I just cannot get over this comment ordeal. The suffocation- OH. MY. GOSH. BROTHER. Are you kidding me? I guess they had a point since you probably don't care about your children, or love them, and only care about decorating right? Not to mention since they know you so well. Brother. I cannot believe these people!
AMAZING!!!! I have always loved your blog! I'm a new mom so the "words of wisdom" from friends, family, and even strangers come often to me. The best advice I've gotten yet…. IGNORE THEM! You and only you know what's best and besides that, this isn't your first rodeo! Congrats on the new one!!
Holy cow that's awesome!
This is absolutely fabulous!
D
http://www.extremepersonalmeasures.com/
Very beautiful and very easy! What kind of fabric did you use?
Brooke I am so freaking amazed by this transformation. You make me want another baby –almost. I facebooked, tweeted and stumbled your post. Beautiful…jaw dropping…for reals!
This is such an adorable transformation! It would make a beautiful headboard for a twin bed later on too. 🙂
Hugs
Missy
Very cute!!! Such a cool idea! Looks like an expensive custom made crib! You did a fabulous job! It will make an adorable headboard later for a twin bed as well!
That's really impressive! And I'm sorry that you got attacked because of the preview. I can understand people being concerned about having squishy foam in the crib, but that's not the way to handle it. I thought that the footnote at the bottom of the post was a great way to handle that! And I think it'll make all of the "critics" feel better to know that it's memory foam that doesn't really give at all. I hope your baby enjoys it! And, kudos for posting it with the crib mattress showing! I wouldn't have posted at all since my crib sheets are stained AND my mattress has holes in it! Baby #4 is coming in 2 months and is definitely getting a new mattress and bedding! 🙂
The coolest thing I have seen!!!! Now I need to convince my husband we need to have a 4th baby so I can use this in a crib of our own 🙂
I LOVE this! Someday I will be converting my baby's crib into her regular bed, and by then I should be ready to do this! (hopefully, maybe?) I'll admit, I am a little nervous about getting the MDF to fit just right!
This is so freaking cool! Love it! I had baby numero uno six months ago, but baby number two may just get a tufted addition to the crib! It truly looks so high end, I am very impressed!
Oh my goodness!!! I love love this, whenever we start a family I am totally going to make this. Thank you so much for sharing on how to make this, it's fantastic!
That is amazing! I'm behind on my blog reading and sorry that I missed seeing your sister on KSL 5 too.
Oh my gosh! I just stumbled across your blog and I LOVE this idea. Now I want to find an old crib so I can make a new headboard for my 5 yo daughter's room! 🙂
This is intense. And I love it. You are a genius, this is gorgeous, and I will do it one day. Congrats on being so crafty and brave!
I love this Crib makeover Great Job. Not sure what negative comments you received but if made properly I don't see this crib being any less safe then installing a crib bumper pad which many people still use today.
THis just gave me a great idea. I have this crib in brown and my toddler is about to grow out of it and I was planning to build a tufted headboard. THis would work so great as the headboard for the full mattress he has. Thanks for the idea!!!
I plan to do this with my daughter's crib which is currently in the daybed conversion. This was the only blog I could find that had the tufting instructions! Thank you for your post 🙂
I wanted to let you know that I commented back on this back in December as I still see my comment #31 lol. I actually followed through and made it giving credit of course to you and your site here is the link so you can see what your idea inspired . http://chaoticallycreative.com/2012/08/07/crib-to-upholstered-headboard-diy/
Thanks so much for the inspiration!
My dad and sister did this to my crib for my daughter. However when we tried to attach the mattress spring to the headboard it did not fit with the memory foam. How did you get yours to reach the screw holes?
This is such a cute idea !! But it can be a chocking hazard if your infant/ toddler pulls of a button !!
Hello, just one question. Does the MDF go on top of the bars that the crib originally had or did you remove those?
Thanks in advance this idea is amazing!
We put it right on top of the bars!