Finding custom decor items can get VERY pricey, and since most of us don’t have a lot of extra cash these days, DIY decorating is getting more and more popular. Making custom decor pieces yourself can save you hundreds of dollars in the long run, and the great thing about All Things Thrifty, is that I TEACH YOU how to do it! 🙂
Items you need for this project:
1 piece of 3/4″ MDF (comes in approx. 4 feet X 8 feet sheets) I got mine at Lowes. The Lowes associates will also cut them for you which will save you time, and their mega-cutting machine cuts a perfect line, so I recommend having them do it for you. I had them cut the MDF into three pieces that were 24 inches wide. The last piece was left over for another project and it is slightly larger than the other three. FYI: One sheet of MDF costs around $26.00.
An overhead projector (I used the old school kind).
A transparency
A pencil
A Corded Jigsaw
Paint of your choice
2 yards Fabric of your choice
Stapler and Staples
D-ring hooks to hang them
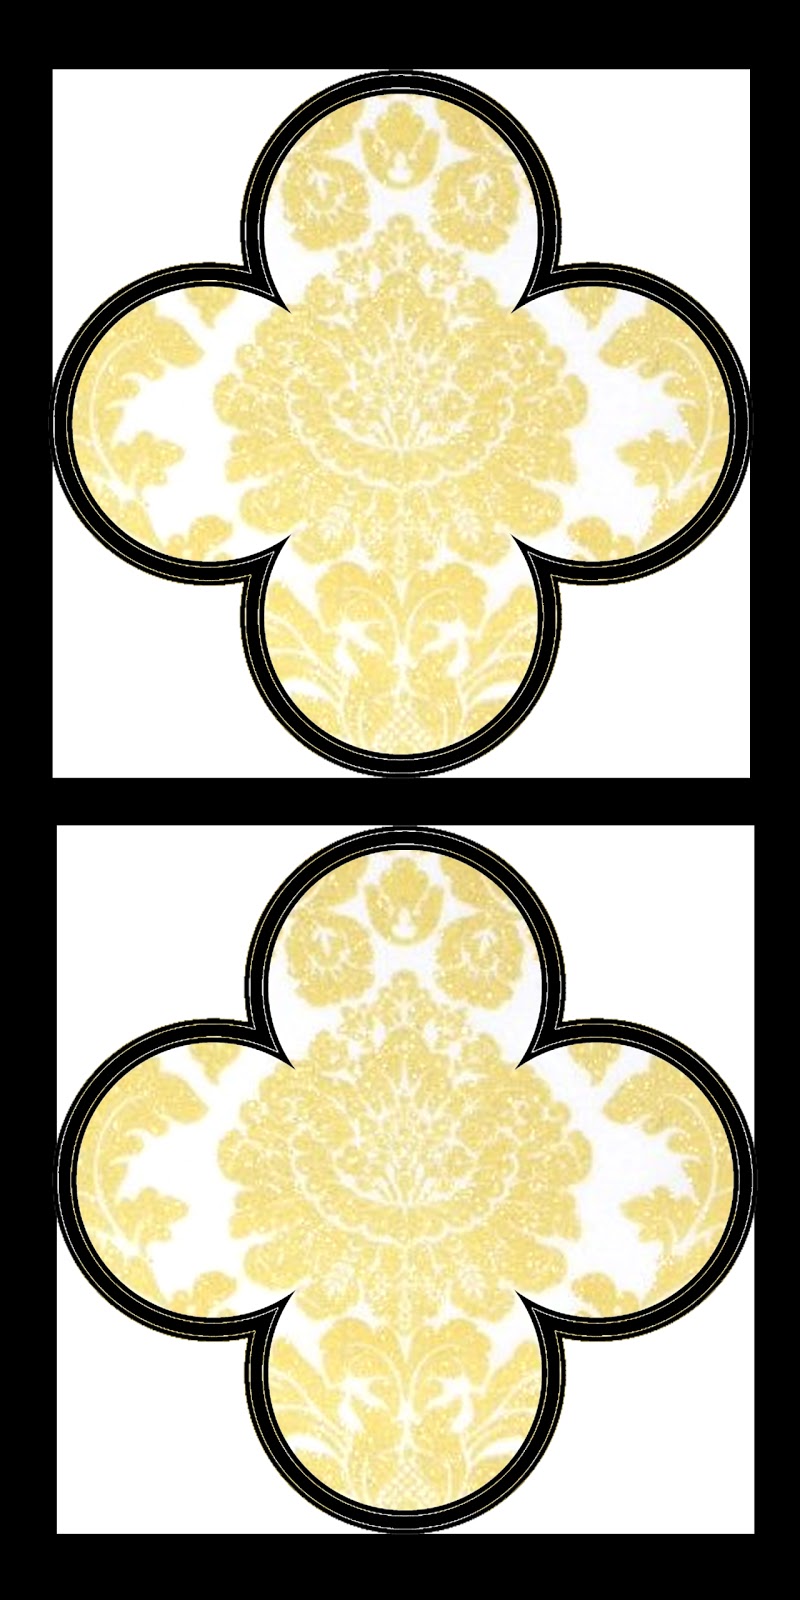
Here is your pattern.


Step 2: Make sure that the design has an equal amount of MDF framing the clover designs. We had to trim a little off of one side of each board.

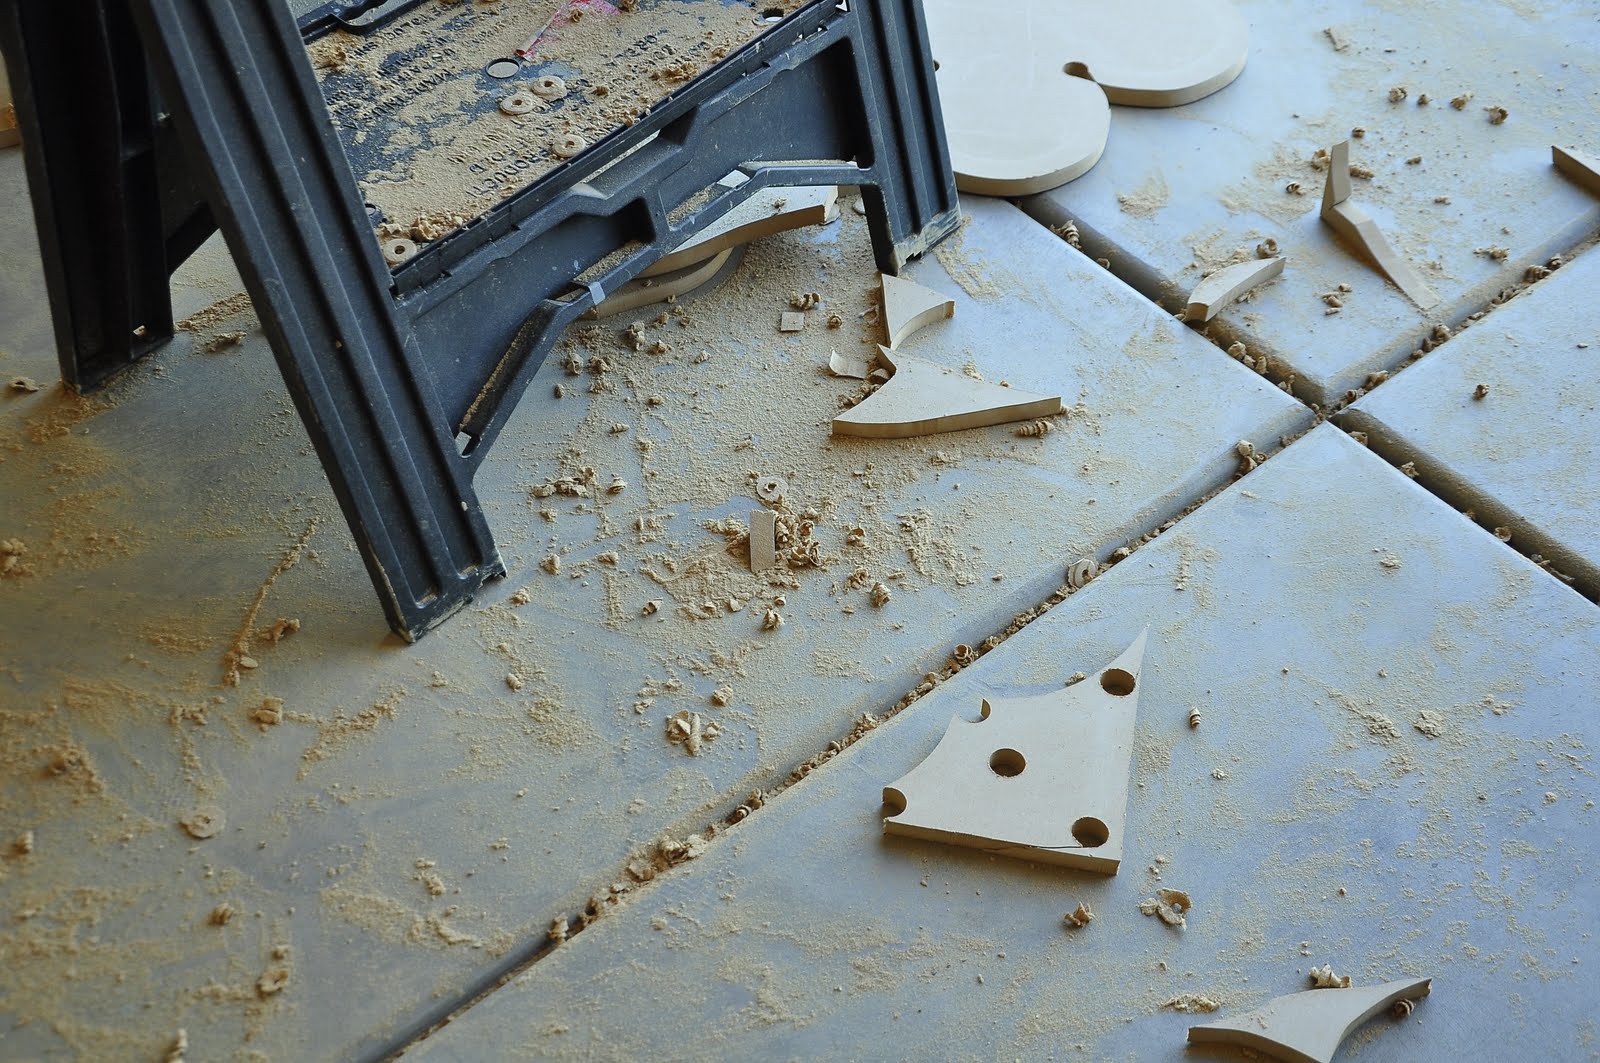
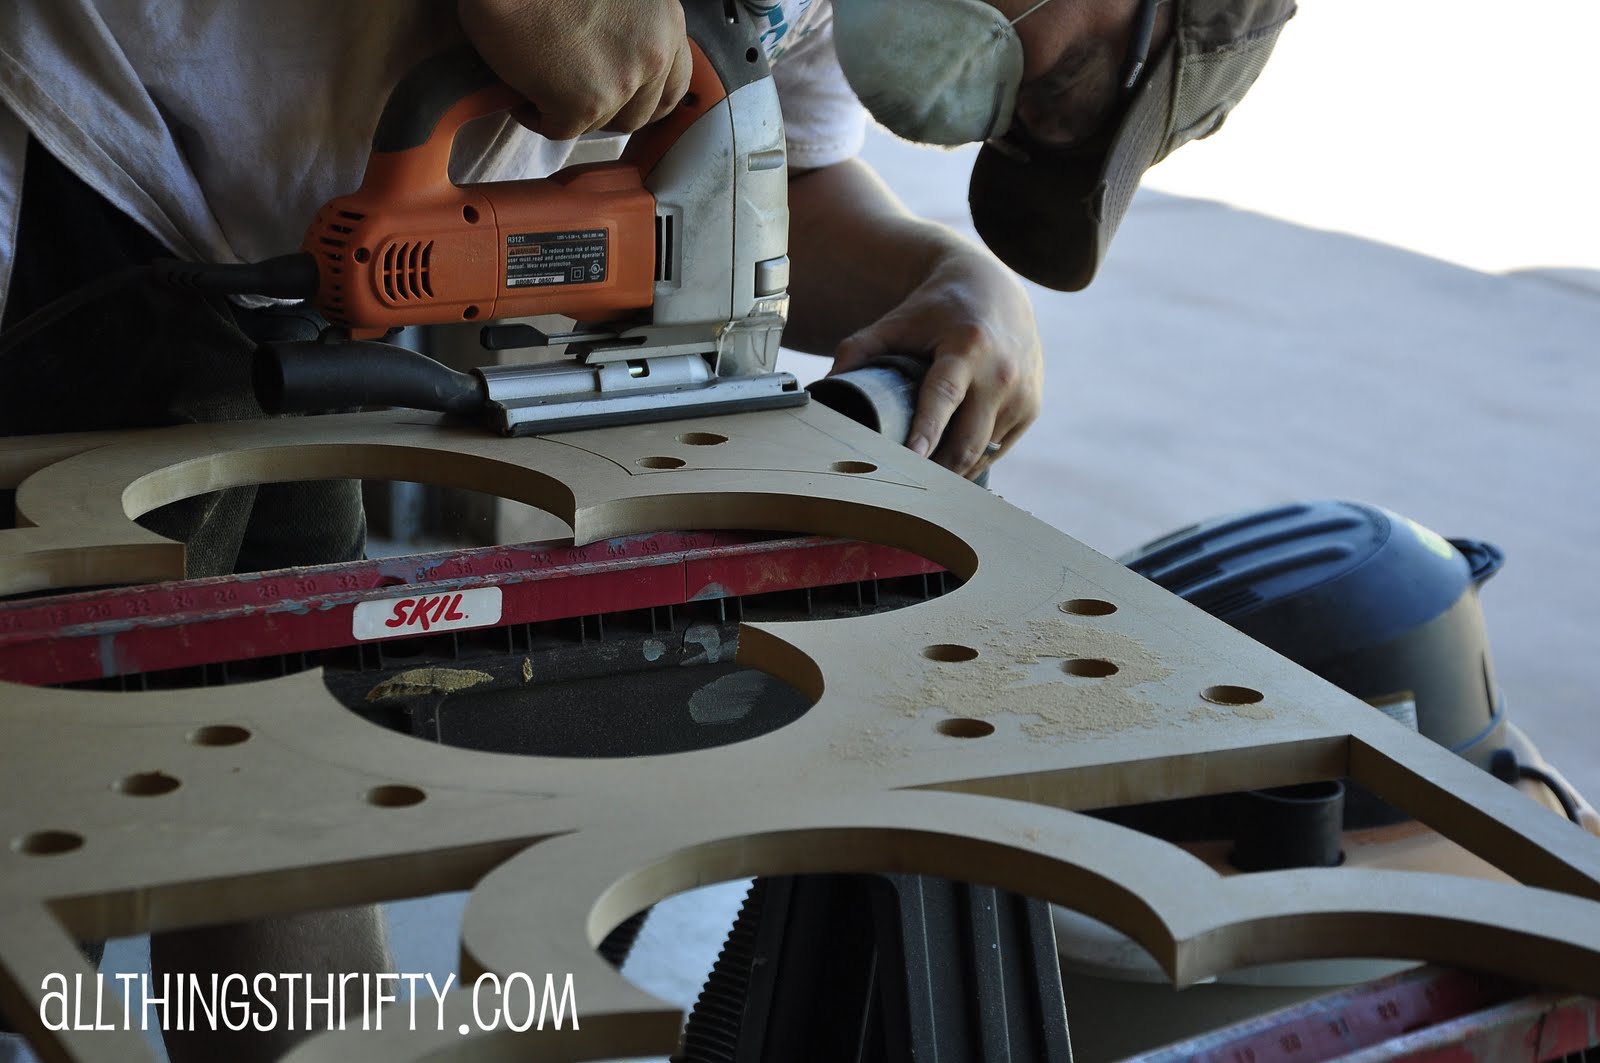
Step 3: Set up your MDF sheet onto saw horses to provide a steady work area. Be prepared to make a HUGE mess, so cut out the MDF design in a location that can look like this in a hurry with no worries.
Step 4: With smooth even pressure, cut out the MDF with a corded jigsaw. Do not use battery powered jigsaws for this project. We learned this the hard way. You will burn through batteries like it’s going out of style.

Be prepared to cut for several hours. Yes, he loves me that much. He is Mr. All Things Thrifty, after all. As you can see, he drilled holes throughout the board. It is challenging to cut curved lines with a jigsaw, so the holes allow him to cut small triangles at a time.
Doesn’t it already look AWESOME!?!?
Step 5: After you have the first panel cut out, lay it on top of the next two panels and trace the pattern on with a pencil. This will ensure that all three panels will be identical.

Step 6: Cut out the other two panels.
Step 7: Paint the panels with primer and paint. I used Krylon (surprise, surprise…my favorite paint brand) Black Satin spray paint for the project. I primed them with Rustoleum automotive primer since they sell it in black. Do not skip the priming step. You will be sorry if you do. MDF sucks paint in like crazy. In face, I used 220 grit sand paper to sand between coats to help achieve an even coverage.
After the panels were painted, I was tempted to leave them as they were. I think they are great. BUT, I wanted a little more pizzazz.

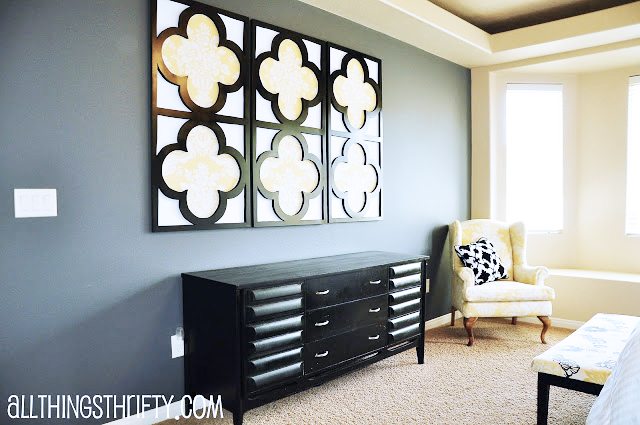
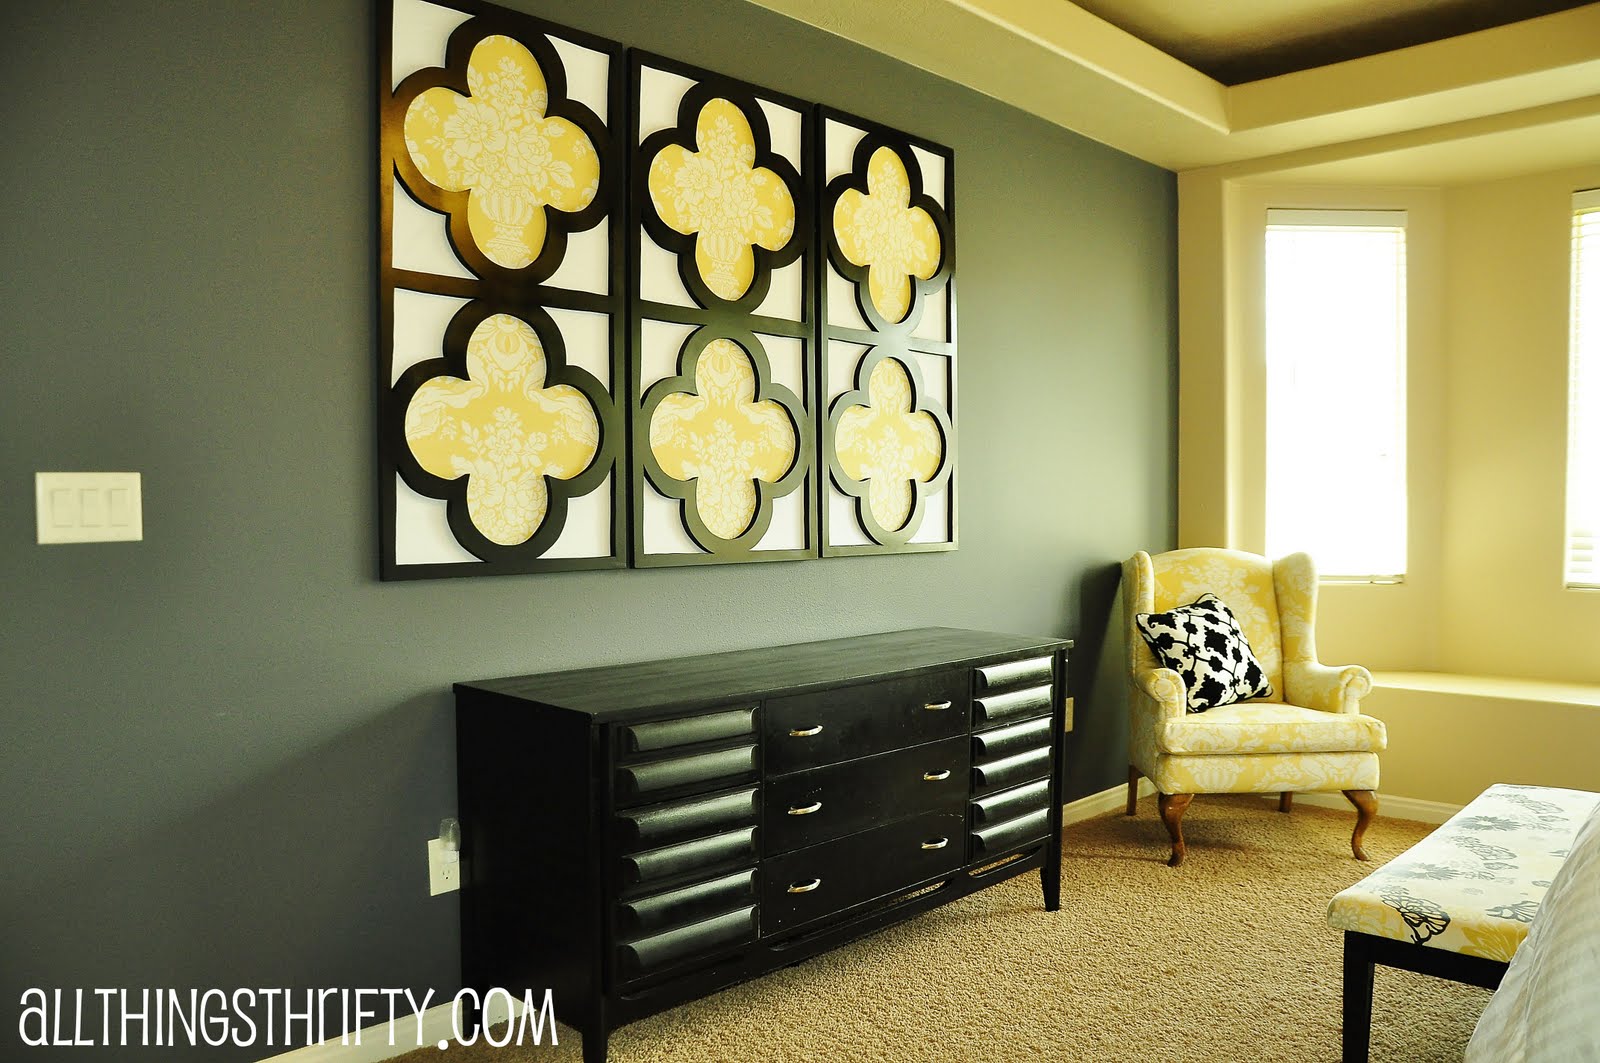
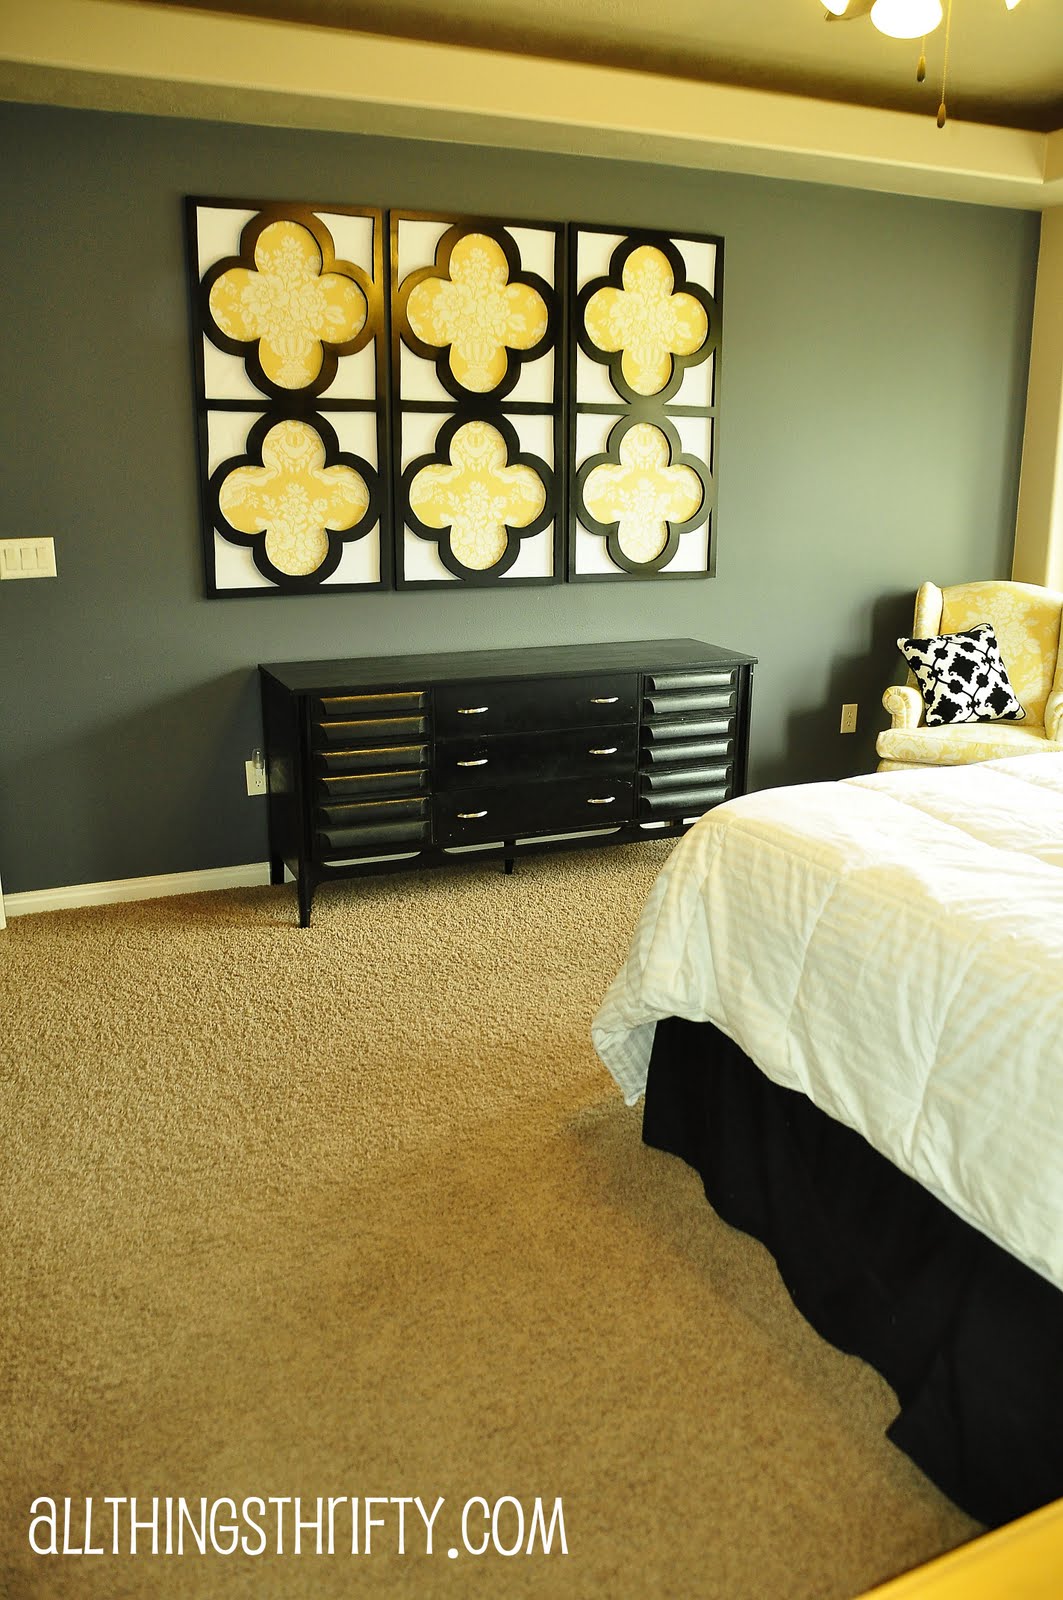
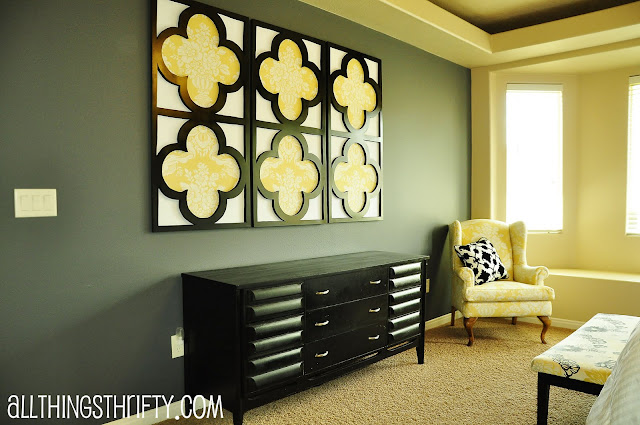
This is what they looked like on the gray wall in my master bedroom.

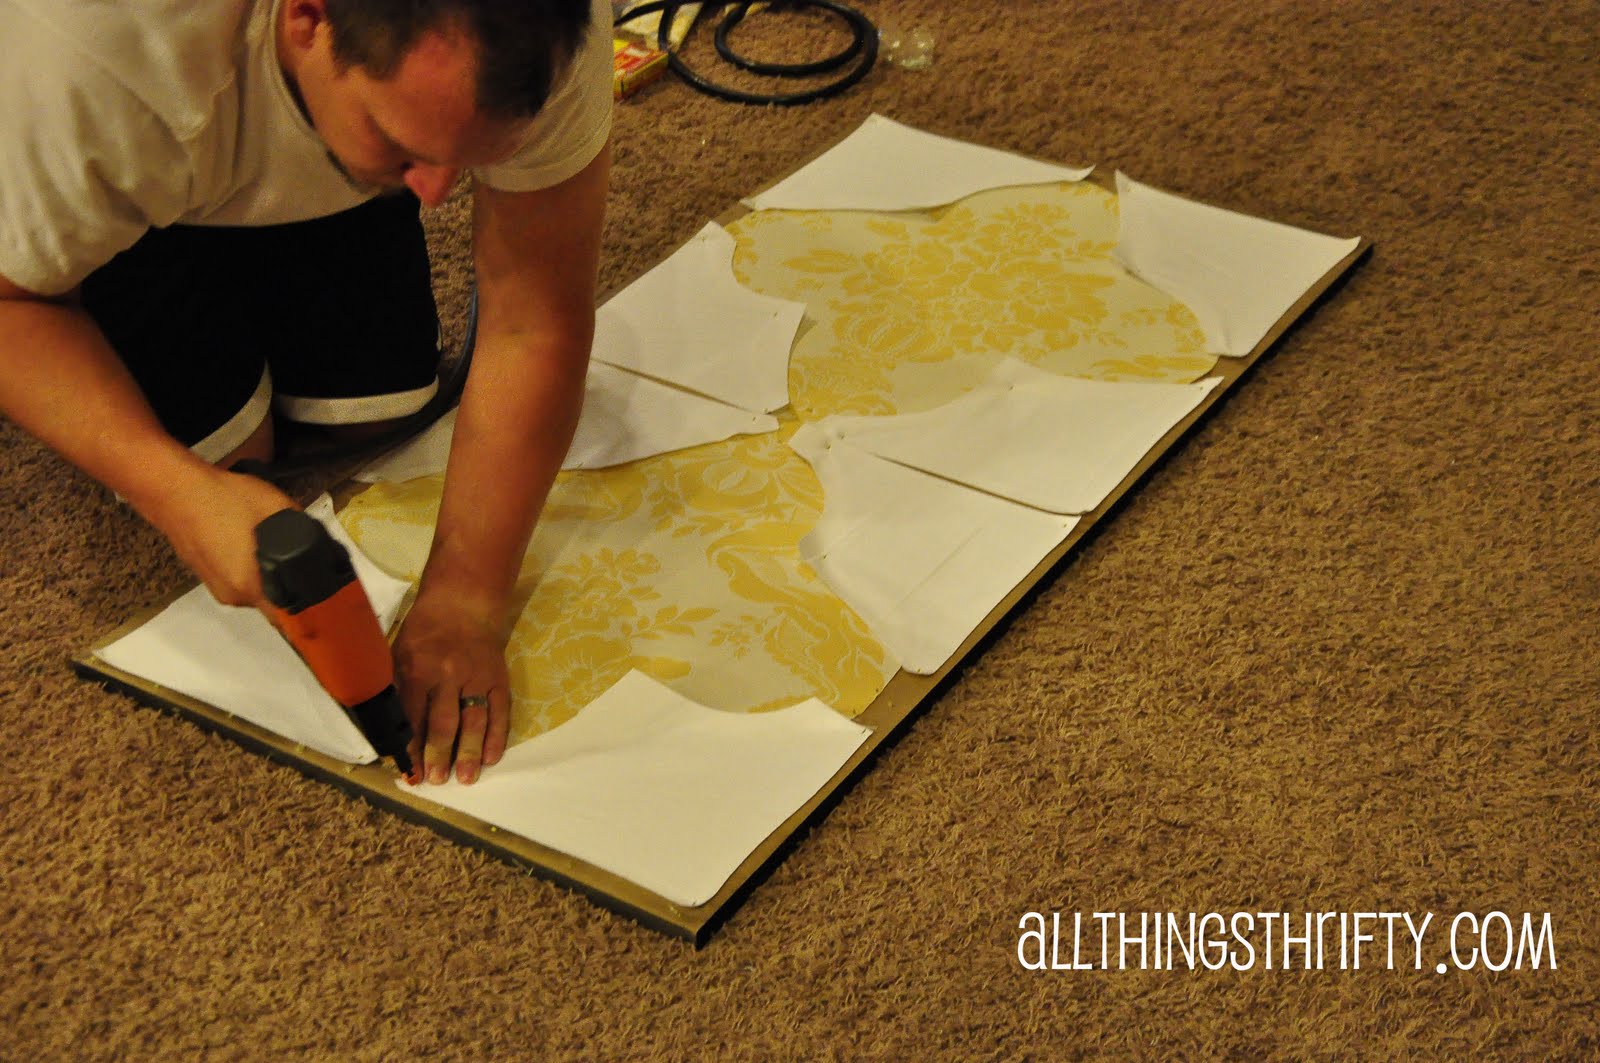
Step 8: Upholster the back of the MDF with your choice of fabric. We used a staple gun for this process. Be sure to pull the fabric tight and staple it into place. MAKE SURE that your fabric design is repeated perfectly. It would drive me crazy otherwise!

As you can see, we put the yellow fabric in the middle of the quatrefoil design, and the corners were upholstered in white. I bought the yellow fabric at Home Fabrics and Rugs in Las Vegas Nevada over a year ago. I am so sorry, but I don’t know the name. It was $5.99 a yard.
I think they are SAWEEEEEEEET! I love them.
The greatest part is that this project was VERY inexpensive. Total cost: approx. $50.00.

 In case you are new around here, let me remind you what my
I was thrilled when my headboard was featured on HGTV.com.

I hope you enjoyed my new project!
That looks awesome! I really need to start buying tools. I'm bookmarking this to save for the inspiration!
This is unbelievably gorgeous!!!!! Love the pop of yellow!
That's amazing!!! I'm addicted to anything with quatrefoil and your wall art is gorgeous. Props to Mr. All Things Thrifty.
Wow, you did a fantastic job. I love it! Thanks for sharing your creativity and inspiration! Love your site. 🙂
Great job! I love your bedroom. Most of the wall space in our little master is covered with furniture and doors, so really only one space (above the bed) for artwork of any size. What fun to create something with such big impact for so little $ 🙂
Great job! that looks awesome!!!
As always – it is AMAZING!!! 🙂
How cute were you on GTU!!
This look SO amazing!!! I am in love with any and all things quatrefoil, so I'm swooning hard over here! I really want to make one but don't have a projector. Any suggestions?
I saw you on Good Things Utah this morning. Loved it! Your projects are amazing and you are so inspiring! My husband even sat down and watched! Great job and keep up the good work!
CA-UUUUUTE-NESS! luvs it! winks-jen
All i can say is WOW – I'm so impressed, it's beautiful!!
That is impressive!
ok that is HAWT!!!! love love love it!!!! i was just showing the 10 year old your website so he can see where i have been getting all my project "ideas" from and he thinks you are amazing too!!!
Thanks for the inspiration…p.s. my multi color dining table set is almost complete…cant wait to show you!!!
What a great tutorial! Thanks for sharing. Please check out my new home decor blog
http://www.goldenolive1.blogspot.com
Brooke, this is BEAUTIFUL!
Love it! I love the whole room – fantastic. Really love the chair! Where did you get it? I've been trying to find a good accent chair!
I love this!!!! Pinning it to my bedroom love board on Pinterest !! Xoxo
where did you get that chair in the corner of the room i love it
Hi peeps, I reupholstered the chair myself. 🙂
I love this!
Thank you so much for sharing!
xoxo
Fantastic! I adore it, and with that I had more room above our headboard in our Master bedroom for a beauty like this one…I will find a spot, you can count on it 🙂
Um, WOW! You and Dan are freaking amazing! Where did your other wall art go?
incredible. you do great things!
Hi Brooke. I absolutely love this. I think what is the best is that this project can be adapted in different ways. I'm already thinking of how I can put a mirror behind it or something for the living room.
You and the jigsaw man did a great job 🙂
Oh my word Brooke how did I miss this? that is amazing. I totally love it…big, bold and beautimous!
I love this. I have BIG plans to learn how to use a jigsaw. Pinning this.
Sooo awesome!
Do you think if I went with a thinner particle board it be to flimsy? I have never tried cutting wood before. I found 1/8 particle board. And I have no clue what the out come would be if using a thinner board.. I was trying to cut the project to $25 bucks… but if it’s better to use the 3/4 i would change my budget.. i want it to last for a long time… is it better to use MDF or particle board… i was looking for MDF at lowes and it’s not on their site for my local store.. or at Home depot…
ooo i found the MDF under paneling… lol I was looking under plywood and osb section…had to go to Moulding & Wall Panels on Lowe’s… but still wouldn’t mind to get your opinion on using a thinner board to save money….
Charlene, I like the thicker board because I want to see the dimension of the board. I have had readers use thinner boards though. I just depends what look you want! Good luck on your project! xoxo, Brooke
Yes it is! It’s very easy and cheap project. Because everyone have an overhead projector and a corded jigsaw in his (her) home!