I have had the idea of how to make huge Christmas ornaments for over a year now. But, every time I worked on actually MAKING these bad boys, something would go wrong. The project seemed to have a devilish side. I tried for hours, and after several project FAILS, the project turned out soooo cute. (At least I think so!)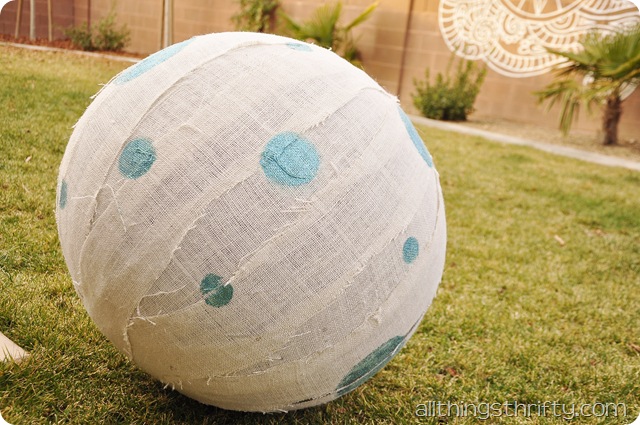
 I started with a yoga ball that I found on clearance at Target. It only cost $7.98. I got the BIGGEST one I could find because I wanted the Christmas ornaments to be as large as possible. But, before I tell you what actually worked, let me give you some tips on what to avoid. HA!!
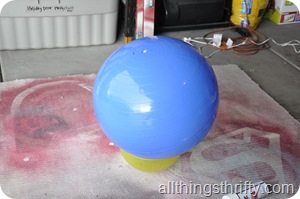
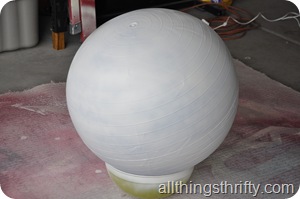
The first thing I learned is that SPRAY PAINT does NOT work on rubber-type materials. Take my advice. DON’T try it. I was so excited because I wanted to make a few of the ornaments to be a shimmery red or green color. So, like always, I primed it with KILZ spray paint. I set the yoga ball on an old mixing bowl to prop it up while I painted it, and then I waited….and waited….and waited. I thought that the weather may have been preventing it from drying. So, I went to bed and checked it again the next day. It was still so sticky that it felt like I had JUST sprayed it. The paint was not adhering to the yoga ball.
After I learned that spray paint didn’t work on the yoga ball, I tried to use spray glitter. That failed too. It was just dandy.
So, instead of giving up, I tried plan C. (I had to come up with plan C first, HA!) I had some burlap on hand, and why not try it, right?!? So, I cut the burlap into strips and started gluing them onto the yoga ball. I used hot glue, and it wasn’t easy, and I found that overlapping the burlap was the easiest way. I overlapped the burlap gradually as I went around the ball.
 Random sidenote: I love these pictures of Creed (my youngest son) hanging out with me in the garage while I did this project. He loved pushing around the water bottle while glued on burlap for hours.
  This picture cracks me up because I am concentrating so hard! HA ha. Don’t judge me for the dirty garage in the background.
  I overlapped the burlap on the top and bottom as I went.
  I did each quarter of the ball at a time so that the burlap was overlapping in the same way throughout the entire project.
After the burlap was all glued on, I decided to paint some fun design on the ball. After changing my mind a ba-dillion times, I had decided to do a large turquoise stripe across the middle of the ornament. I know, I know, you are not surprised by the turquoise. But, as I shook the paint, the lid came off of the craft paint. It was like slow motion. The lid came off, and I could see the paint spitting a million little splatters all over my perfectly glued burlap ornament.
I. Was. DEVASTATED. Mind you, I had already spent at least six hours on this project at this point. You wouldn’t know it by what I had as a result. At this point, I had two yoga balls that were sticky with paint and glitter paint that were ruined, and now I had a burlap ornament that had TERRIBLE splats of turquoise paint COVERING IT. It was bad. It looked horrid.
I wanted to cry because 1. I had an event that I need to decorate for in two hours that I was intending on using these huge Christmas ornaments a the focal paint, and 2. I had already spent too much time on this project to give up now.
I did what any crafting maniac would have done. I turned them into POLKA DOTS. It was a miracle. It worked.
Then I created the top of the ornaments with cool whip and sour cream containers.
 I cleaned them out, dried them, and painted them gold with metallic craft paint. After it was dry, I hooked it onto the ornament with string. (You could glue them on too). I already had the red ornament in my storage bins from a few years ago. After I bought it, I had thought, I bet I could make something like this for pretty cheap. Little did I know that the project would take four days of hell. Ha! The teal ornament is a vase that I bought at Homegoods that I stuck a painted container on the top to make it look like an ornament too.
Although I planned to have four done in the time I made one, I was still pretty excited with the result. I wish you could tell how big these bad boys are.

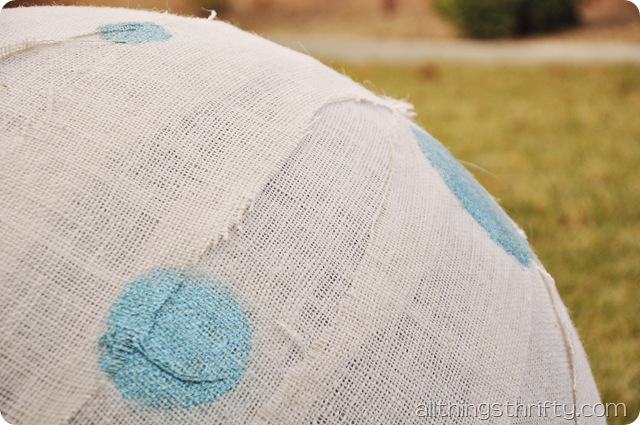
The burlap adds that fun grassy texture, and I love that the edges are fraying. That is exactly what I wanted it to do.
 Think of all the colors, patterns, and endless possibilities!! Just make sure to take my advice so that your experience goes a little better than mine did! xoxo.
Check out our other outdoor holiday decor! I bet you will like them!
DIY Yard Nativity and FREE patterns!
![yard nativity set_thumb[7]](https://www.allthingsthrifty.com/wp-content/uploads/2012/12/yard-nativity-set_thumb7.jpg)

Wow, that's too cool!!!
These are TOO cute! I saw some huge ones on OneKingsLane but they were $40,000.00!!! These are totally just as cute. So tell your husband tonight that you saved him $39,945.00!
Lmao
Maybe use the big bop m balls on a rubber band? You can use decopauge(i think, let them dry, pop the balloo) then paint them.
I love them! Sorry it was so frustrating, but thanks for being so open about that, though. It's nice to know other crafters have fails, too! 🙂
~Natalie
P.S. I hope your party was a success!
you could use the big huge balls in the toy section also, they are what $4-5 each!!
Wal-Mart I Think Sells Them For $2.50 Each
these are cool 😉
Those are super cute!
def super super cute idea!!!
http://infinitelifefitness.com
http://mscomposure.blogspot.com
Now THAT is yoga!
This is completely gorgeous! You have me all revved up for next year. I just need to find my ball somewhere in the shed:/, Belinda
Such a neat idea. I'm going to remember this if I ever need big decorations!!
it turned out awesome. I remember you talking about making these I am so glad you did it!
These are awesome, and you are a riot girl!! I'm your newest follower!
They are gorgeous! You did a great job!
You did a great job, these are gorgeous….love your blog, and I hate it, just spent a half hour looking at everything, you are very talented! Thanks. Please look at my daughters blog, white house black shutters
thanks
Marilou
They look great!, could you use regular play balls and cover them in wrapping paper and then put poly on them to seal them?
Sure, why not!!
Just wondering, I have been looking for something like these to do for outside decorations. They are beautiful! I live in Newfoundland, Canada, where it can get pretty windy. Any suggestions on how to secure them to the ground so they don’t blow away?
Hmmmmm, maybe some sort of chain with a stake to stake it into the ground? I’ve always used them inside, so I haven’t thought about that! Good luck!
so Brooke,
what kind of paint would be more suited to this project? I want to try to make two giant ones for my front yard.
If you think paints a bad idea altogether, maybe I should just find yoga balls in green and red, huh.
Thanks
Laurie Raymond
Yes! That would be ideal. Green and red yoga balls would be perfect!
lovely! any ideas of how to hang these from outdoor trees once the gold piece on top is put on? rope spray painted gold? Something that will look decent in the daytime?
I think different sized beach balls would do also and if you could find them now, they would be cheap.
Not sure if you would want to try paper-mache for these or not, but I once dressed up as Wilson from Cast Away for Halloween. I used a yoga ball and paper-mached it. It took an hour or so to do I think. I left a hole on the end where the air hole of the yoga ball was so I could deflate it and remove the ball once it dried. You could then paint or spray paint it any color you want. It may not hold up to the elements outside as well I guess, but might be neat to even include a strand of lights in the inside and could poke them out randomly around the ball or something. Just a thought in case you hadn’t tried it before!
Way to stick with it on the ornaments! On a side note, how did you do the big painted design on your wall/fence? That is amazing!!!
Thanks! HAHA YES! Here is the link: https://allthingsthrifty.com/2010/09/dress-up-your-backyard-fenceblockwall.html
Just an idea you might investigate. There is an aditive used in automotive paint used to get paint and primer to stick to plastic, vinyl and rubber. You should be able to find it any place that sells automotive paints.
You can use a couple layers of mod podge on the rubber material to create a texture paint can adhere to.
Would you ever try gauze instead of burlap or let the burlap dry then let the air out of the ball? Like a person would with a balloon?
Kool project. I have a 25 year old son named Creedence and we call him Creed, such a unique name.
Love it!
I wonder if you cut a slit in the ball and stuff it with fiber filling, then tape over the slit, if it would be an option to eliminate deflating issues?