You all know that I am FINALLY done with Lexee’s girls room! I am in love with this project and the main focal point in the room are these ginormous letters above her girls’ beds!
Although I do cut my own letters with a jigsaw at times, this particular project I didn’t. We were short on time so we ordered them this time. We bought the letters from Craft Cuts, and they are fantastic! We got the letters in just a few days after we ordered them and I loved that you can specify the size of the project right on their website. You can also choose the font that you prefer. I chose ARIAL bold for our letters. We wanted them to be 31 inches tall and they are made out of MDF.
After we got the letters, we decided that painting an ombre stripe would be the best choice for the room, so I measured the letters into 4 equal sections.
Next, we chose the color scheme and picked out four colors that gradually get lighter and lighter.
We went to Home Depot {but Lowes would work too if it’s nearby for you}, and bought four paint samples. Since the samples are only about $3.00 each, it was the perfect option for this project. If you are doing a bigger project, obviously you will need more paint.
Honestly no I don’t remember the colors, but my go to coral color is called “charisma” from Sherwin Williams. I would be willing to bet that the second darkest color is charisma.


 and taped off our first two sections to paint.


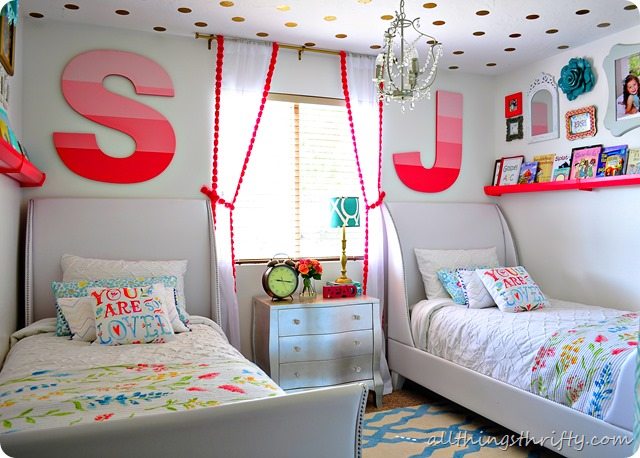


I love the big letters!! They turned out so cute!!
Those are so cute! Can’t wait to see the full room.
These are so classy! And I love when I get to see your pretty face in your posts! 🙂
Love the letters! What thickness did you go with?
Thanks! We went with 1/2 inch MDF. 🙂
Just curious… How did you hang these bad boys??
We installed D-ring hooks onto the back of each letter. We got the D-rings from the hardware aisle at Home Depot. Good luck! It was super easy.
These are so cute. I’m curious as to the paint color names you picked. They would be perfect for my daughters room.
I am in love with these letters and the colors. I have tried and tried to match your colors. Can you tell me what colors you used?
Honestly no I don’t remember the colors, but my go to coral color is called “charisma” from Sherwin Williams. I would be willing to bet that the second darkest color is charisma.