Before you take this opportunity to grab a nap thinking “Who needs a whole blog post about brush care?!?”
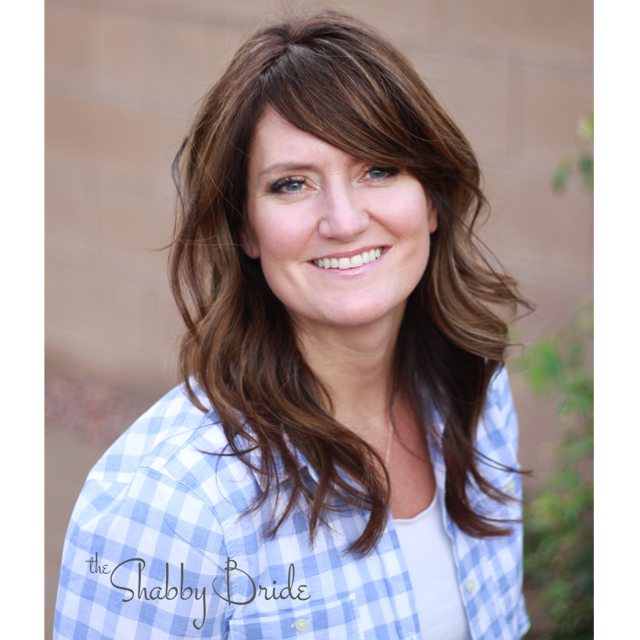
Let me get your attention with this fantastic selfie:

I don’t mean to scare you.
Then again, Yes I do.
Your brushes could look like my hair if you don’t keep reading…
If you have been painting with chalk paint for any amount of time, you know the best brushes have natural, chisel-tipped bristles. Sure, you can skimp by buying cheap brushes, but I’m here to tell you that when it comes to coverage and even application, the cheap synthetic ones just don’t compare. Trust me.
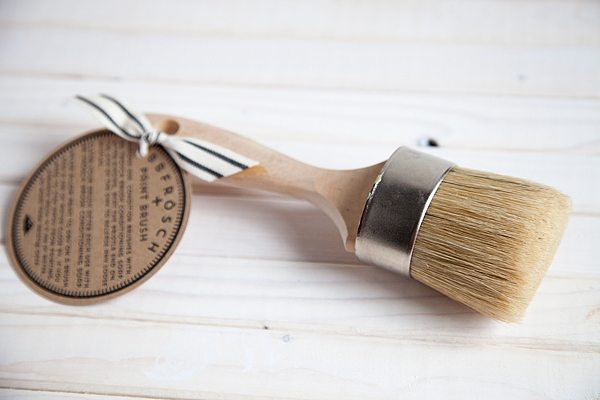
My brushes are from BB Frösch because they last FOREVER, they have those perfect chisel-tipped natural bristles I’m talking about, they have a thicker ferule for longer life and better bristle support, they have a shorter handle which makes it easier to get into tight spots, AND they are about half the price of the boutique brands.
Back to my hair…
Turns out, if I don’t condition after washing, my hair doesn’t look and feel anything like human hair. It resembles something more along the lines of a brillo pad with split ends.
Now imagine the same fate for your favorite brushes.
No bueno.
I figure my brushes are my tools for making money, and they are an investment, so I want to take care of them, which means I follow these simple brush care basics:
1. CONDITION YOUR BRUSHES
Turns out most cleaners out there (including your run-of-the-mill dish soap) do an amazing job of STRIPPING THE LIVING DAYLIGHTS out of your brush, making it dry and brittle over time.
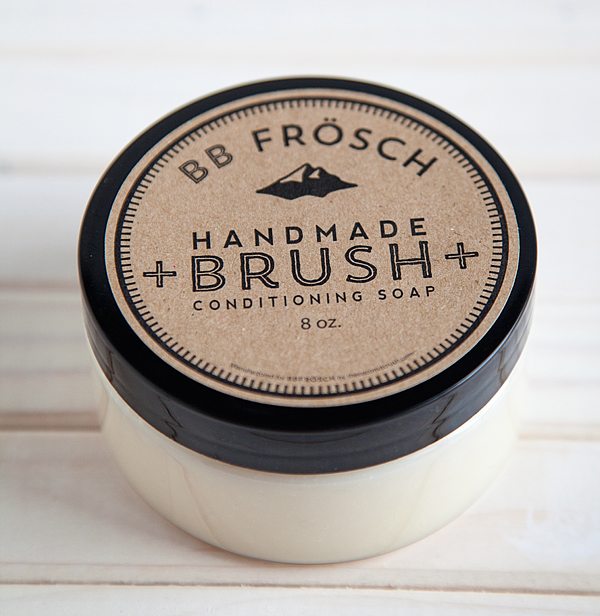
I use BB Frösch Brush Conditioning Soap because every time I clean my brush, I’m conditioning it at the same time. That’s right, cleaning and conditioning in ONE STEP.
My kind of time-saver.
As if an awesome-smelling brush conditioning soap weren’t enough (seriously, it takes away the “wet-dog” smell you usually get when washing natural bristles), it comes in a plastic jar for easy cleaning and next-to-the-sink storage. AND! When the soap is gone, you just drop a refill puck in and keep re-using the jar.
I use BB Frösch Brush Conditioning Soap for my paint brushes AND my wax brushes. I even use it for my make-up brushes!
***NEW BRUSH ALERT***
Before you ever use a new brush, CONDITION it.
Now you don’t have to suffer the fate of new, run-away bristles getting in your paint.
Follow these steps for NEW and OLD brushes, alike.
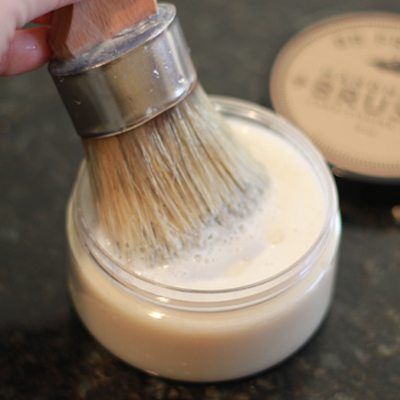
First, wet your brush.
Second, swirl your brush two or three times in the jar of Brush Conditioning Soap
Third, put the jar down, and swirl the soaped-up brush around in your palm to work up a clean-smelling lather. This is how I clean the paint off my hands and the brush at the same time. For those of you who aren’t afraid of a little too much information, I keep a puck of this soap in my shower to take care of all the areas where I “painted” myself during my project, because this soap is incredibly moisturizing on my skin, too!
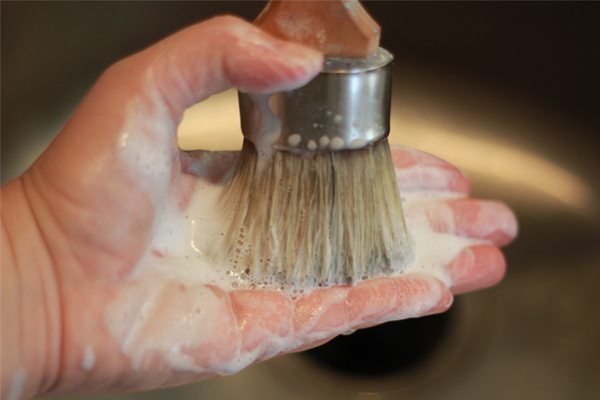
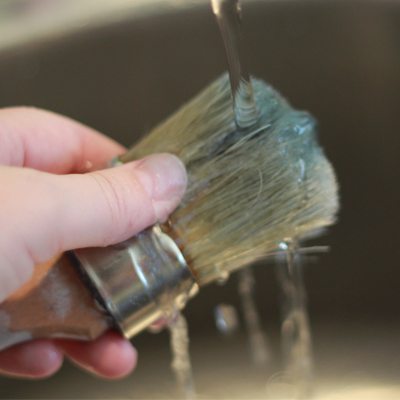
Fourth, rinse your brush, “pulling” out the suds out until no suds remain.
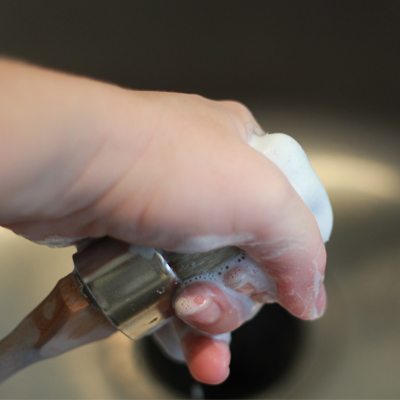
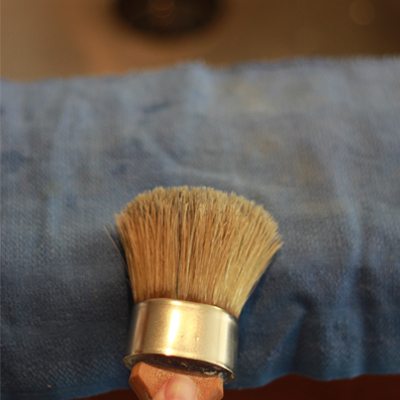
Follow the previous steps until your soap suds are clear. Your brush may be “stained” from the tint of your paint, but it is clean as long as the soap suds are white and the water runs clear.
Here’s THE MOST IMPORTANT STEP for NEW brushes…
Five, beat the bristle-end of your brush on the sink edge (you may want to cover the sink edge with a towel.) This will release any loose bristles that are inevitable with new brushes. Now, you shouldn’t have any new-brush bristles in your paint project!
Follow these same steps every time you paint, and not only will your brushes get softer over time, so will your skin!
Moving right along on your Brush Care Basics Journey…
Now that you know how to condition new and old brushes alike, here’s how you make your end-of-project-brush-cleaning even easier.
2. KEEP A JAR OF WATER HANDY
I like to use leftover salsa jars.
Of course, you don’t have to go buy chips and salsa to fully appreciate this post, but, why not?

Put just enough water in the jar to cover the bristles of your brush, but not the ferule. Since the ferule is where the glue is, you don’t want to give that glue any opportunity to loosen the bristles over time.
Every time you need to step away from your chalk paint project, submerge your brush, bristles-deep, in your jar of water. This will save boatloads of time when cleaning, because paint won’t have time to dry on your brush.
Last, but not least…
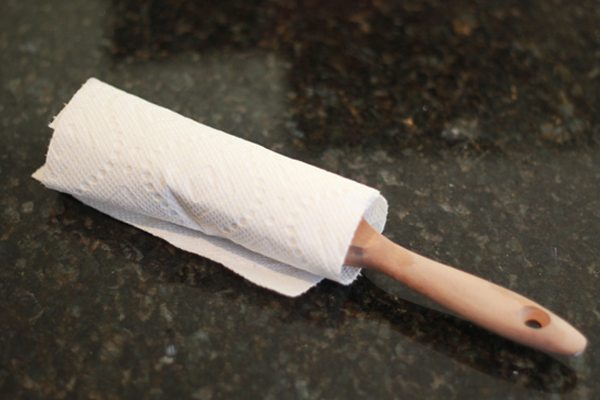
3. TRAIN YOUR BRUSH
Just like the sweetest of children and the most well-meaning of husbands, even fancy, expensive brushes sometimes need a little training. Lucky for you, when it comes to brushes, this is slightly easier than with the afore-mentioned loved ones.
After washing/conditioning your brush, rinsing it and beating any bristles loose, gently wrap the bristle-end of you brush in a paper towel and allow to dry. This will train any bristles that want to fan out to straighten up!
For more tips, tricks and inspiration, you can find me at bbfrosch.com, on Instagram or Facebook!
What a great post! Informative and humorous 🙂 I’ve always wondered what to do with my brushes after using wax. Does this clean them too?
I totally have the new brush in my paint problem. Never thought about conditioning it before, or ever. Thanks for the tips! I’ll try with my regular conditioner for now.
Thank you! I don’t understand why this stuff doesn’t come with instructions.
I live in an apt building with limited resources for rinsing out paint brushes after painting with chalk paint so I soaked my brush in a bowl of water and soap. How do I dispose of the water safely, can I pour it down my kitchen sink or outside on the grass?
I’m using chalk paint. Any help or advice is appreciated. ? Thank you in advance.
Kassidy–If your paint is no-voc or no-voc mixed with BB Frösch, you are fine to wash your brushes in the sink. Do not dump any paint down your drains, but washing brushes is fine. I recommend BB Frösch brush conditioning soap over any regular soap and over soaking brushes for any extended period of time as soaking can weaken the epoxy used to hold the brush together. I hope this helps! https://www.bbfrosch.com/collections/shop/products/bb-frosch-brush-conditioning-soap
Hello! I have noticed the paint stays on my brush (like the paint wraps itself around the bristles). This has happened with homemade chalk paint and premade chalk paint.. has anyone else had this issue? Should some paint still be on the bristles after washing it? I’m so confused and I feel like I’m going through brushes left and right. I understand staining but this stuff is wrapped around the bristles and can be scrapped off if you have unlimited hours to do it, which I don’t. I’ve used mineral spirits and it doesn’t take it all off.. any information about this and what I might be doing wrong?
Heather–You will LOVE BB Frösch Brush Conditioning Soap! If you have particularly “stuck on” paint in your brushes, wet your brush, swirl into a jar of brush conditioning soap, then let sit for 20 minutes or so while the soap helps break the paint down. Then, swirl the soapy brush head into the palm of your hand and rinse. You may need to do this a couple times if there is a ton of paint on there. A couple things that will help paint build-up to begin with: • use a paint tray instead of dipping your brush directly into your jar of paint • When you have to step away or take a pause in painting, leave your brush in a jar of water–make sure the brush is only bristles-deep, though! Don’t submerge your brush past the ferrule, or that will compromise the integrity of the epoxy that holds the bristles in the brush. Here’s a link for the most amazing soap ever! https://www.bbfrosch.com/collections/shop/products/bb-frosch-brush-conditioning-soap