Let me just start with the fact that I was very naive going into this flooring project. If you have been following along on Instagram, you know that we are up to our chins in the process of installing hardwood flooring on our entire main level. Last night at 1:30 am, we set up our bed in the kitchen. I slept with my head six inches away from my kitchen sink. Ya gotta do what ya gotta do to get a good night’s sleep, right?
I am actually glad for my naiveness to be honest. I am not sure if I would have been so gung-ho if I would have known what I was getting myself into. I won’t hold anything back and this post will tell you all the nitty gritty details. The good, the bad, and the ugly. If I can help save you time, I deem this post a success.
Items you will need when tackling your own tile project:
Tools:
{We used more than this, but we found what was the most efficient so that’s what I will share with you. I’ll spare you the trial and error that we experienced}. I will be using affiliate links in this post. Just keeping’ it real.
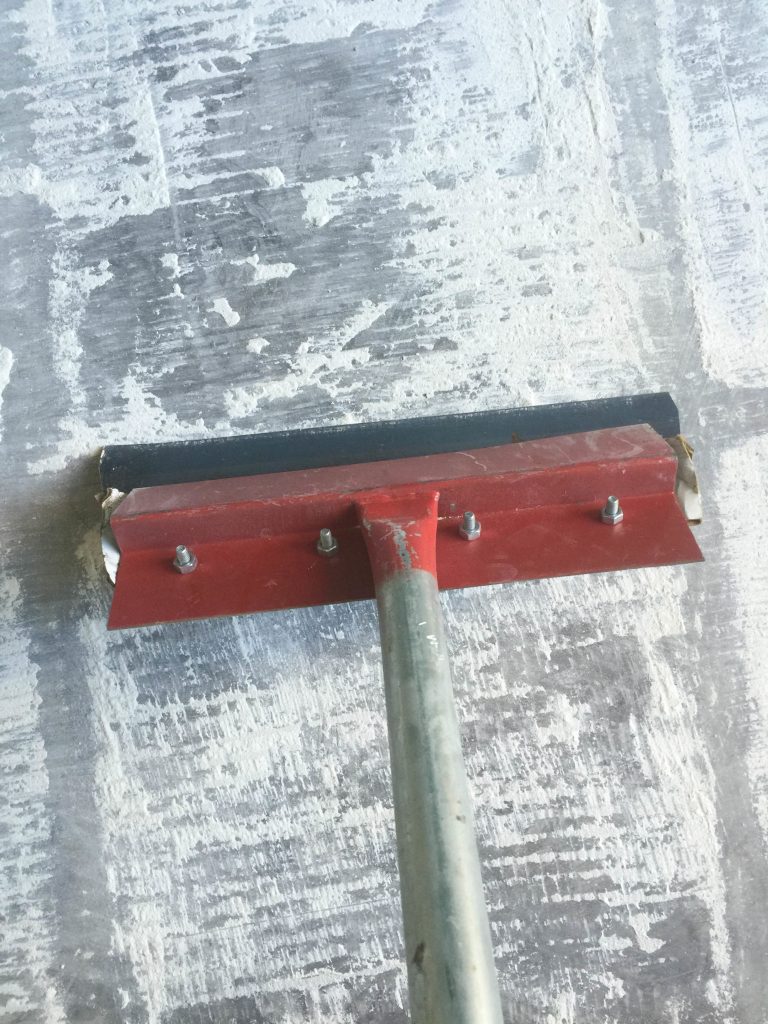
A Pulsing Hammer-Drill with a Tile Chisel Bit. 
This tool saved me life. I wanted to curl up and cry in the corner after two days of tile demolition. This tool sped up the process 10 fold. Thank you Shawn and Laura for letting me borrow yours. I owe you.
If you don’t have one, borrow one, rent one or buy one. It is WELL worth it. It’s that important. They are only about $169, and I would have paid much more than that had I known how great it works.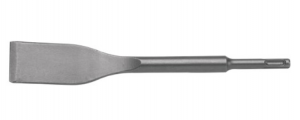
We tried several chisels and this is the one that worked the very best. I broke several others first while using different tools.

A small hand-held sledge hammer worked the very best. I personally liked the 4 pound one. We had several different sizes from 3 pounds to 12 pounds, and we hardly swung our huge one. When we did, it just didn’t work as well as the small ones. I’ll talk about the technique of hammering in just a minute. Maybe it’s because I am not as strong as Cody Sattler.
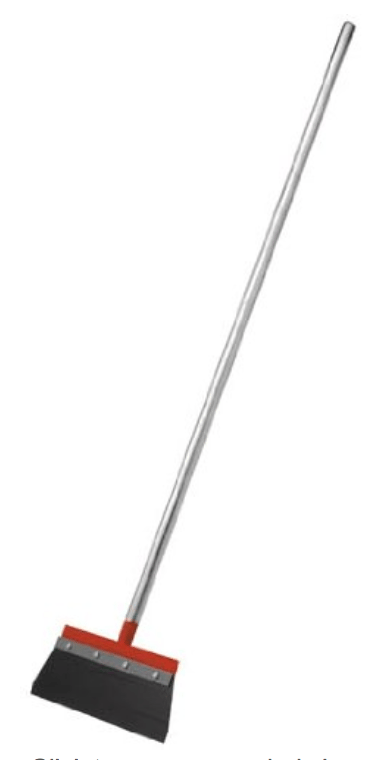
This scraper works great for smoothing the floors after the thin set has been removed. We also used this when removing the carpet, so it’s a good investment if you are remodeling.
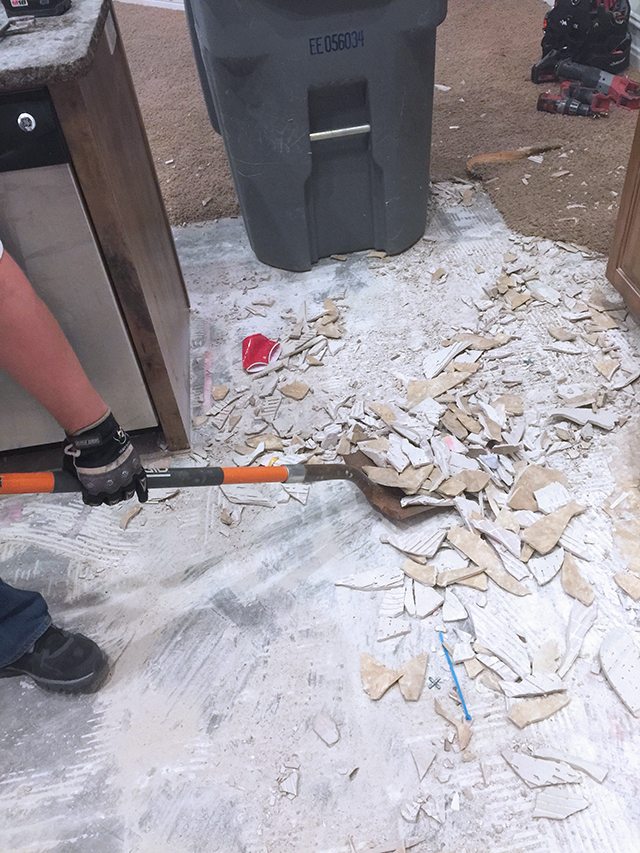
A flat-headed shovel AKA Square Nose Shovel
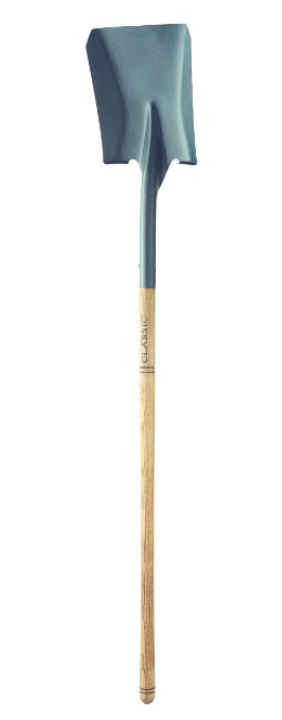
We used this to shovel the shards of tile into the garbage can.
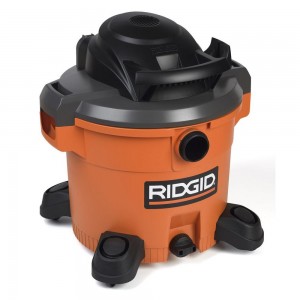
A shop vac is essential. You will be floored at the amount of dust and debris that your project will cause. The vac is a life saver.
Other items you ABSOLUTELY need:
{No ifs, ands, or buts. I learned the hard way about these}
Bandaids {Yep, I’m going there. If you are a Mom, you know that Bandaids walk away quickly and you cannot risk it. You need at least 25. We even cut our hands while wearing our gloves!}
Knee Pads {These are crucial}
Protective Glasses {to save you from a shard of tile going straight into your cornea}
Long-sleeve Shirts
Closed-toed Shoes { I thought flip flops were a great short-cut at one point. Bad idea.}
Long pants
A good pair of Heavy-duty Gloves
Dust Pan and Broom
Old Sheets
Dust Masks
Now that you know what items you need, let’s talk about the removal process.
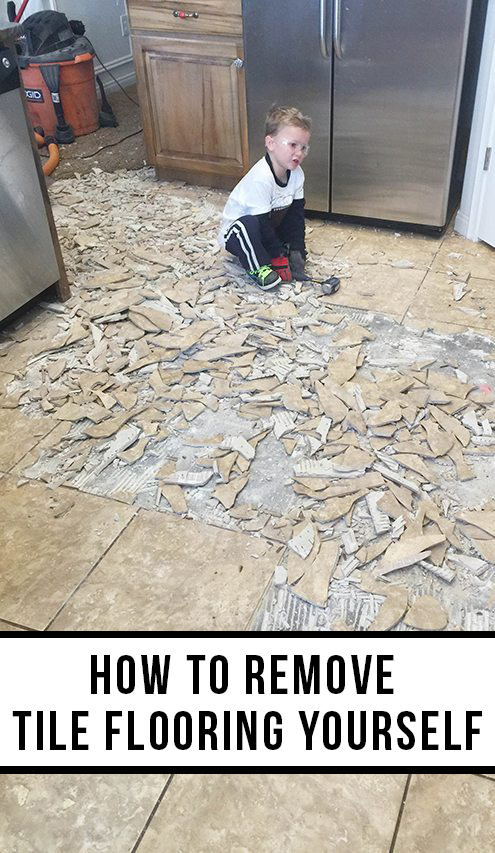
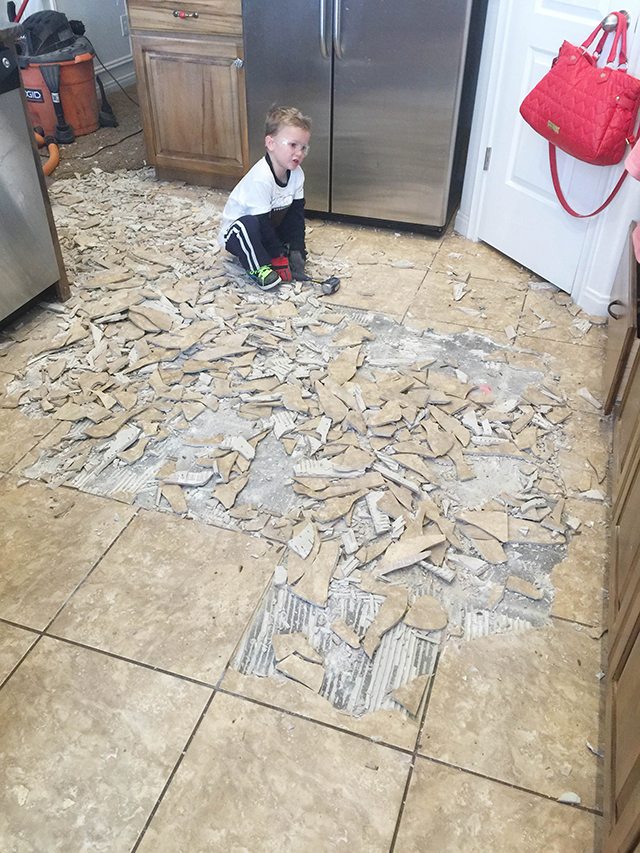
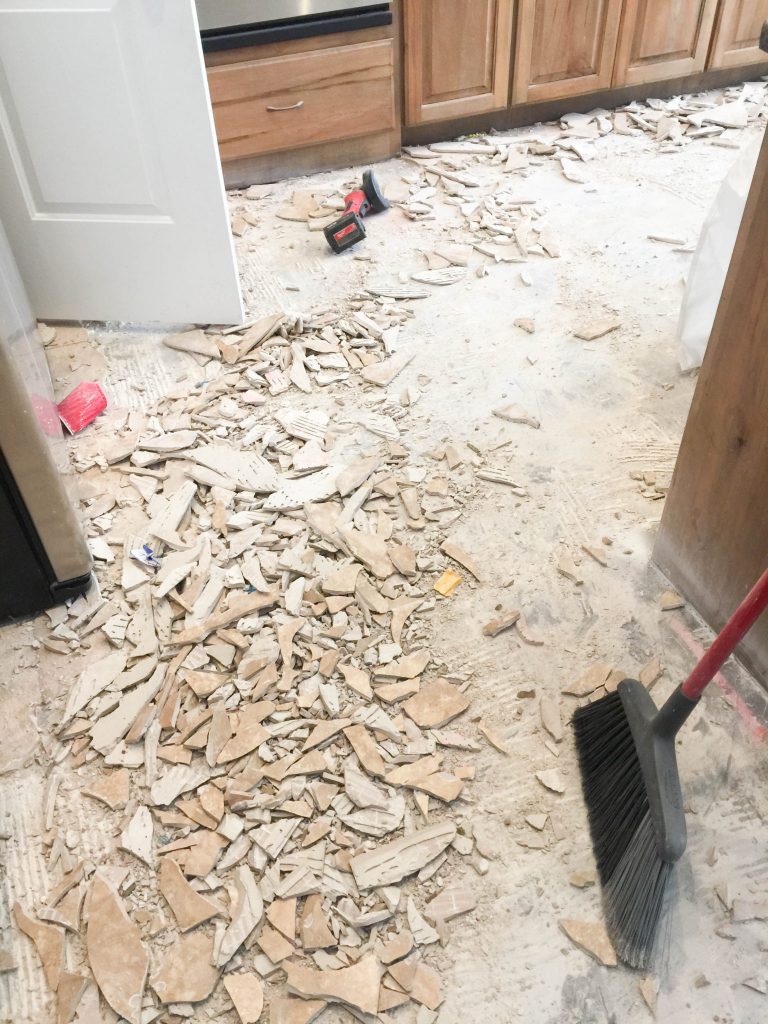
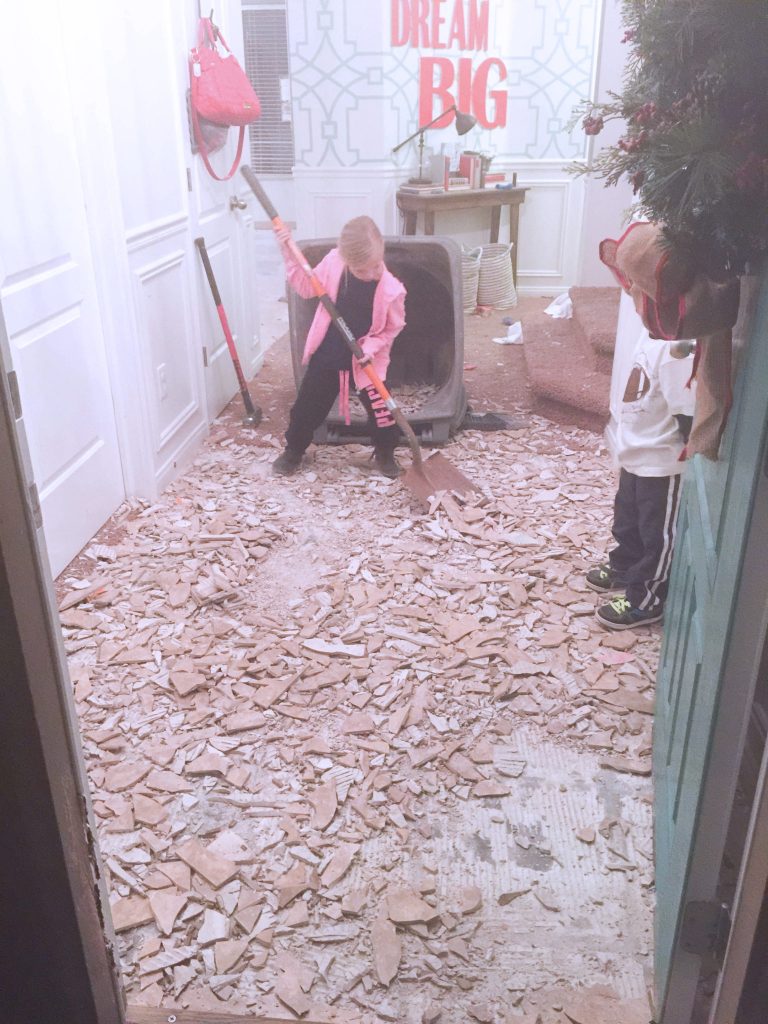
Step 1: Cover everything that you care about in your house with sheets and un-decorate everything in the close vecinity. I was excited. I didn’t take the books off the shelves and the sink had dishes in it. I have never experienced dust like this, folks. It’s intense. I’m not sure our house will ever recover. We have dust in every. nook. and. cranny. Our air conditioner sucked it up through our return air vent and spread it to every room in the house. Even my upstairs bedrooms are now covered in a thick white coat of dust.
Step 2: Hit the tile with a sledge hammer at a slight angle. You will find the sweet spot by experimenting, but once you find it you will speed through this process. My 3-year-old thought it was the coolest thing in the world.
I learned that the four pound sledge hammer was the best one for my strength. It may differ for you. A normal hammer worked too, but it didn’t work that well.
TIP: The first night of tile removal taught me a ton of lessons. I was wearing cut off capri-length sweats and a short sleeved shirt and flip-flops. Yep. I’m smart. Within five minutes I learned how sharp the tile is. I stopped to put on shoes. Then, five minutes later my legs had 5 bleeding nicks. I stopped to put on pants. You get the drill, I’m kinda slow sometimes, but I promise you need to cover yourself. Tile can be as sharp as a razor blade. I didn’t know that before, and now I know, and knowing is half the battle.
TIP: In the last 5 minutes of tile removal, we found that the hammer drill worked GREAT to get the tile out too.
Prepare yourself for a Mess with a capital M.
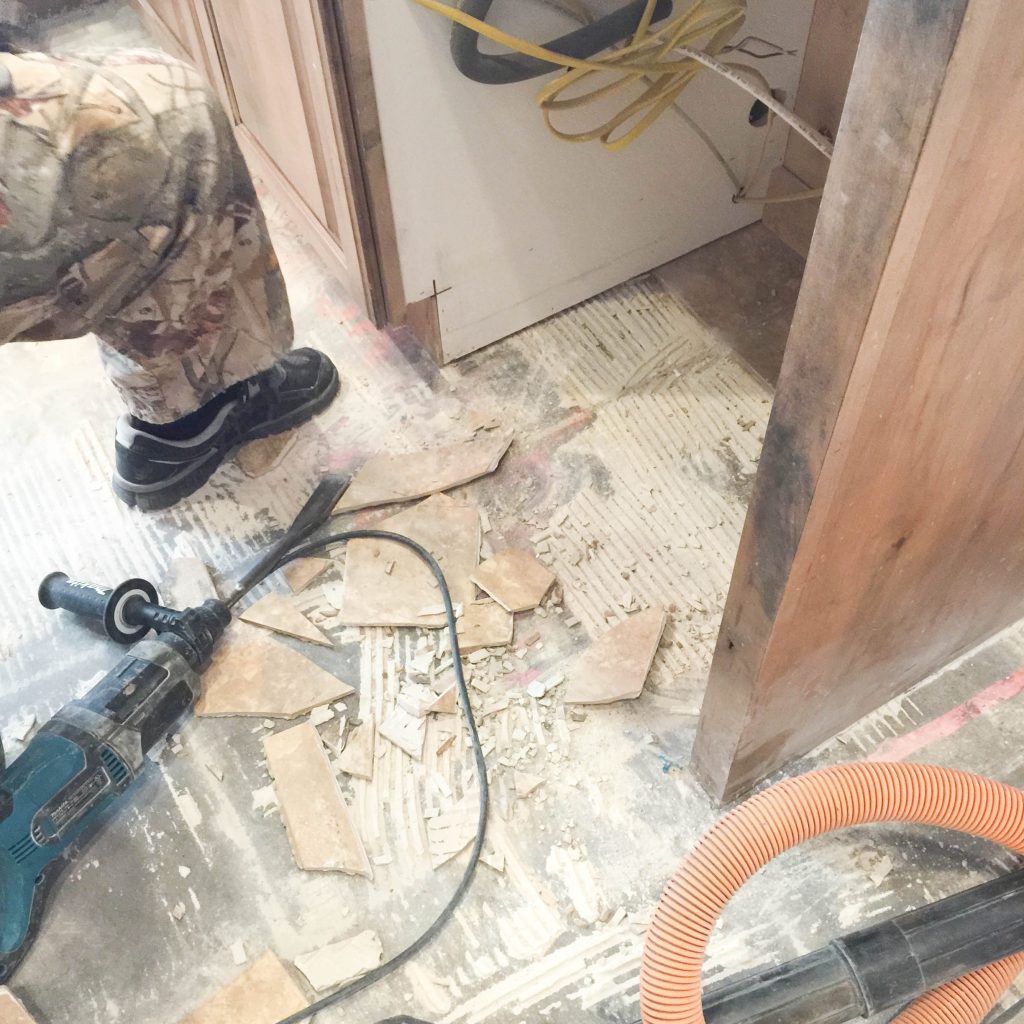
Step 3: Remove the tile from the edges of the room. Since it’s impossible to hit the tile close enough to the cabinets and along the wall with a sledge hammer, you need another technique for those areas. We found that the hammer drill worked better than any other tool. We tried using an angle grinder, but the hammer drill worked waaaay better.
TIP: The tile comes out much faster along the baseboards if you remove the baseboards first.
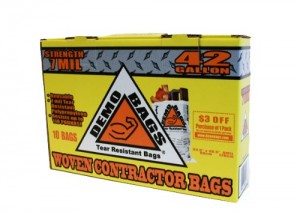
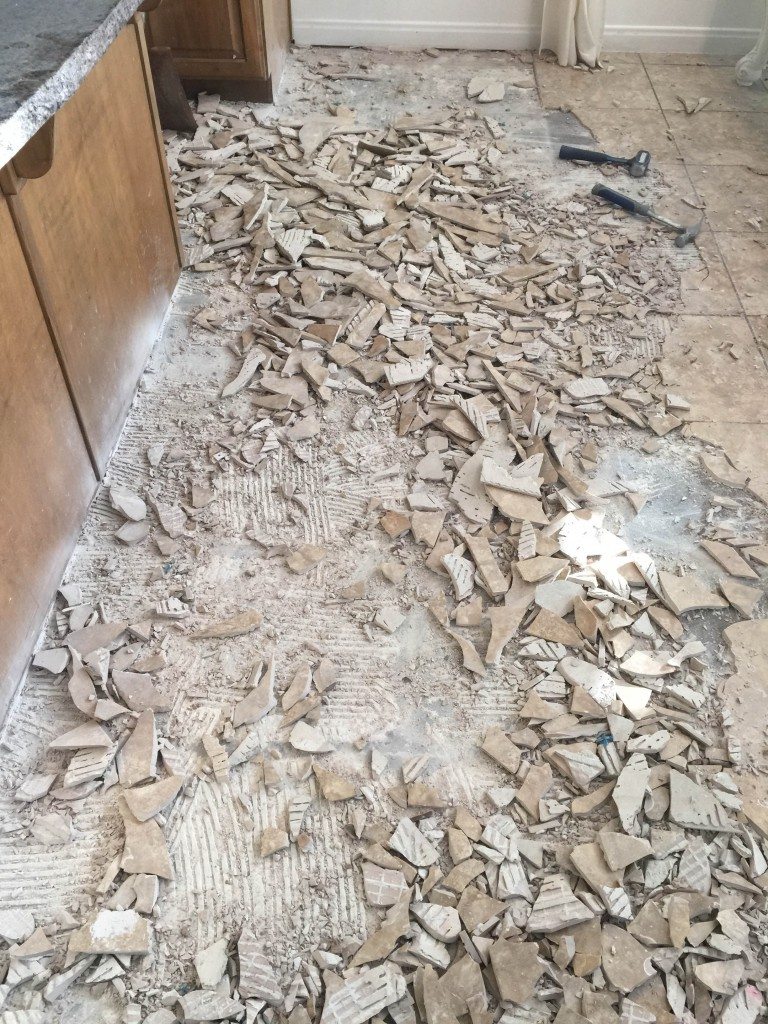
Step 4: Clean up your broken tile with your flat headed shovel. It works great to shovel them into the garbage. We used our rolling garbage can or the construction bags for this.
TIP: Be super careful. I sliced my fingers several times during this process. I was even wearing gloves and the tile sliced right through the leather and cut my finger.
![]()
The kids loved this part.
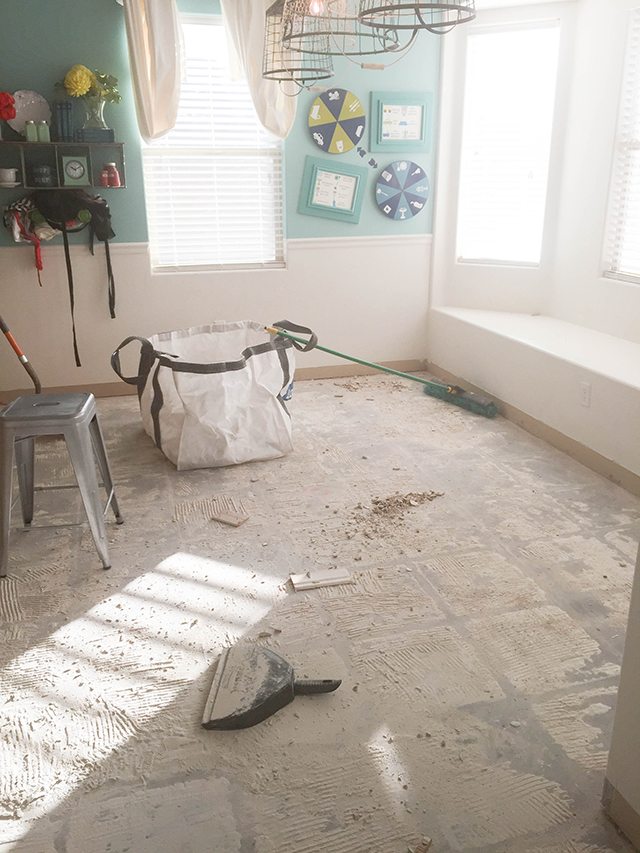
Sweep up all the tile and grout with the dust pan and broom, but don’t spend too much time sweeping. It’s a waste of time. As soon as you start scrapping off the thin set, the amount of dust will multiply by one million.
See how foggy this picture looks, it was taken after the dust settled all night, and there was still dust in the air.
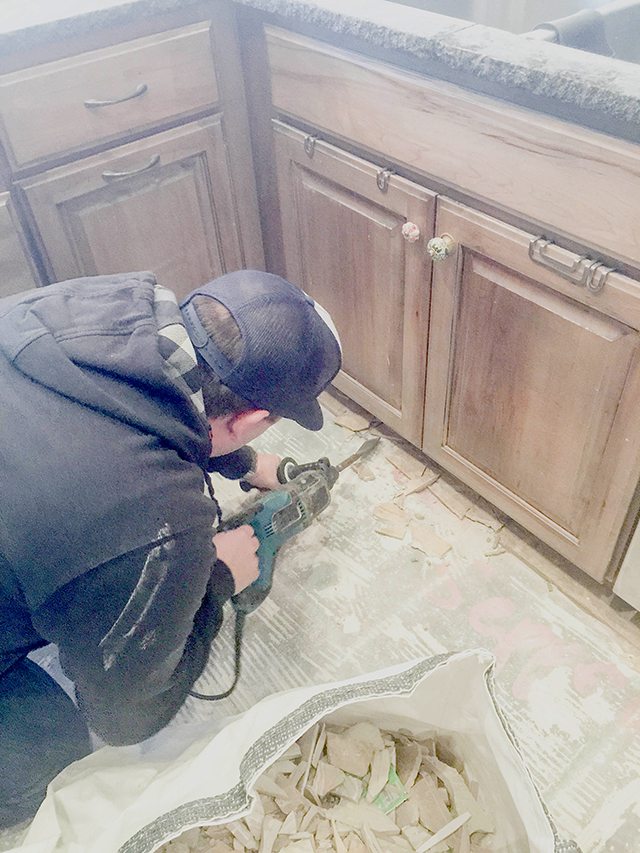
Step 5: Use your hammer drill/chisel to scrape off the thin set. After you have removed the tile, the real work begins. This is the part that I was 100% not ready for, but listen up, you can do it. It’s not that bad and it goes fairly fast once you have the right tool.
Tip: Wear a mask. It will protect your lungs from the dust. I forgot a few times, and I coughed a lot after that.
The thin-set will look like this, and in order to lay down new flooring, you need to scrape it until it’s smooth.
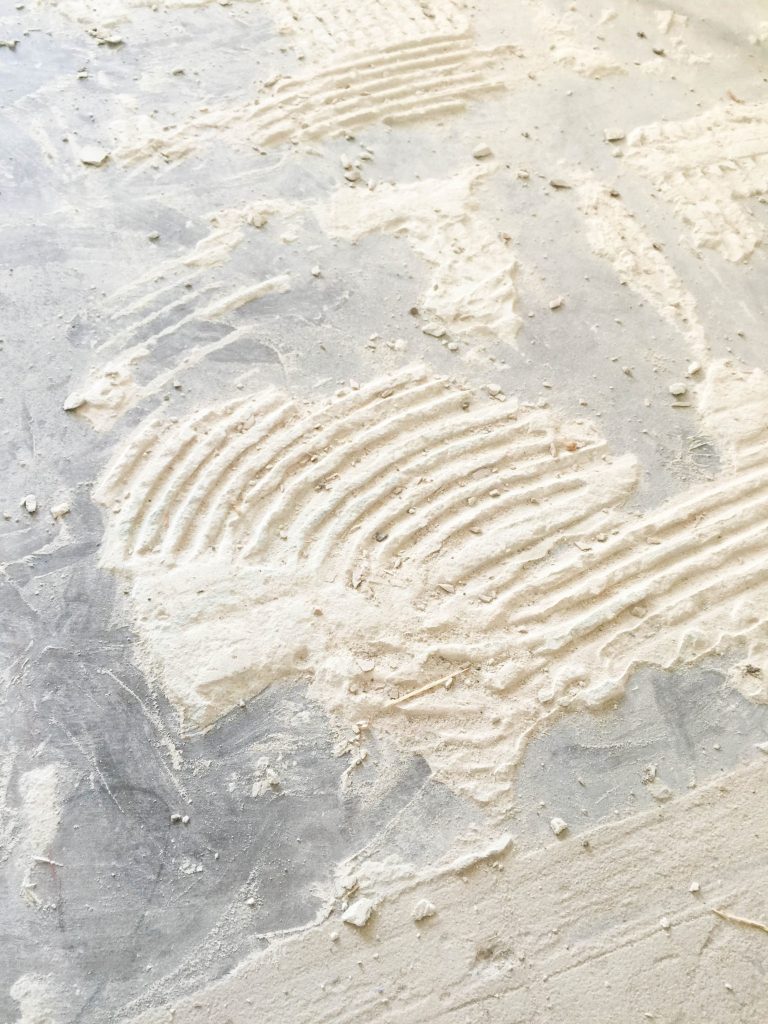
To do this, use your hammer drill with the tile chisel and set it to pulse.
Step 6: Make one last pass with the hammer drill and remove any thin set that is sticking up along the floor.
Step 7: Smooth the floor with the floor scraper.
Even after several passes with hammer drill, the concrete will still have some thin set. You don’t need to get every bit of it off, but it needs to be pretty smooth.
After you have done the scraping, you are done with the hardest part of the entire process.
![]()

A few of my friends and family have asked me if I would do it again myself. I think it’s too soon to answer that question. It’s kind of like child-birth. You can’t ask a mom if she’s going to have another baby right after giving birth. 🙂
In all honesty, I’m not sure if I would do the thin set scraping myself if I had the funds to hire someone. I’m trying to forget how much work it was.
We ripped out the dingy old carpet too, and I’ll post about those details soon. I’ve hated the crappy carpet in my house for years, and when we moved into my house it was a beige cave.
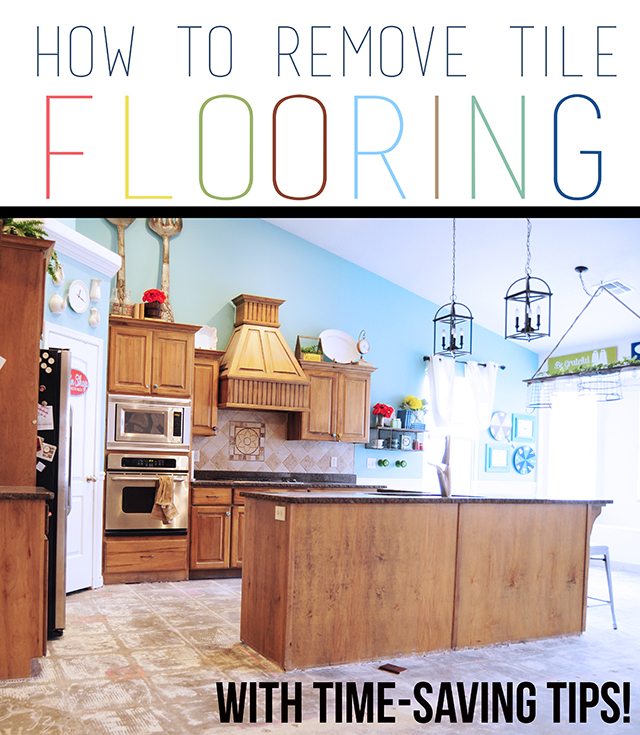
The wood flooring that we chose is absolutely beautiful. It’s changing the entire look of our house for the better!
Follow along in real time on Instagram.
xoxo,
Brooke
Look at the kitchen after! It’s a dream come true!

Holy mother of dust!
Very helpful post with the crucial info for me (“is it a lot of work? Y/N”). Now I am having second thoughts about re-flooring my bathroom. I must come up with an easier (lazier) idea. 🙂
I’ve verified that the solid core vinyl plank flooring can go right on top of everything (but carpet) and it is waterproof, so ok for wet areas.
I am priming over my ceramic tile in one bath with special primer (ask a real tile store for recommendations) and then just tiling over the top of it. The half bath I just have to get the small amount of tile off and I can unscrew the cement backer board.put down a new piece and tile.
There is a system called DustRam that is awesome! I did the tile grout removal mess in my bathroom – what a mess! Wish I had a DustRam contractor in my area , would use it in a heartbeat!
You are amazingly brave! Congratulations on a job well done! I think I would have been too terrified to try.
Wow. This looks grueling. Maybe someone needs to design tile or other flooring options which are not so hard to remove.
Be sure you change your furnace filter now. It is no doubt clogged and you don’t want to damage it.
Buy extra A/C filters too and change them every few days for a few weeks. Otherwise you will be fighting off dust for months!
You got a great tutorial here for those brave of heart, strong of body and short of cash. ???? tile tear out in our area is $3.00 – $4.00 soft depending on whether it is hand removal or a ride on dustless machine. So you have saved yourselves quite a bit of money!
I look forward to seeing the rest of the project.
How did you get rid of the refuse?
We bagged it up and took it to a nearby dump.
If you have a larger area try a “Bagster” . You can get them from Lowes and Home Depot. They are heavy duty fiberglass folding containers ;manufactured by Waste Management. Fill them up with construction debris and Waste Management sends out a truck to pick it up and carry it away. They’re kind of expensive but save a lot to time and work.
https://www.thebagster.com/default.aspx?gclid=CjwKCAjw1v_0BRAkEiwALFkj5h-OctM7lUHG5adJ1lUlRBZ9nyDYf6H5j7iw8_HtBP0tjauQ-pkUeRoCsRsQAvD_BwE
This is brilliant , I am a single mam and I’ve just bought a TLC home. Tiling is one thing that I want to remove and I have to close some doors in. I have been a bit afraid to try as I am unsure what to do or even get started. Your article has made me realize that you learn along the way and do research on the internet as someone has gone before me.
Thanks again for taking the time to share.
Hi Brooke Congratulations on a job well done. Could you please indicate how long did it take for the process, tiled area size and number of big and little helping hands?
This may allow me to plan my demolition work.
Cheers
Taking out the tile took a week of constant working. It was worth every ounce of effort!
That’s it! After reading I am laying floor on top of my old tiles!!!
Did you turn off the air conditioner when you did the removal? I recently had my upstairs bathroom retiled and the guy ran the a/c during the entire project. Two months later I am still seeing a lot of grainy dust on the furniture.
We didn’t. In hindsight that would have been brilliant.
Hi, I am glad I found your blog. You are making me hopeful, we can do it. We just started to remove our 865 square feet of tile. After we had to throw out Lumber liquidators 3 months old high formaldehyde laminate. We definitely are going to buy hammer drill tomorrow. Because so far we are using sledge hammer. And it is hard! After being exposed to a such high formaldehyde level we have become very sensitive to most chemicals including adhesive that was used for the tile, so we bought a misting sprinkler head and placed it in the house next to a spot where we are removing tile to prevent dust from flying up. It really works. Also did you try sending thin set with floor sender that’s what i saw on youtube, But we are not there yet. Do you have any advice on cutting out tile along built ins, it was built on top of the tile. Again thank you for your blog.
The hammer drill and bit will be perfect for going around built ins! 🙂 Good luck! It’s a big project!
Would like to see pic of finished project!
I added an after picture to the post just for you! 🙂
I so wish I would’ve read this post before having our downstairs tile ripped out. The amount of dust is indescribable and it just keeps coming. The man left the ac running because it’s super hot here but it sprayed dust throughout our whole house. I seriously don’t think it will ever be the same. I’ve been coughing up a lung for days now. Changing the air filters repeatedly is a must for anyone considering doing this. The end product looks beautiful but unless it’s an empty home, you will see a thick layer of dust on everything. I suggest moving everything. Taping every vent so it doesn’t get sucked up into the duct work. And do not plan on staying in the house while working… Unless all of these tips help and you don’t end up with a serious dust problem. May the odds be ever in your favor 😉
Jenna. I am in the same boat as you. I had this tile project done back in December of last year and my house is still not the same. I see a thick, grainy dust everywhere. I even had to have a new a/c installed as my a/c was badly damaged due to all of the debris. I think I may need therapy to recover from the trauma this project has caused me. Don’t think my house will ever be the same either. 🙁
They do have that whole ventilation cleaning trucks. They vacuum out all your duck work, and that wouldn’t your problem with dust. We did it when we moved in our new house in the truck took out so much refuse out of our vents it was amazing
I watched a remodel on HGTV. Never knew this until seeing on the show. After the entire remodel, couple had a company come in and clean the entire home. This was not your Merry Maid service but professional equipment for cleaning ducts and drawing air out of the home. Afterwards the family moved in. How easy is this to find this service in any state I dont know but worth the cost to sleep in a clean home.
Hi! We will be tackling this project in our new house before we move in . I have read that its a good idea to cover the a/c vents to prevent the dust from going all over the house. But how long did it take for all the dust to settle down after you finished removing the tile? Just trying to plan out because we also need to paint the inside of the house. Thanks!
If you can, I would recommend painting FIRST for that very reason. But if that’s not possible I would say it was at least a week before it all settled. But I still found dust for months after everything was done! Ha! Hope this helps and best of luck! xo
After reading this blog and numerous other internet resources we decided to tackle removal of about 550sf 20×20 ceramic tile over concrete floor. Many of your tips were invaluable – safety equipment/clothing, turn off A/C, use power tools, demo bags.
We rented a 20 lb (heavy!) demolition hammer from home depot with wide chisel bit for the tile and scraper bit for the thinset. Tile came up in about 6 hours including filling demo bags with broken pieces. Scraping the thinset took an additional 8 hours though we had some difficult spots where thinset was put directly over old vinyl adhesive from before the tile. The first day was 9 hours for 2 people and we were physically exhausted from the heavy tool and carrying out 40 bags filled to 40-50lb – so tired we could not continue the next day and took a few days to rest before being able to finish. Having more people to take turns with the tool and run it continuously, we probably could have gotten through it all in a single day.
During thinset removal it also helped to wet down using a 1-gallon pressurized sprayer, the kind you would use to spray for weeds or insects, but use a brand new one that never had any other chemicals in it. This kept the dust down a lot and also softened the thinset somewhat. Also put a fan blowing exhaust out the nearest window to get the dust out as fast as possible.
Contractor estimate for demo (550sf x 3.50) = $1925
Our cost: tool rental 210 + demo bags 50 + sprayer 13 + scraper tool 30 + dump fee 35 = $338
Savings: $1587
It is definitely a tough job but didn’t you feel so proud after? 😉 I LOVE the info you shared above too, so thank you for that! Best of luck with the rest of your fun project! I’d love to see what you do!
THIS MAKES ME SO HAPPY! WAY TO GO!!!!!
Omg, we just went through this process. What a nightmare!! Our entire upstairs (which we closed off) was covered in dust. It looked like it snowed. I cried. I have thoroughly dusted 3 rooms so far.
We still have areas with thin set but had to return the floor sander we rented for 24 hr. I will try the scrapper. Ugh I feel your pain. P.s I too started off wearing flip flops, shorts, and t shirt. ?
This is beyond helpful! Thanks for the details. Even the comments have been helpful. At lease I now know if I take enough drugs and consume enough alcohol to CONSIDER THIS, I will know what I’m in for. But what about those self-propelled stripping machines with the blade on the front? The claim is they take up ceramic and porcelain tile.
I’m sure the cost of removal will be more than the new flooring with installation. I really want to DIM.
Thanks again.
A machine is definitely worth looking into. It’s a beast project.
Good job, looks terrific. I am taking the plunge and your story serves as good motivation. Wish me luck.
Good luck!
Even if you wish to tackle this project yourself, don’t expose your children to it. Ship em off to grandma’s or send the mom with them on a trip for that time till you get the resulting silica out of the air supply and home. You may want to check out the terrible consequence of such projects and google “silicosis” of the lung or just bite the bullet and pay the cost of a dust-free tile removal company you google in your area.
I agree and wear good quality dust masks.
Oh my! I’m ecstatic to have found your post! I have “virgin” oak floors under ceramic tile and linoleum, and I am DYING to expose and finish those beautiful oak floors. Any tips on how not to destroy them?
Brooke
Wow, that would be so amazing, and a LOT of work. I would honestly ask a professional how to do it, because in your case it may be impossible to get all of the thin set off the wood without sanding it with a floor sander. But, the problem with that is that as soon as you hit the wood, it will sand down those floors too. but I think they would need to do that anyway. Linoleum glue is a bugger to get off too I would imagine.
Don’t worry to much about getting every bit of adhesive off the wood just take the floor boards up turn them over and sand them to a nice finish
You have been INCREDIBLY helpful!! You’re right – this is a sucky, not easy job. We tackled a small entryway years ago; we were traumatized. BUT, we were completely unprepared. We want to do several upgrades in the house, and we are working on a budget. So, some of it hs to be done by the amateurs (us). Thank you for your honesty – and humor! ?? Kitchen is beautiful, BTW!
Thanks for such a great breakdown of this project. What kind of sub-floor do you have? We are almost finished laying wood look tile in the living room and hallway and will have to tear out tile in the dining room that was laid directly on concrete slab. I’ve read this is a beast to do!
Yep, it’s a concrete slab. Good luck! It will be worth your hard work in the end!
It ‘s really great to know.Thank you for sharing.
This looks grueling. That would be so amazing, and a LOT of work
Thank you so much for the tips and insight. I want to tackle the same job but I was afraid that it may be too much…it’s just me. I am a new DIY’er ! But having the info you provided, with the tools and clothes info, I think I can, I think I can, I think I can!!! Thanks so much! God Bless!
I have done this in the past and swear I will never do it again. In our new home we paid Cutting Edge Tile removers in Houston to do it. $2.00 a square foot. Best money I ever spent. No dust. Their system really worked. Saved all of the back breaking work and no dust. My husband didn’t think it would really work but it did.
Great to know! We bid it out here in Southern Utah, and it was much higher than that! Plus they are months out on booking!
Hi Brooke,
Thanks for sharing your knowledge. As a landlord and rehabber for over 40 years I’ve done just about every imaginable rehab job there is. Even put down lots of ceramic tile. Never tore any up until now. This project is in my own home. In my late sixties with bad shoulders and knees I got a bid to do it, but was hit with sticker shock. So as always I decided to tackle it myself. After 3 hours hammer, chisel and pry bars, I got only 3 sq. foot of the double layer up, I took a break and found your website. That was at 9pm. By 9:45 I was at Lowes buying a Hammer Drill. What a blessing that was. Home by 10:30 and had to try it out. In ten minutes I had another 3 sq. ft. done. Have lots left to do but now it’s not so bad. Just want to say thanks again for posting your experience. Never to late to learn. 🙂
Mike
Your comment just made my whole day! I am so glad to have helped save you some time! xoxo good luck with your project!
I am inspired by your work and got some great ideas. Thanks and keep sharing 🙂
Hi! I should’ve clicked the link before I went to Home Depot and I would’ve seen the link to a rotary hammer, but I bought a hammer drill and that makes a circular motion! I do know that your description says “pulsating” hammer drill, but it is actually called a rotary.
Nice job! You recommended dust masks without giving a reason. You’re whole family is seen working in this mess without the masks. The reason you want the masks is called silica. A previous poster mentioned it. When you see a knowledgeable person cutting tile they use a wet saw, (a saw that wets the cutting material to eliminate the dust from 5he air *engineered control). A dust mask is insufficient against these minute particles. You need a respirator with a particulate filter (@$100), and I recommend a suction fan with a hose. I work heavy construction in the NY/ NJ area, pile driving and rock drilling (sub foundation) we encounter a lot of silica… o have t hugged my kids first thing after 2ork their entire lives due to fear of exposure. This stuff is worse than asbestos. Google silicosis, silica exposure, lung lavage, NIOSH silica (dust)…..erc. KEEP KIDS SAFE!!!
I just went through this process and I had to laugh at the suggested band aids in your list. My hands looked like they went through a grinder. The tile shredded my gloves too. Not only did I take up the tile, but the cement board and residual glue holding that down. (We had to even up our sub flooring) Three days of blood, sweat, and tears. We are getting ready to lay hardwood and I know it will be worth it.
You are one tough cookie! It will be worth it!!!
Sorry to rain on your parade. Did you verify the absence of asbestos before venturing into this project? Asbestos is an extremely dangerous material, especially for the children. Please don’t take a chance; have the tiles tested.
I am currently going through this process right now! I just had my kitchen floor removed and I was so shocked to come into the mess of dust everywhere! Nothing was covered up except my TV and couches, thankfully! We are having a time getting rid of the dust! How did you do it???
Oh man it took weeks to get it all out! I tried to vacuum it, wipe it, and even sweep it! I’m not sure anything worked fabulously.
Where to rent linoleum removal tools? If you like to DIY, you should own a hammer, chisel, putty knife, utility knife and other smaller tools mentioned above. Fortunately, you can rent larger floor strippers from The Home Depot. These larger strippers can vastly decrease the time it takes to remove linoleum floors.
Duct tape a shop vac hose near the chisel while operating, helps collect a lot of dust before it goes airborne.
We are removing tile now for the second time and the advise you gave is great. Removing tile is hard hard work and makes the biggest mess, but if you are on a budget it will save you a ton of money. Gloves are also a must have to avoid blisters and cuts on your hands.