


Year at a glance FREE Printable Calendar
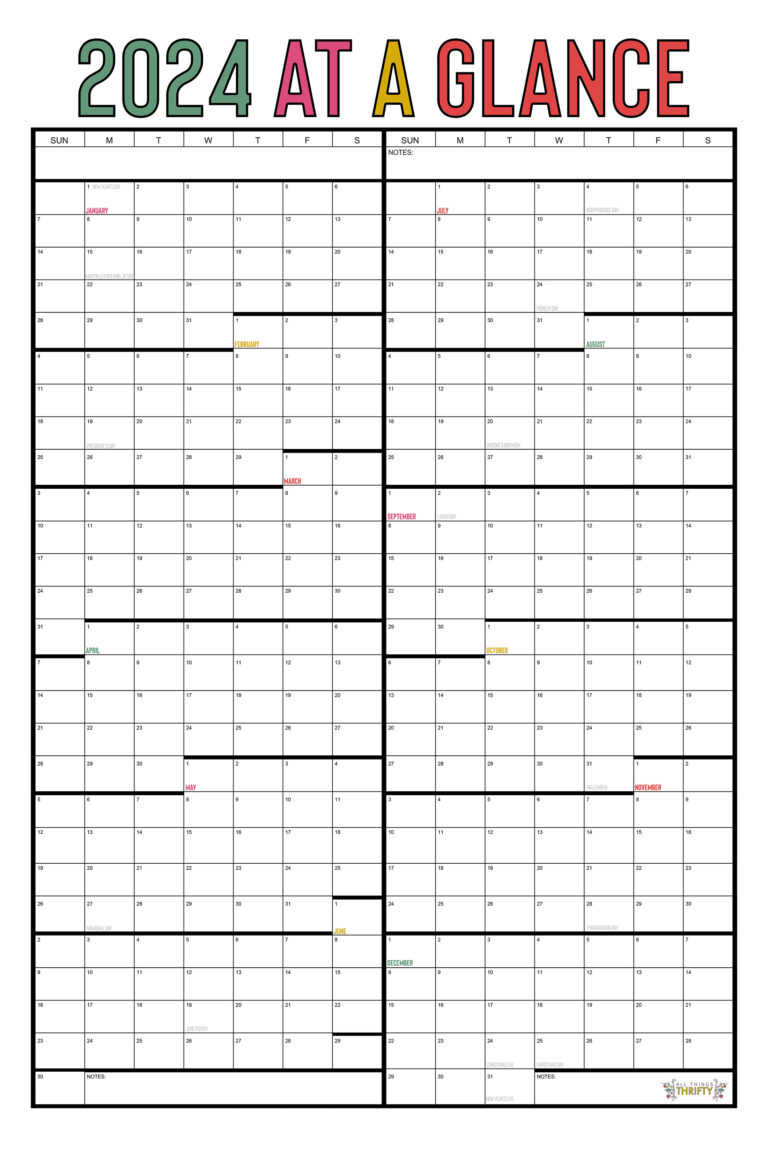
Hey friends!! Happy NEW YEAR!!! I am pleased to announce that back by popular demand is the year at a glance FREE printable calendar for 2024! These things are my saving grace. I just LOVE being able to see
Published on December 27, 2023