
Hi! It’s Jessica from Lou Lou Girls! How’s your Christmas prep going? Are you freaking out yet!! Only 8 MORE DAYS!!! Holy cannoli! I did all my shopping online this year, so I’m feeling pretty good about it, except one of the MAIN gifts hasn’t arrived yet, so I’m crossing my fingers that it gets here in time, or before we head out of town for holiday shenanigans! This year was fun, because we moved into a BRAND SPANKING NEW HOUSE , you can see it——->here! Yippee!
And, now that I have a garage, I can FINALLY do some fun DIY projects! The last 8 years, we’ve lived in a town home, with no garage, and frankly, no space to do anything fun like this! So now I’m going crazy with fun ideas. I thought it would be fun to make a HUGE Joy sign for our porch, since we don’t have many outdoor decorations.
This project is SUPER simple, and can be made for under $30! YAY! I love it when things are fun and thrifty! Can I get an amen from all my All Things Thrifty sisters and bros.!?
So let’s get this party started. This is how we, mostly my hubby, did it!
1- Start with a piece of MDF board. Mine was left over from another DIY project, so it was basically free, right?! You can get one at your local hardware store for only $14 for the whole sheet, and they’ll even cut it for you if you go to Home Depot! I used about half for this project, so I’m counting it as $7.
2- Find an image that you like online. I just googled ‘joy’ images and found one that I liked. I found the free template for the border on my sign here. Or, you could create your own, if you’re tech-savvy like that!
3- Once you have found the images you like, hook your computer up to a projector and project the image onto the board. Then trace the image onto your board with pencil.
")
4- Now get out your jig saw and cut along your border. I had my hubby, Mike, do that for me, because I’m prone to cutting my fingers off!
")
")
")
")
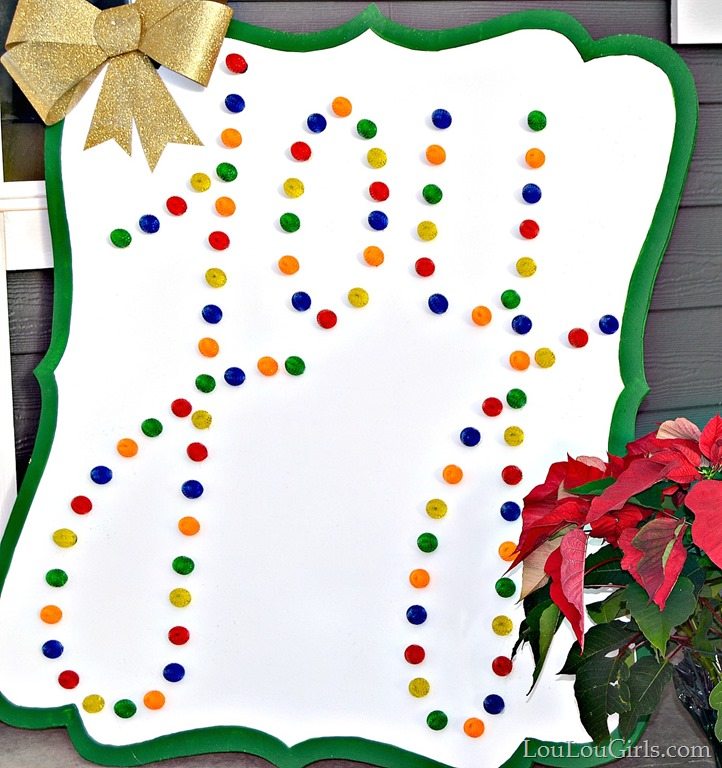
5- Paint your board. I used some left-over white paint to paint the board, since the lights were multi-colored, I wanted to make sure each color would stand out in the day time!
6- Paint a border on your sign. I just used an inch wide paint brush, and green craft paint, and carefully followed the border. If you’re nervous about getting a straight line, you could project a smaller version of your border image onto your board, and trace it, so you have a guide.
7- Put the lights in. First you need to screw off the bulb so you can put the back through the board, and then screw the bulb back on from the front. Some of the bulbs were a little loose, so we used a little hot glue to secure them, since the lights are LED, they won’t get hot, so we won’t have to worry about them melting the glue again once they’re plugged in.
")
")
8- Add a hinge to the back so it can stand on it’s own. We got ours at home depot for $3 and used scrap wood! Screw the rectangle piece into your board, and the triangle piece into your kick stand.
")
")
You’re done! It’s so easy!
")

Here are some more fun ideas from Lou Lou Girls! We’re on Facebook/ Pinterest/ Google+/Instagram/Twitter. Come party with us, we’re crazy!


Chewy Salted Caramels Dipped in Dark Chocolate
![christmas minute to win it games_thumb[2]](https://www.allthingsthrifty.com/wp-content/uploads/2014/12/christmasminutetowinitgames_thumb2.jpg "christmas minute to win it games_thumb[2]")
Ooo this is so cool! I thought it would be more complicated. Love it!
<3 Kelsea | Kels Shark
Thanks Kelsea!
So cute Jessica!!
Thanks Steph!;)