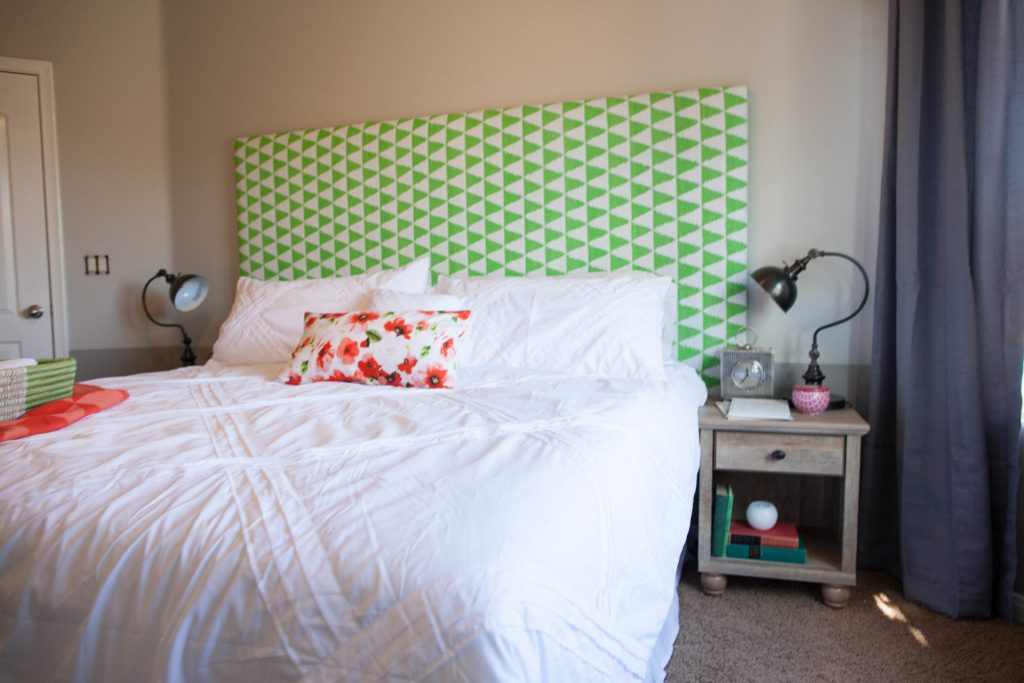
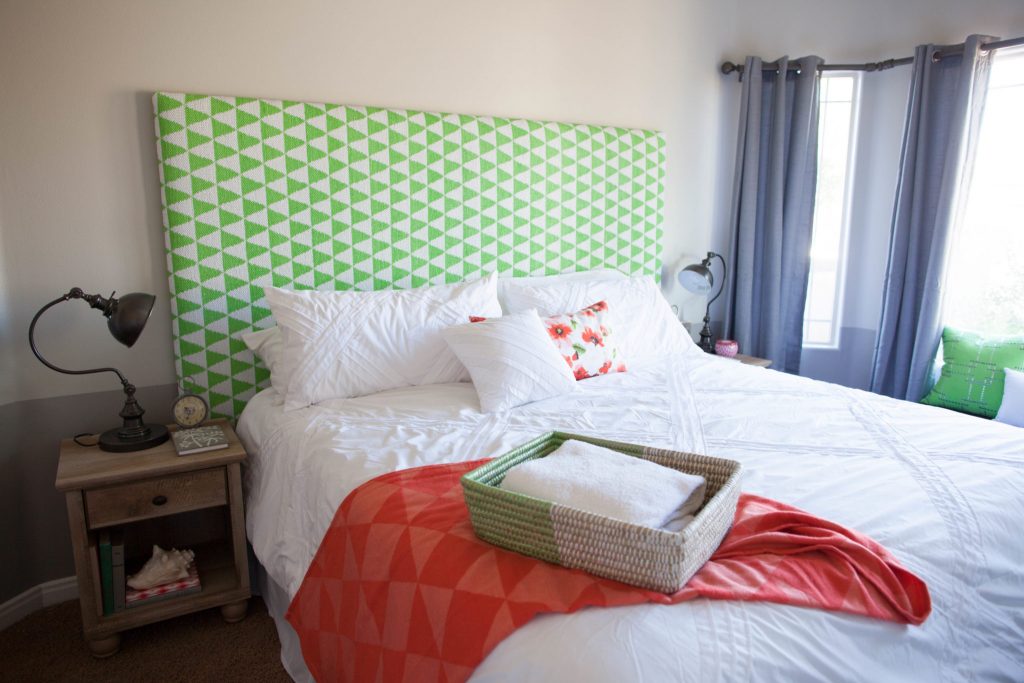
Our guest room is such a fun and colorful room, and guests have told me numerous times how welcoming it feels. That makes me so happy! In fact, check out my post about guest room essentials if you have a minute!
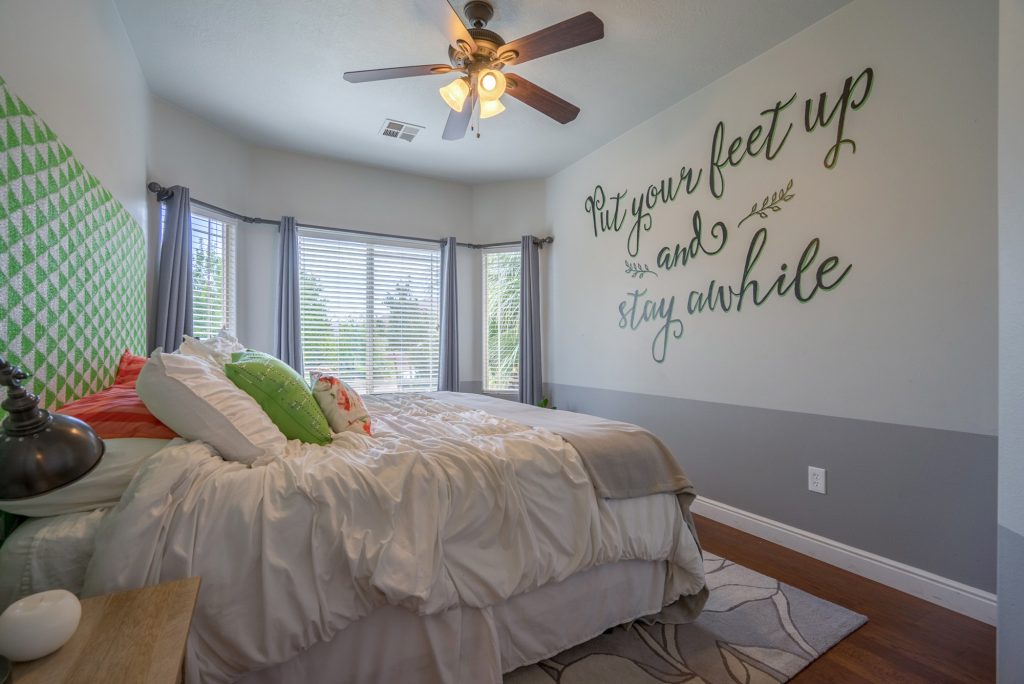
The headboard in that room was kind of a fluke plan, but it turned out great. Sometimes you can’t control the way a room turns out 100% in the planning stages, but it always turns out better in the end because of all of the craziness that happens along the road of of the decorating process.
I ordered this rug from RugsUSA {nope not an ad} and when it came it was PLASTIC. So beware, when a rug says it is 100% polypropylene, that means plastic. I did not know that. Good times.
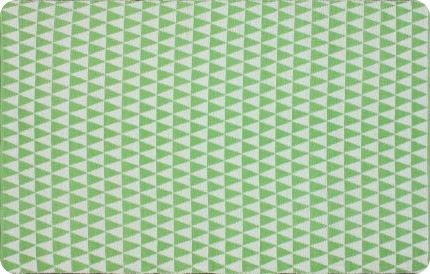
So after it arrived, I changed gears and adjusted the bedroom plan. I was happy with the price {I paid $78 with free shipping}, and I was happy with the color. It was perfect.
So instead of using the rug on the ground, we made it into a headboard. It is perfect and it was extremely inexpensive.
Supplies needed:
4X8 ply wood sheet
A King-sized foam pad
A circular saw
A pneumatic staples and staple gun
Scissors
D-ring Hooks for installation
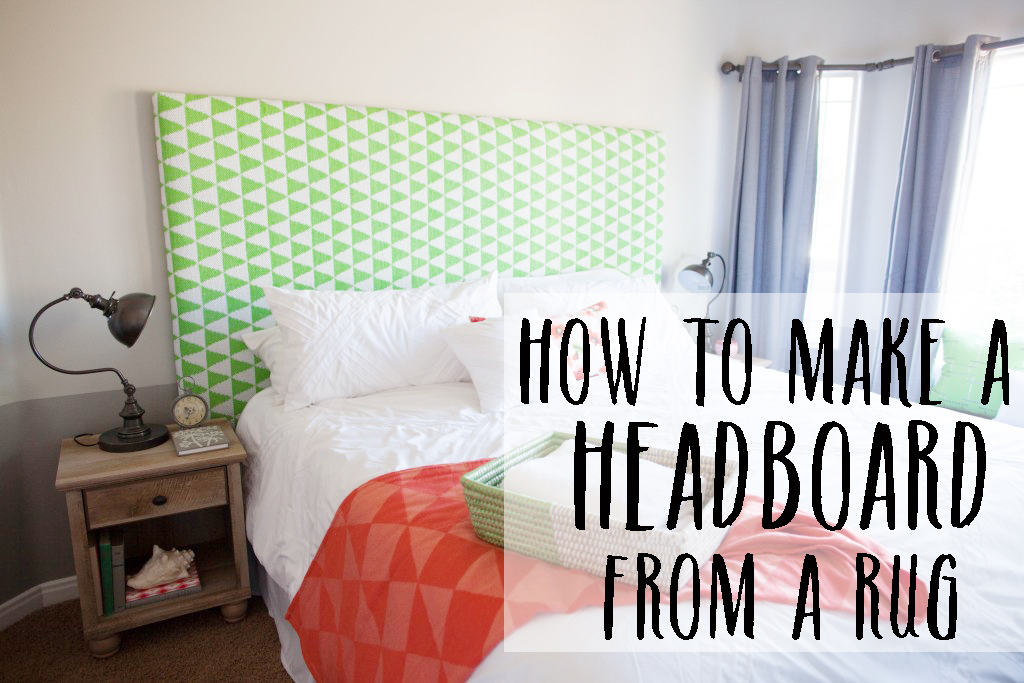
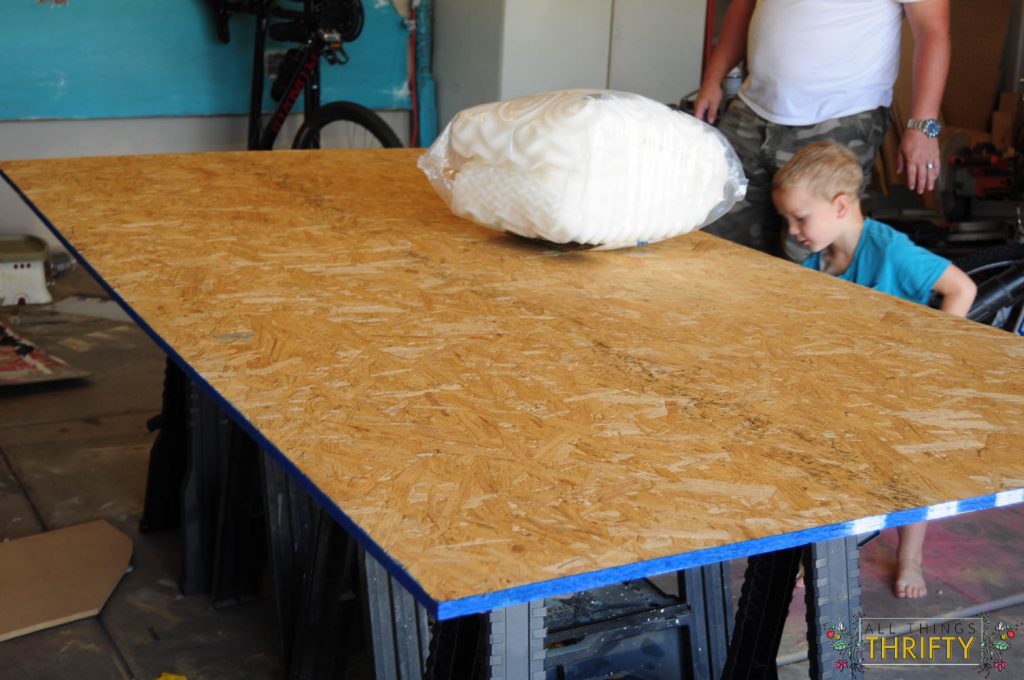 Step 1: Cut your board to the width that you want. I wanted my headboard to stick out past the mattress, so we cut ours 86 inches wide. The mattress in that room is a king size, and I wanted the headboard to be 5 inches wider on each side.
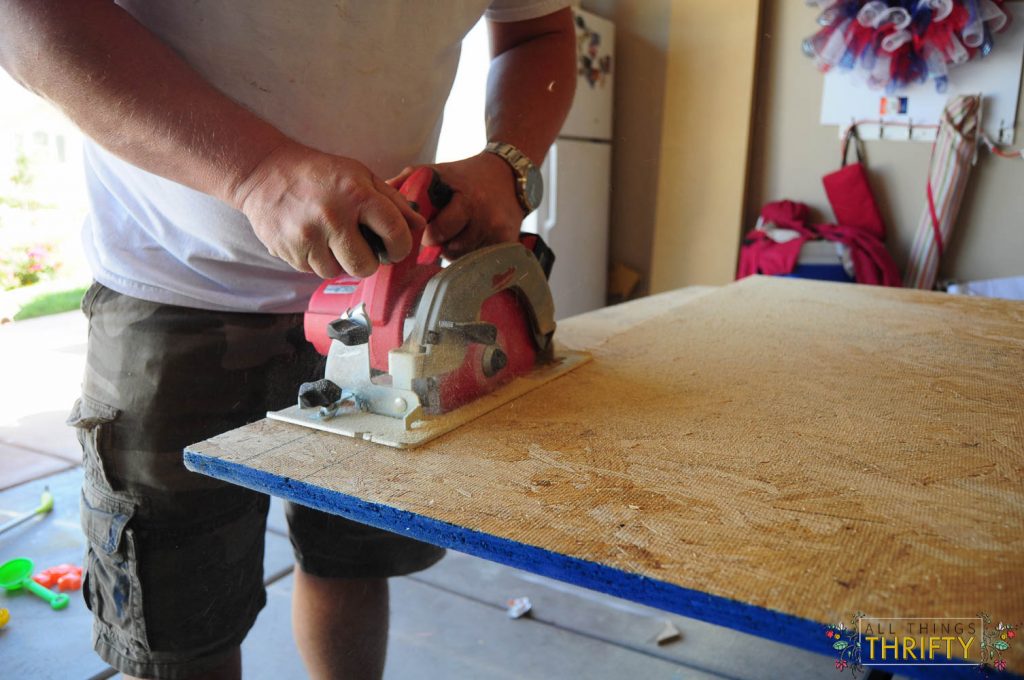
We left the height 48 inches.
Step 2: Next, lay out your fabric and your foam pad over your board and adjust the rug so that the pattern is how you want it.
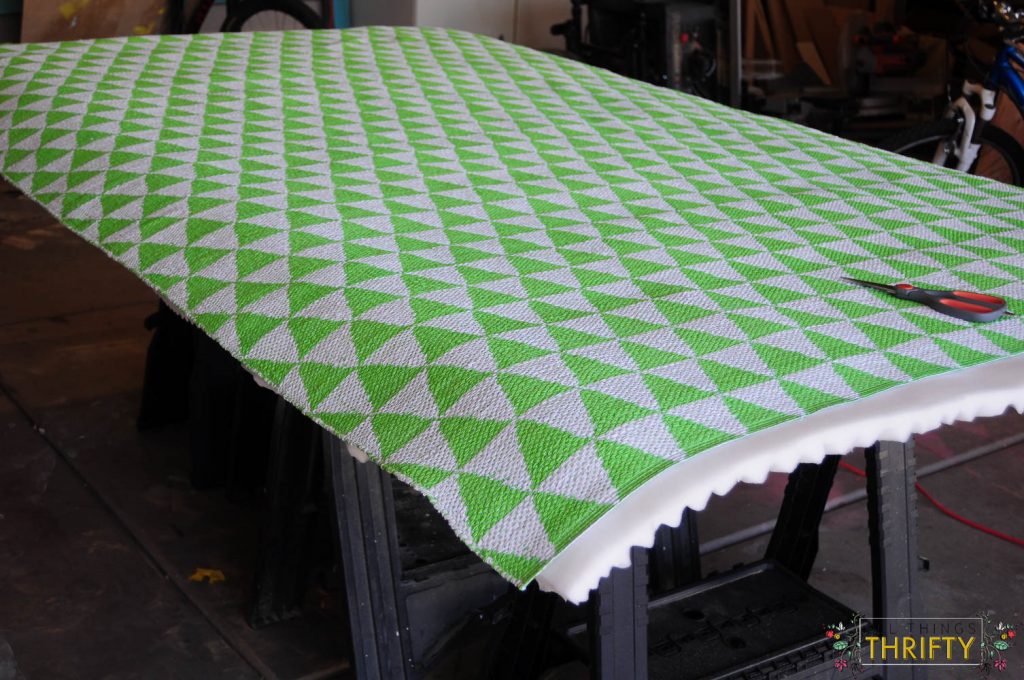
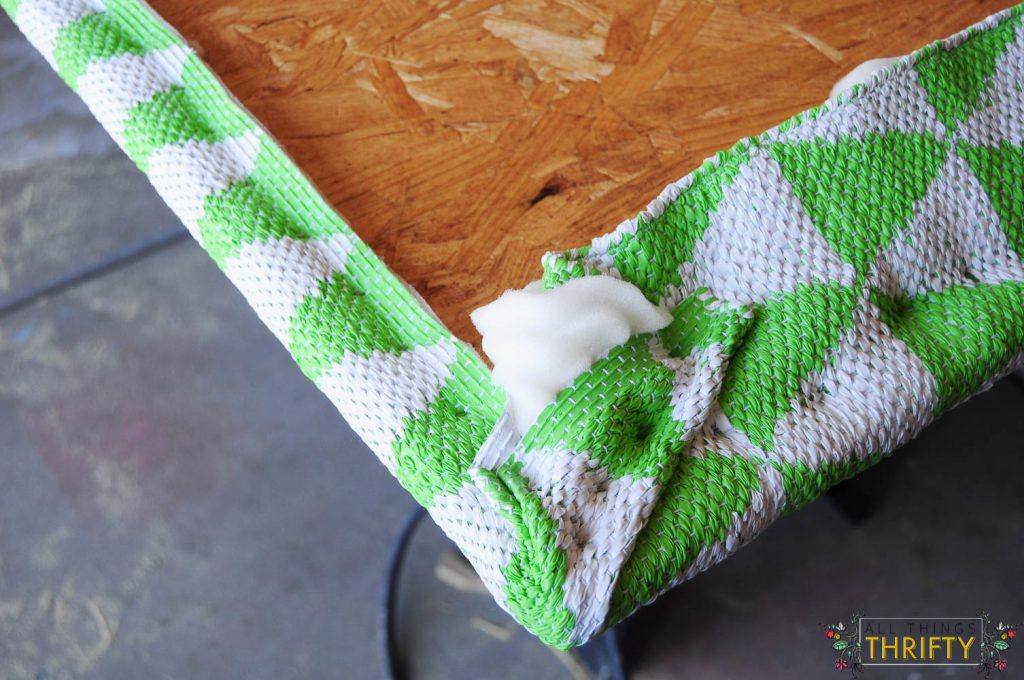
Step 3: Trim your foam with heavy-duty scissors. This makes it easier to staple to the ply wood in the long run.

Step 4: Flip your wood over to make it easier to staple, and use the instructions that I explain in THIS tutorial about upholstering benches to staple the rug to the ply wood. Upholstery is not hard, but I suggest you read that tutorial.
Side note: Make sure your staples are not too long. you don’t want the staples to come through the other side and poke someone while they sit in bed. We used 1/4 staples.
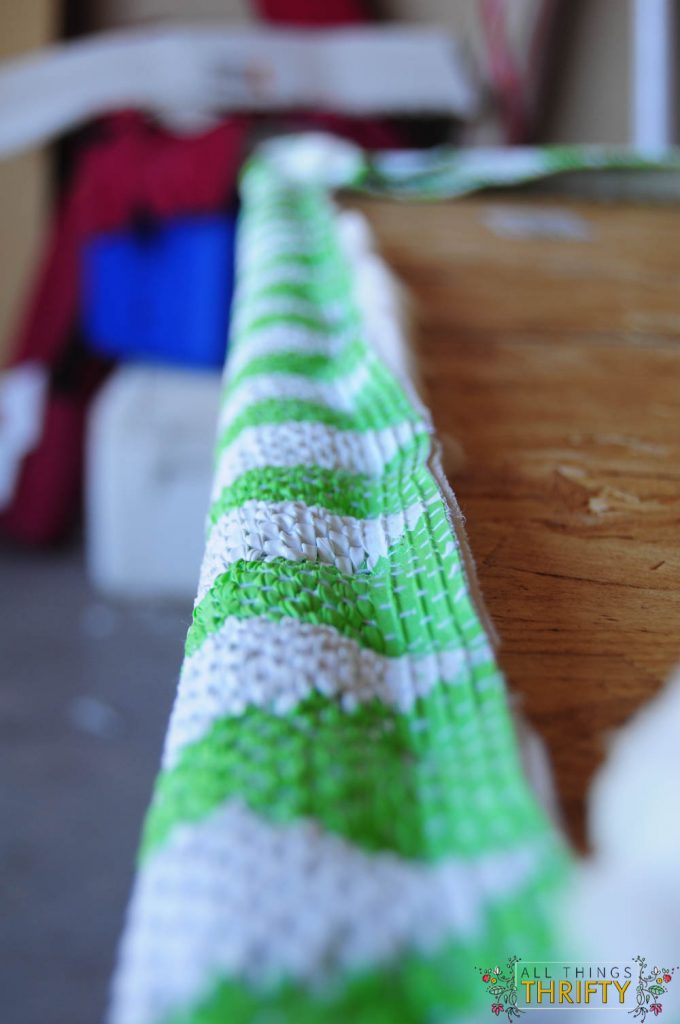
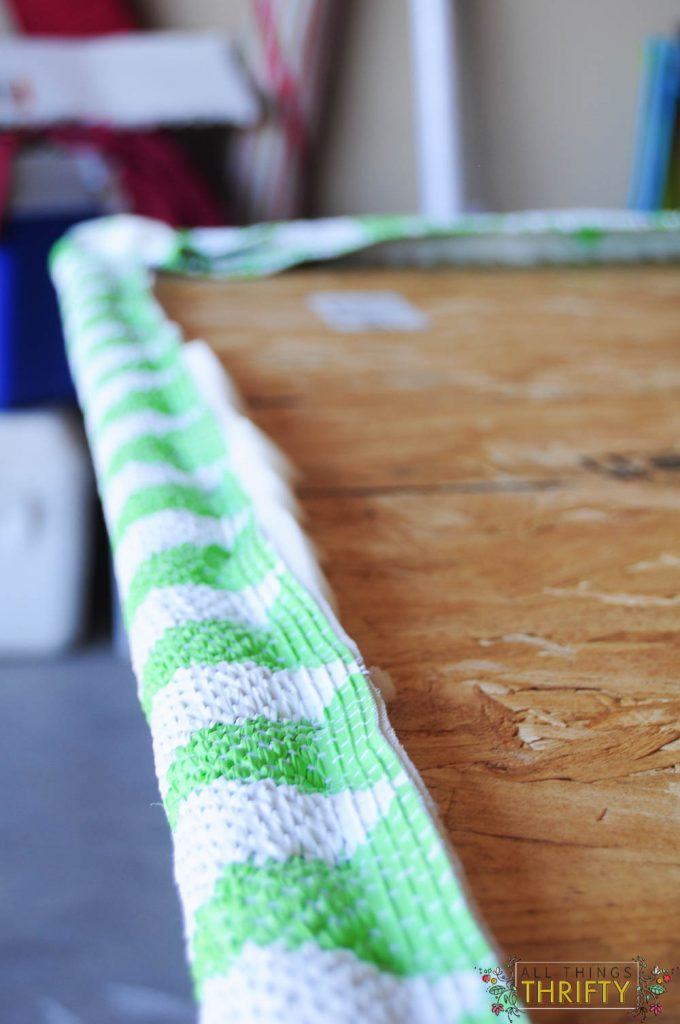
The back side will not be pretty, and you don’t want to cut your rug at all. Cutting the rug would result in an unraveling disaster.
Continue to staple the rug to the ply wood all the way around {again, using the order that I explain HERE.}
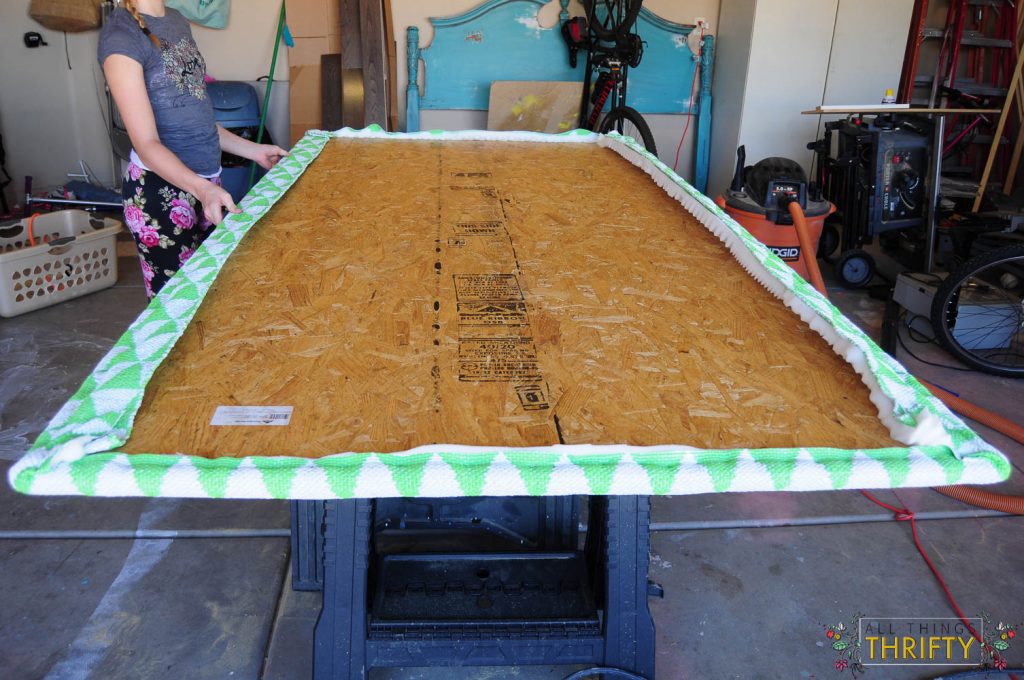
The upholstery process took us less than 15 minutes from start to finish.
In order to use a rug, it needs to be thin enough to bend all the way around your wood. So, if your rug is super thick, it is probably not the best idea to upholster anything with it.
Total cost:
$78 for the rug
$25 for the foam pad
$25 4×8 Ply wood sheet
$2 D-ring hooks for installation
$130 TOTAL
For a king sized headboard, I think that’s pretty darn thrifty!
xoxo,
Brooke
Happy Monday!
HI! I was just wondering how thick your sheet of wood was? BTW, as an architect, I can tell from your photos that it’s not plywood–it’s what’s called OSB (oriented strand board). Nobody will care, but I thought I’d share something I picked up in 5 years of architecture school! 🙂 Have a great day!
This turned out gorgeous! We have been talking for a while about getting a new bed because ours is hideous and this is the perfect solution!
I love how your bedding coordinates with the headboard! The shapes! The colors!
You’re a genius! I’d never think of upcycling a rug into a headboard. It looks so cute 🙂
You are so creative! I love how it turned out!
Love the headboard! Great idea! Did you hang it on the wall or is it sitting on the floor?
We hung it with D ring hooks into studs. 🙂
Love a thrifty find! Looks awesome.
Love it, and just gotta say, looking at the rug for more than a second makes it appear to move rapidly back and forth.