When it comes to chalk painting, one question I get asked a LOT is “Do I have to strip (or sand or prime) my piece before painting?” The short answer is NO because a good quality chalk paint will bond with virtually any surface (wood, metal, laminate, tile, fabric, etc.)
HOWEVER…
If you want a beautiful looking, and feeling, piece at the end of your efforts, there are times when it pays off to prep your piece by either sanding, stripping or priming…or a combination of all three.
This was one of those times!
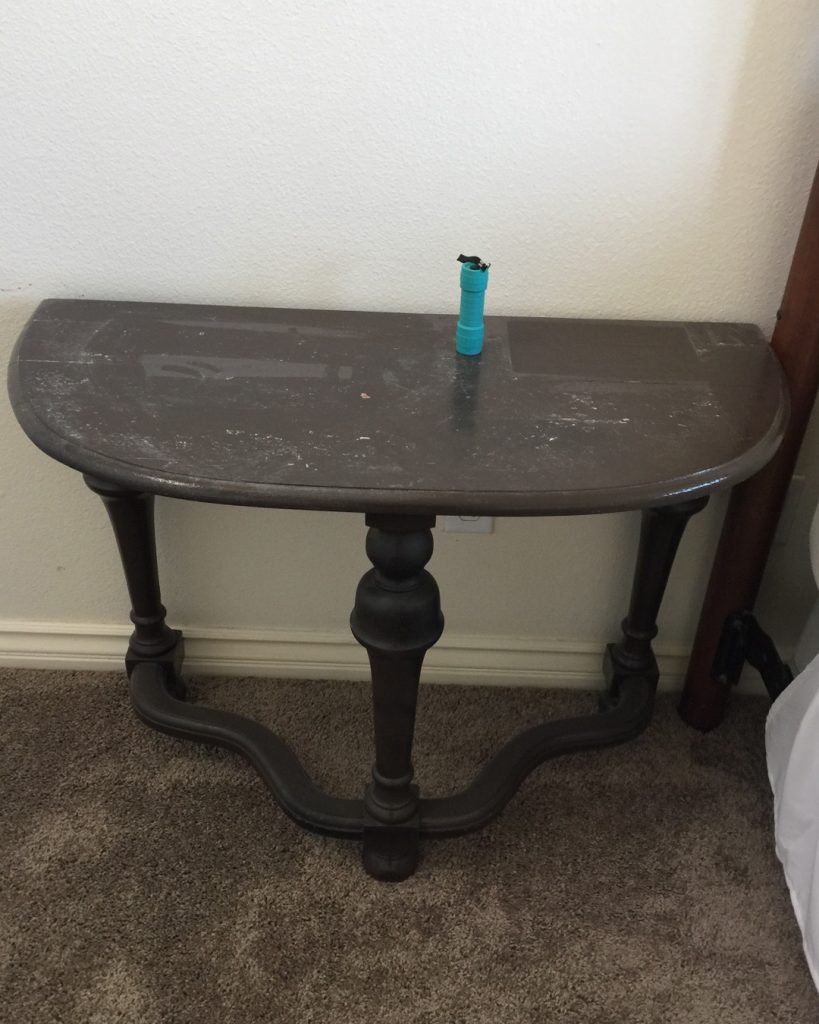
My husband snagged two of these darling little tables when he helped his parents move recently. Sadly, they had been spray painted! As if that weren’t enough, the spray paint was brown, drippy, and peeling off everywhere.
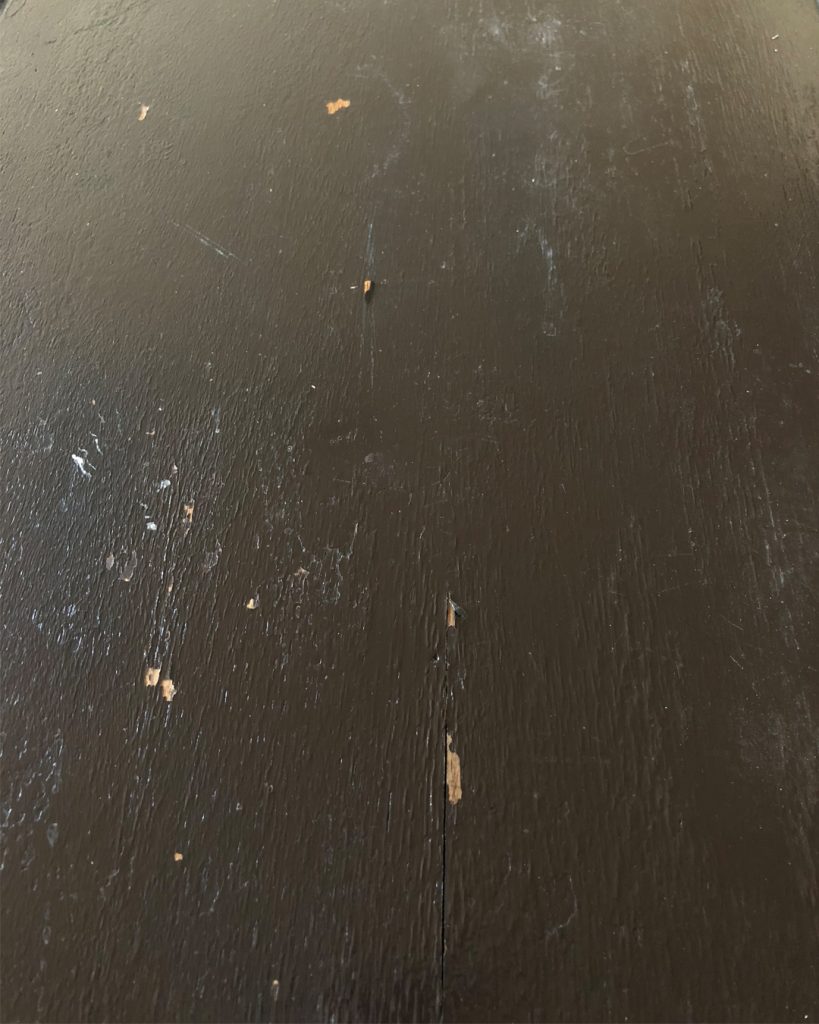
Simply painting over it wouldn’t have smoothed out the gloppy parts, and it wouldn’t have solved the problem of peeling and chipping paint.
As much as I hate stripping furniture, it was necessary for this project!
Here’s what I used:
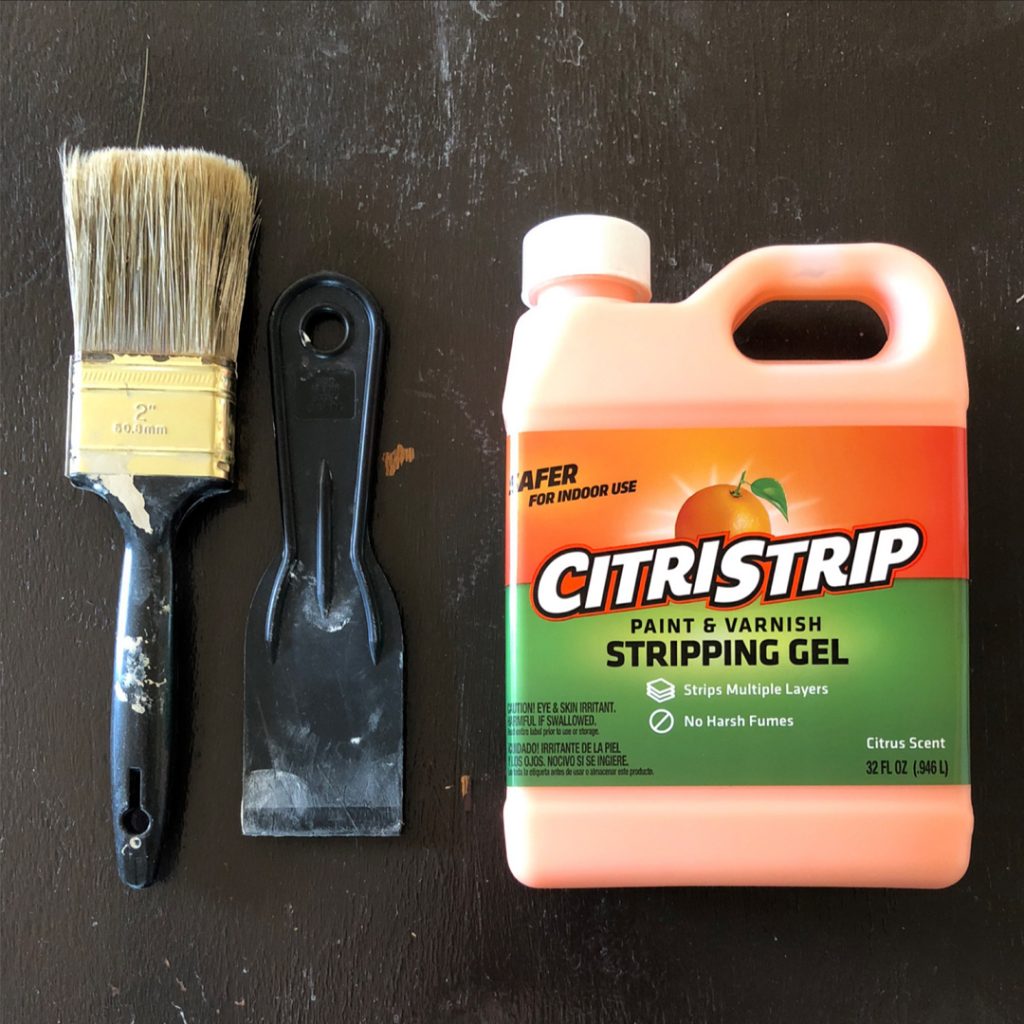
- Citristrip (this is less harsh and doesn’t have the strong smell of other stripping products.)
- Plastic Scraper
- Old Paint Brush (don’t use your good chalk painting brushes!)
- Gloves (not pictured, but super important)
Optional (not pictured)
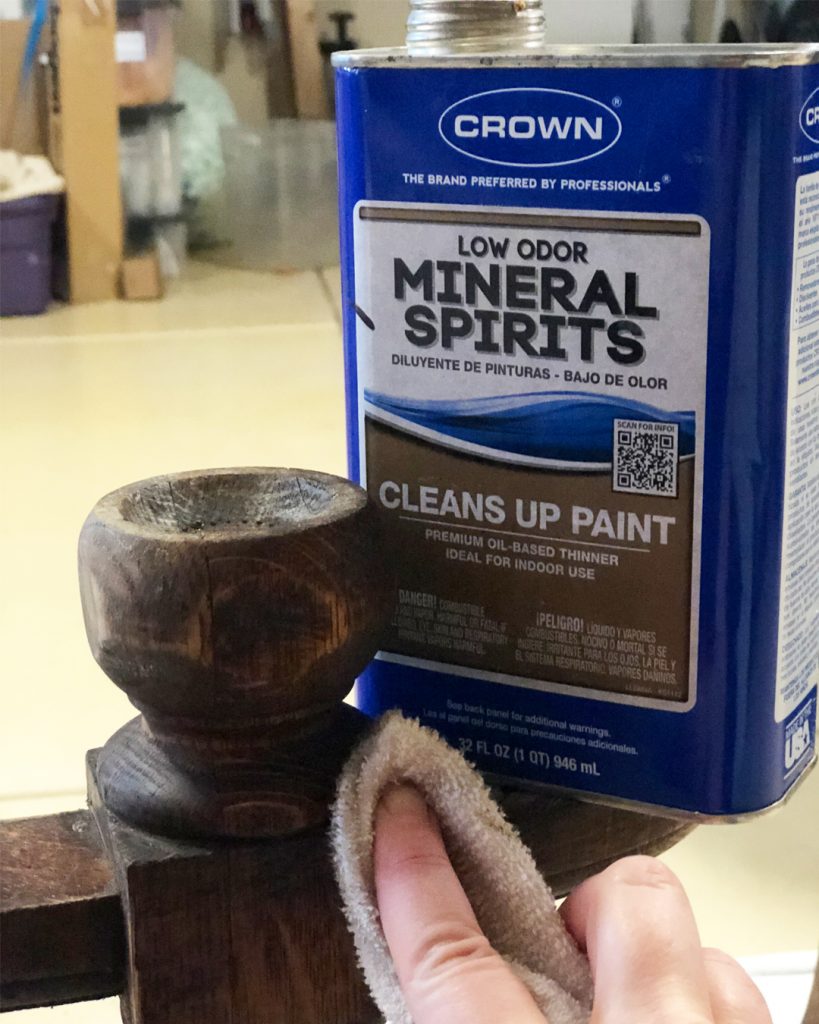
- Mineral Spirits and a cloth
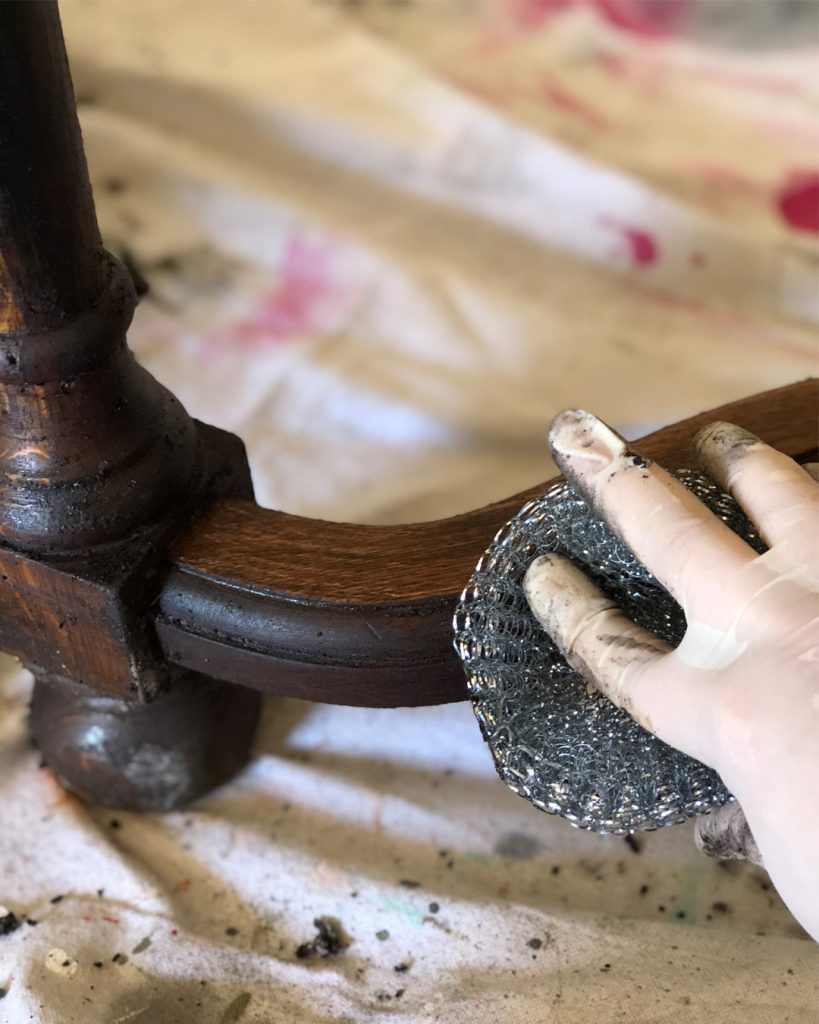
- Steel Scrubby Sponge
First, pour the Citristrip into a disposable container.
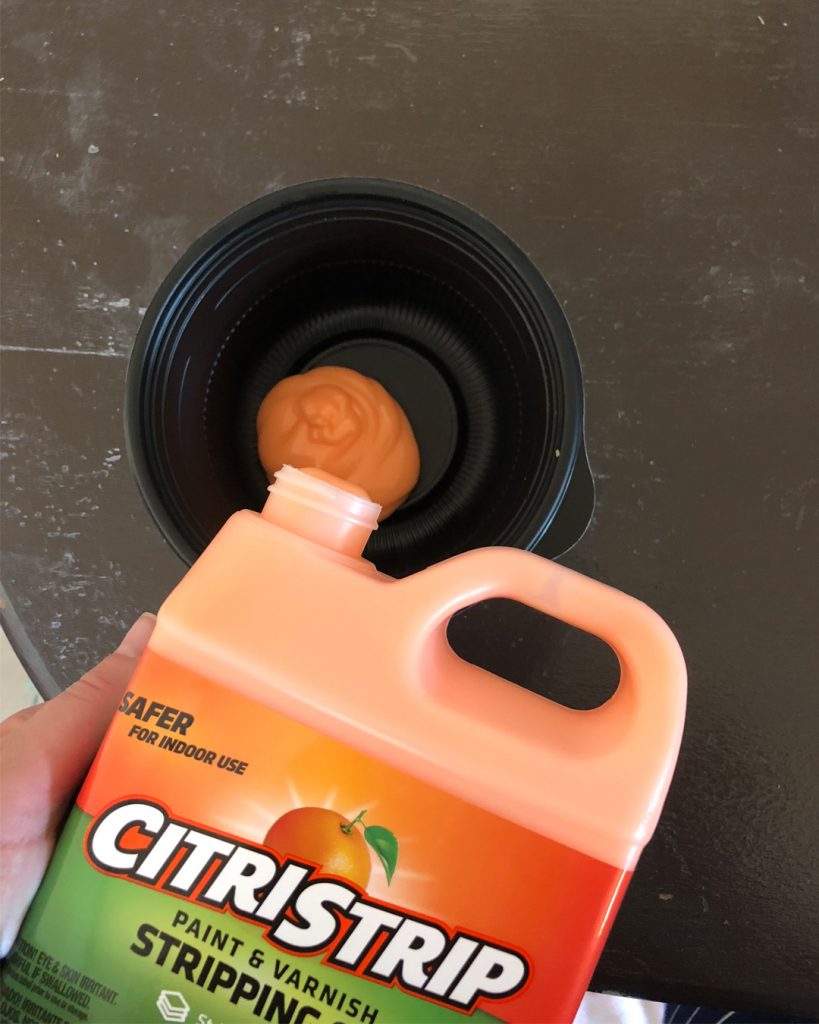
Step 1: Brush Citristrip generously onto all areas where you want to remove the existing finish.
Step 2: Allow to sit for at least 30 minutes. You will see the surface begin to bubble, and it will be tempting to want to scrape it off, but you’ll have better results if you wait the 30 minutes.
Step 3: After at least 30 minutes, scrape the bubbled finish off with a plastic scraper. Don’t use a metal scraper because it can scratch and leave gouges.
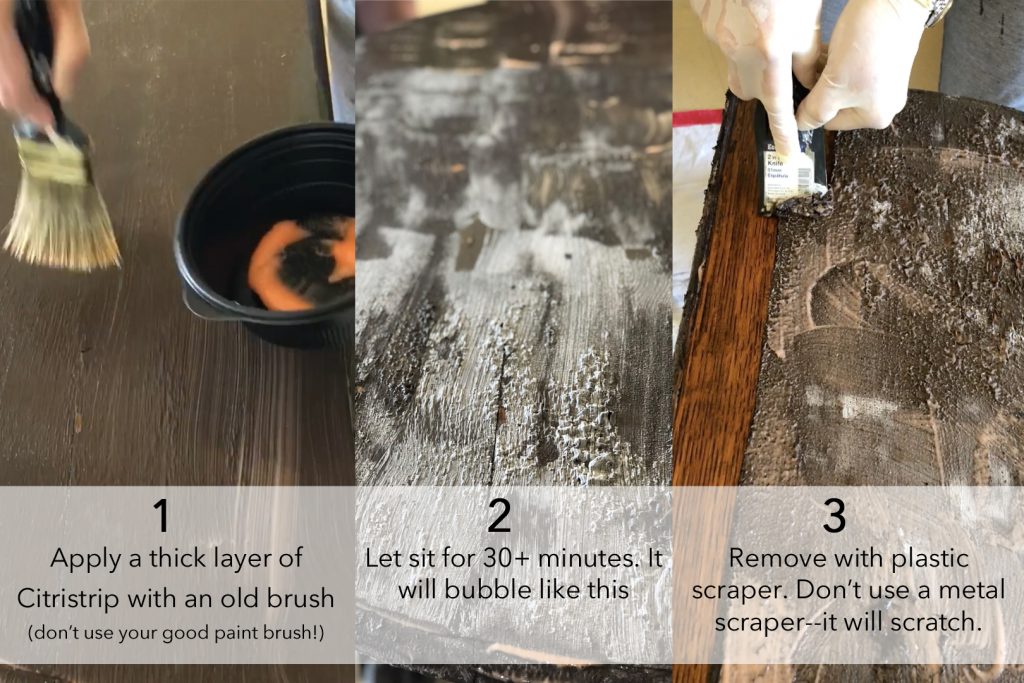
When most of the finish has been removed, use a cheap steel sponge or a sponge with a rough side to remove the smaller pieces of stripper/paint.
At this point, you may still have some areas with paint/stripper that hasn’t come off. If those areas are large, apply a second coat of stripper and repeat the previous steps. Otherwise, simply take a cloth dipped in mineral spirits to rub down the areas where you used stripper. This will help remove any paint or stripper that could interfere with the new finish you plan on doing.
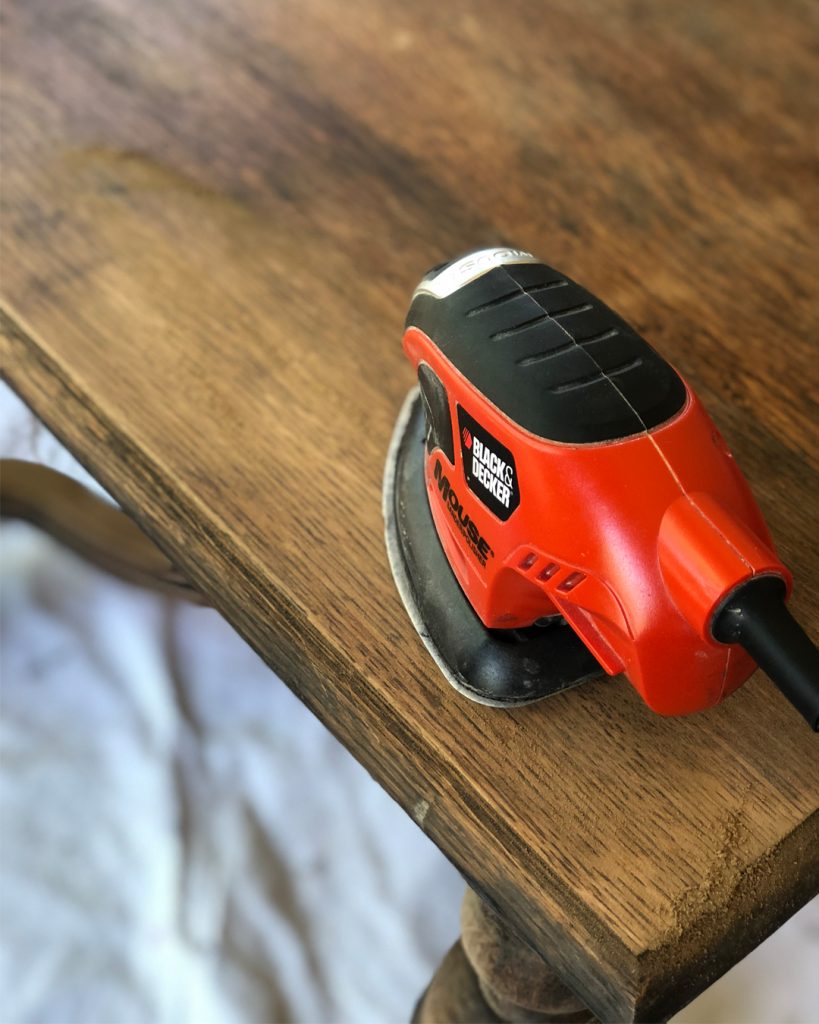
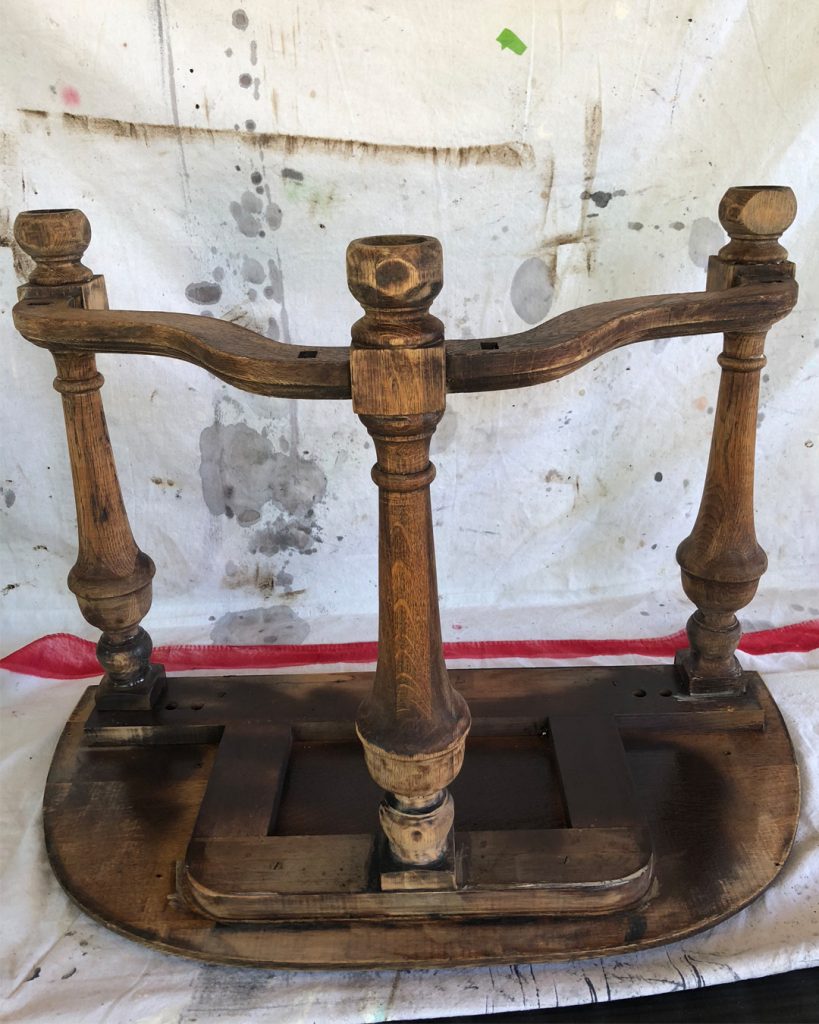
If most of the old finish has been removed, your piece is fairly smooth, and you intend to repaint, you can just skip ahead to repainting. If you want to stain, faux stain, or simply wax the beautiful wood you have just revealed, you’ll need to sand the surface to get everything smooth. I used 220 grit sandpaper as well as my favorite little sander, the Black and Decker Mouse.
Once the spray-painted finished was removed, I began to really fall in love! It was hard to understand why anyone had wanted to cover up the original finish to begin with.
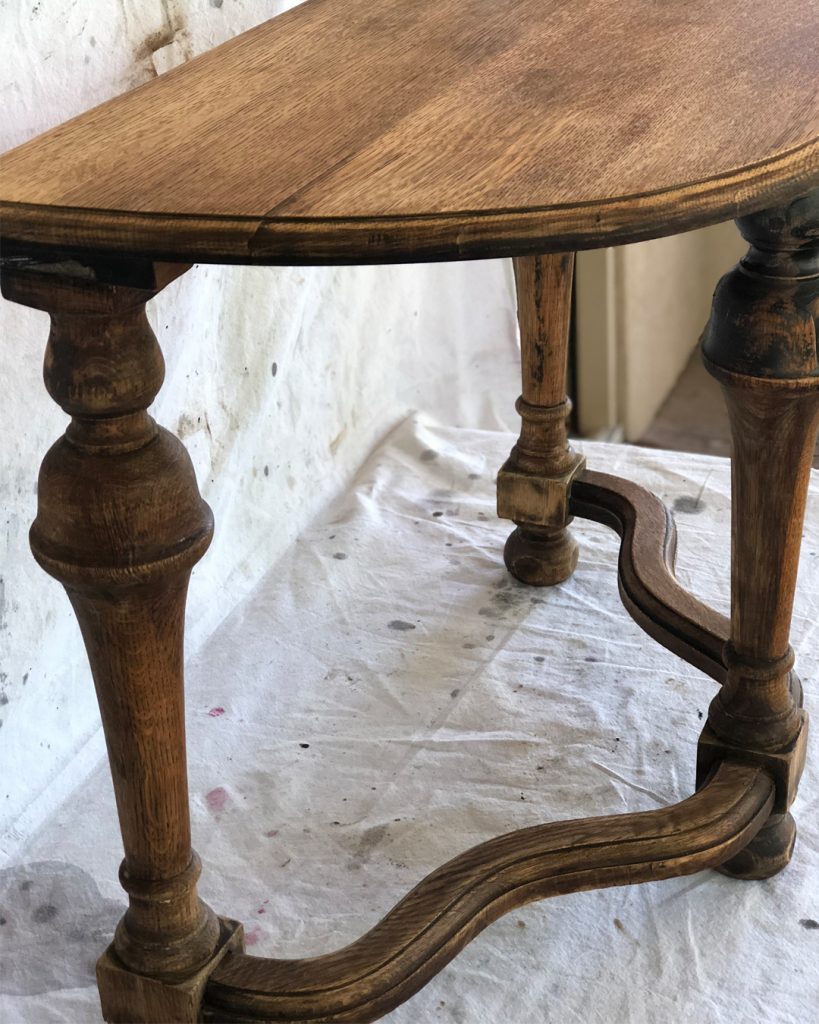
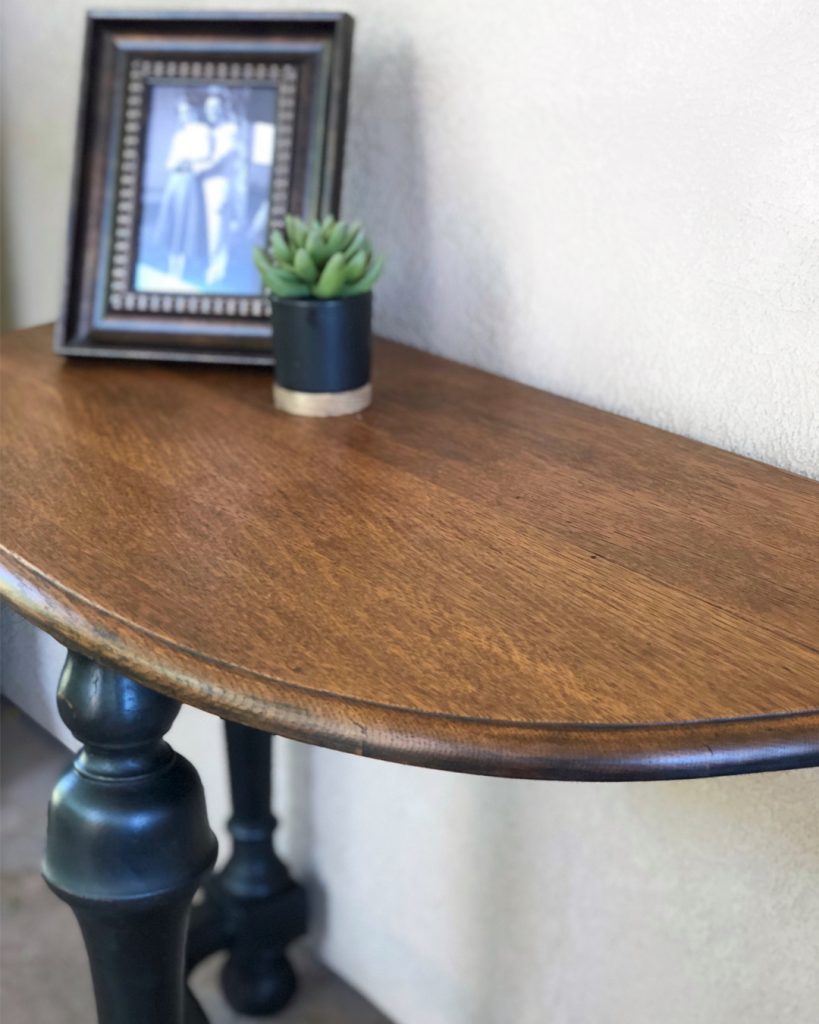
I contemplated just restoring the original finish but ultimately went with my mom’s plan (since the table is going in her home) which was to highlight the beautiful grain on top of the table and paint the base.
Pro-Tip: Start painting with your piece upside down. It’s a lot easier to get the less-seen spots first rather than turning your piece upside down once it’s been painted.
To refinish the table, I used the following:
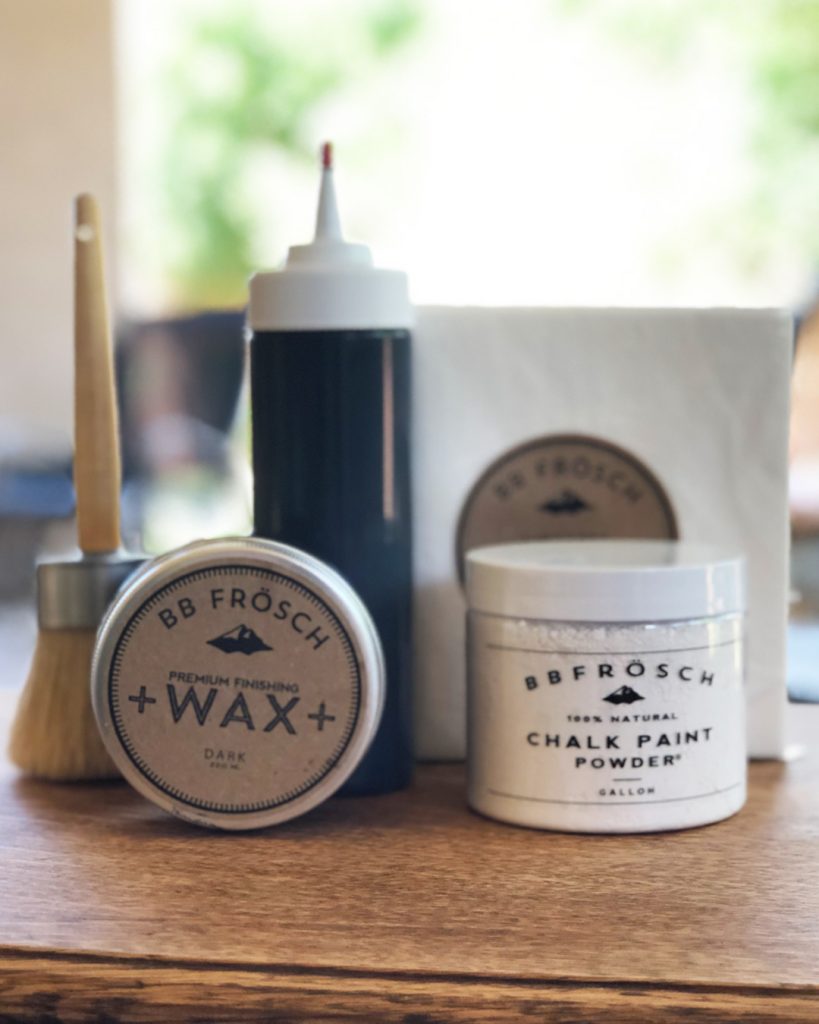
I mixed flat black paint with BB Frösch Chalk Paint Powder to make my own chalk paint for the base of the table.
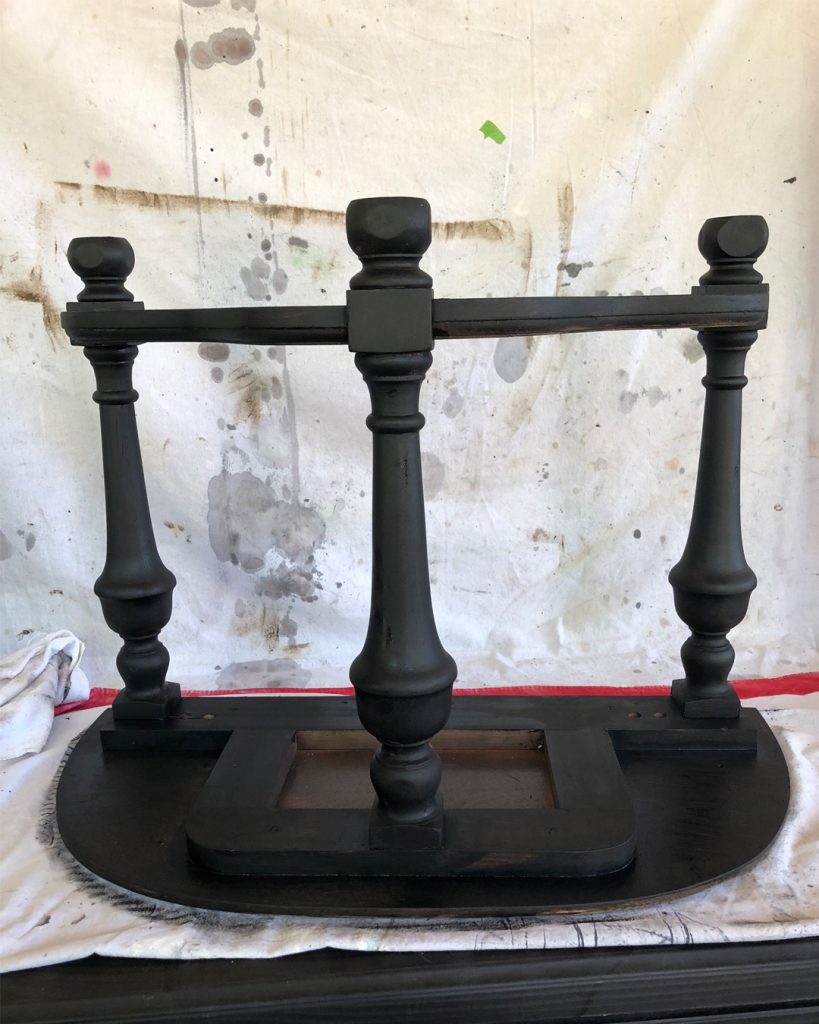
I got great coverage with just one coat, so I turned the table right-side-up to finish painting the base. Once it was dry, I sanded the raised areas with 220-grit sandpaper to lightly distress.
I used BB Frösch Dark Premium Finishing Wax to seal and protect the black paint. I always use dark wax over black paint because it gives it a gorgeous, rich finish.
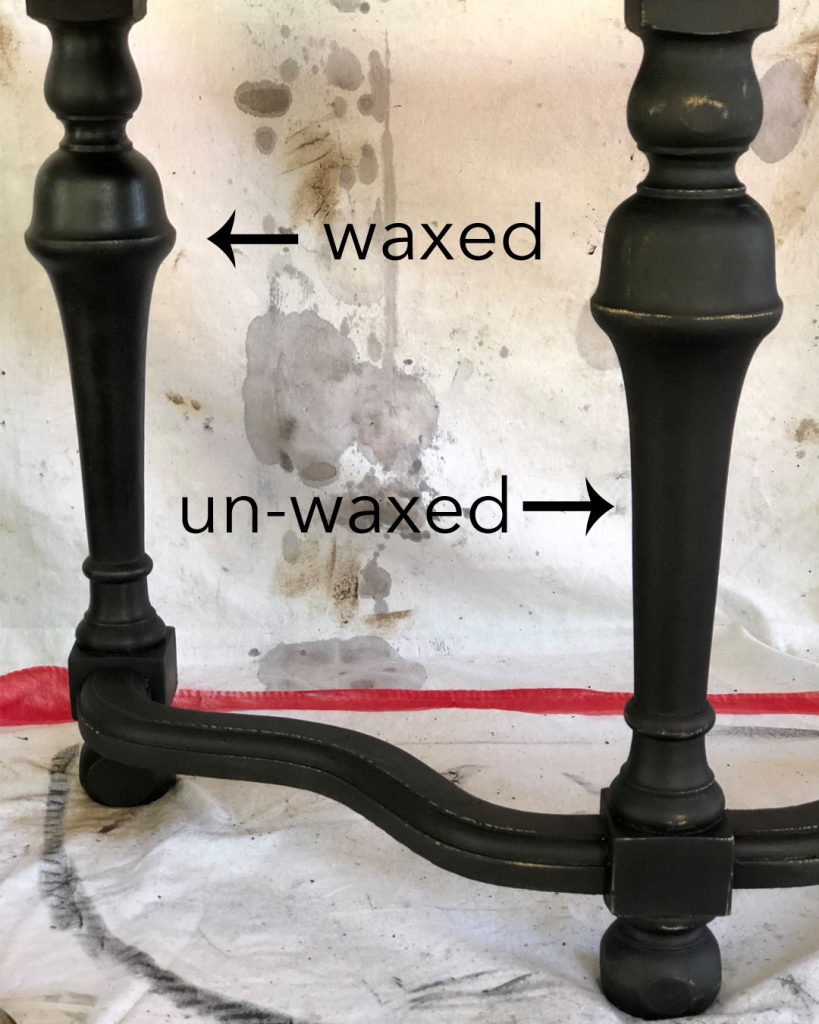
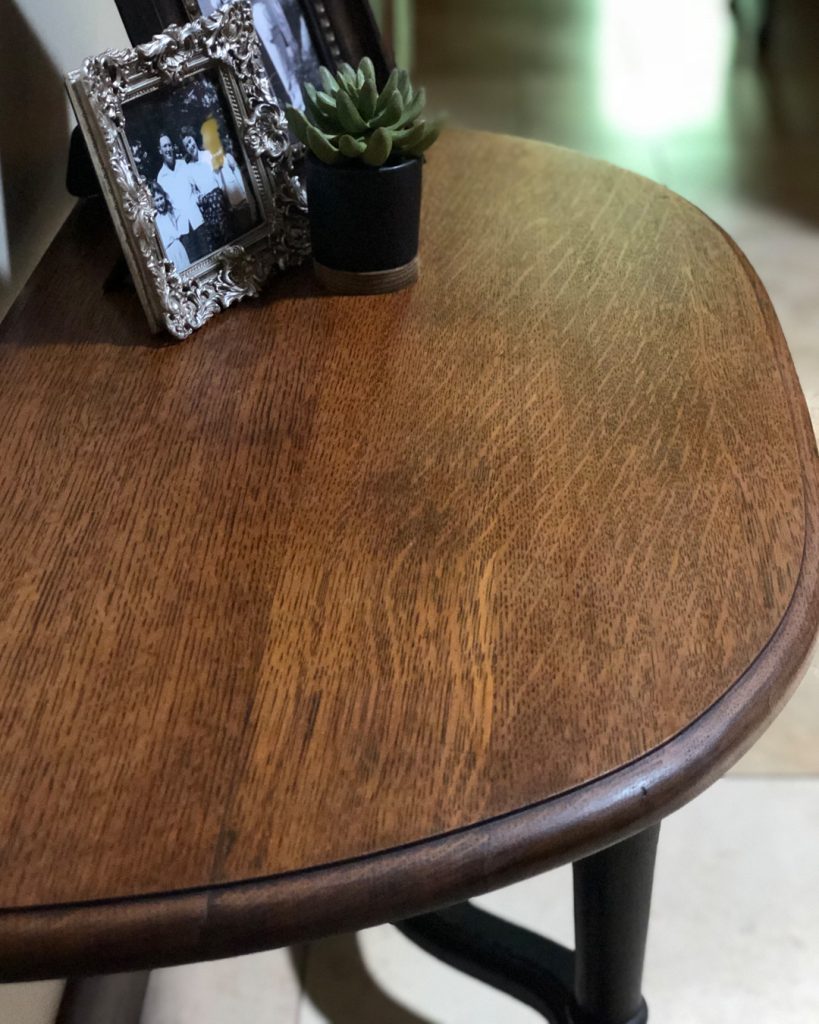
With the base painted and sealed, I simply dark-waxed the table top with the same wax I used for the base.
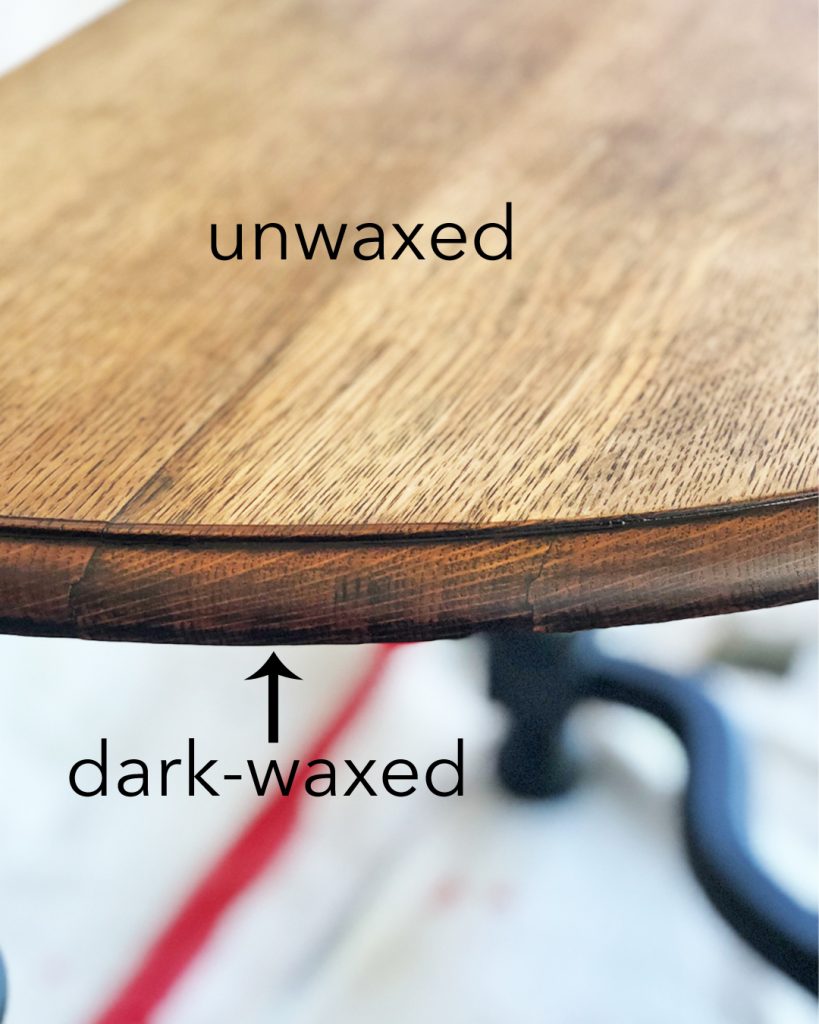
I LOVE the way BB Frösch dark wax looks on raw wood! It nourishes the wood while sealing it and really highlights the grain.
The whole project, stripping, included, took about four hours. The stripping part definitely took up the majority of that, but I’m so glad I did it!
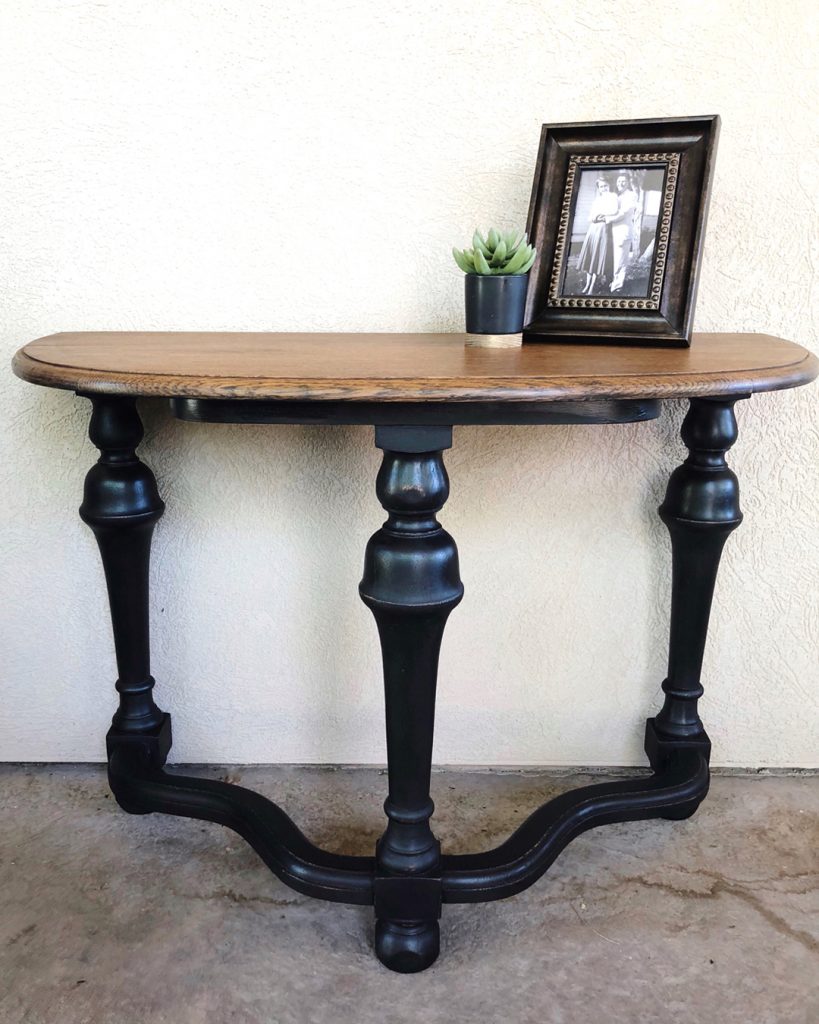

In less than an afternoon, the new table is stripped, refinished and in it’s new spot at my moms’ house!
Follow BB Frösch on Instagram, where you can find the stripping process on my story highlights.
Find more affordable chalk paint inspiration at bbfrosch.com. Follow BB Frösch on Pinterest and Facebook.
SO GORGEOUS! I have a drop leaf table I’ve been wanting to strip but it seems to have 800 layers of paint so I’m intimidated! Might have to give it a whirl soon!
Look so beautiful!! I bet you must spent a lot of time to have this result but worth it!
Fantastic article
What determines if you are going to stain, faux stain, or wax?