- This post is sponsored by The Home Depot. All opinions are 100% mine.
Ever since we got a second washer and dryer set from The Home Depot, laundry is becoming friendlier. Since we just bought our new home in the past three months, we are furiously organizing, and changing things to function better for our family. A new house brings new systems of living. The laundry room was first on my list because laundry never ceases. It doesn’t care if you are moving, sick, or on vacation, it follows. So, having a functional and efficient laundry system is key to a successful household in my opinion.
Our laundry room is pretty large already, so we had plenty of room to work with, plus now that the laundry room is functioning efficiently, we will makeover the space to add some character and style. The plan is for an entire overhaul with new tile, painted cabinetry, and new countertops.
I’ve always dreamed of having two washers and dryers, and after researching which ones to choose, we went with LG Huge capacity sets that will nearly triple the amount of laundry I can do at a time. To see all of the reasons why I chose this set, check out my article I wrote on the Home Depot blog.
![]()
Here is the makeover master plan that will happen eventually. But we aren’t overhauling the room quite yet. We are starting with functionality first.
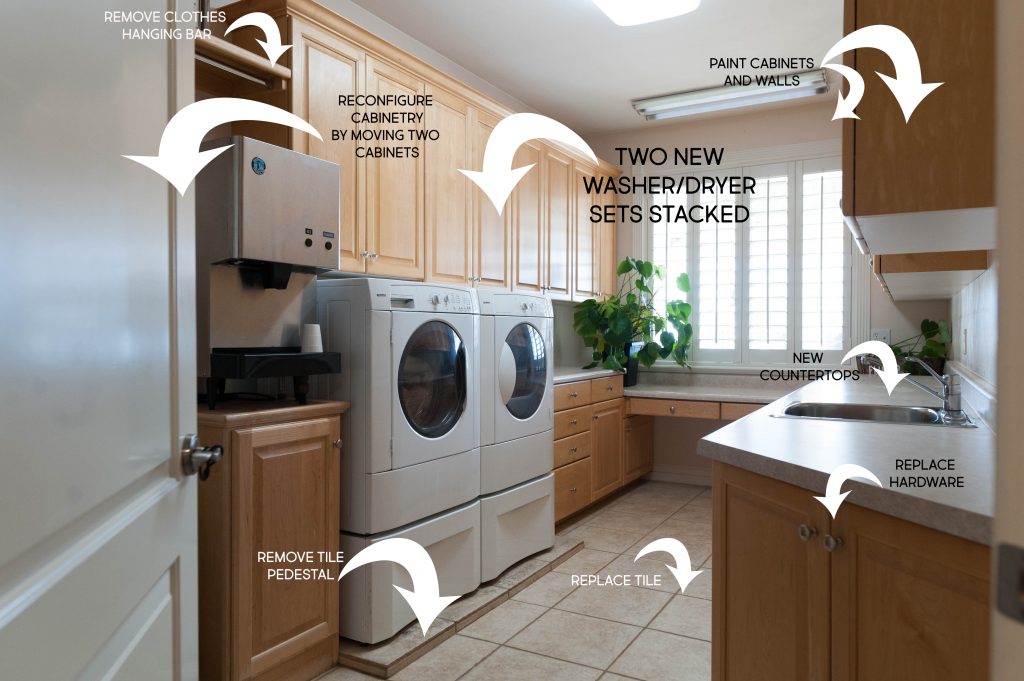
In order to start phase one and add a second washer and dryer, we had a few things on our to do list first:
- Demolish the drywall to get access to the piping and electrical in the wall.
- Add a second drain and second hot/cold water lines.
- Splice existing gas line to add a second gas hookup.
- Move electrical outlet higher.
- Change the location of the existing dryer vent and add a second dryer vent
- Reconfigure the cabinetry.
- Order the perfect appliances and stacking kits.
- Remove all existing insulation in the wall
- Install new insulation
- Replace and repair drywall
- Install new LG Washer and Dryer sets
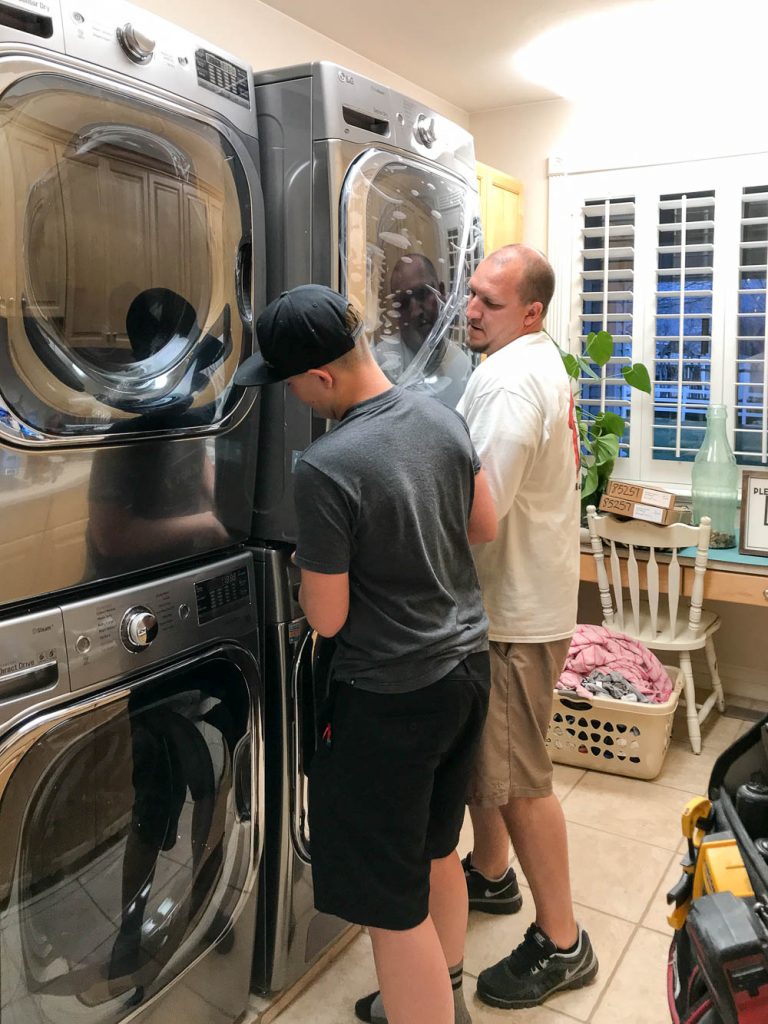
We recommend you hire a professional for this portion. My husband does this for his career, so for us to do it ourselves it wasn’t a big deal, but for a regular household, a licensed contractor is recommended. To be honest, I wasn’t thinking it was going to be that big of a deal and of course, since he’s a handy guy, he acted like it wasn’t a big deal at all. But, anything that involves demolishing drywall first is a bit tedious. But, it only took a few afternoons for him to reconfigure everything and it was ready for the new plan.
First, we removed the cabinetry where the new washer and dryer were going. We decided to remove the drying hanger rack because we never use it. The two cabinets that were above the washer and dryer before will be installed stacked on top of each other on the left side of the ice maker. I didn’t want to lose valuable storage space.
![]()
Then Dan cut a hole in the sheetrock with a box knife.
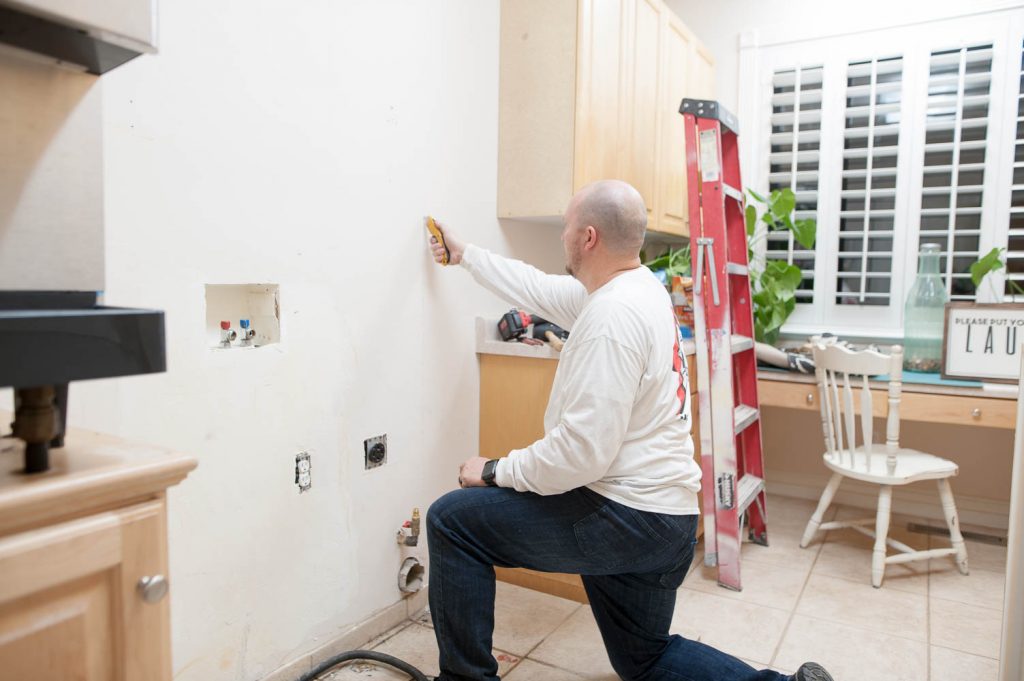
The sheetrock came out easily.
![]()
Then, we cut a hole in the insulation sheet to remove the insulation in this area of the wall. We stapled the remaining fabric back to the studs so the entire blow-in insulation didn’t fall out of the wall above this portion.
We bagged up the insulation and threw it away.
![]()
It was a very messy job. We had insulation everywhere! It made me wonder how the insulation guys do it every day!
![]()
Next, Dan split the water lines and created a second water hook up.
![]()
After consulting with a professional plumber, Dan added a second drain, but since the pipe was large, the plumber said he could have them both drain into the existing pipe. So Dan elbowed the new drain into the old one.
![]()
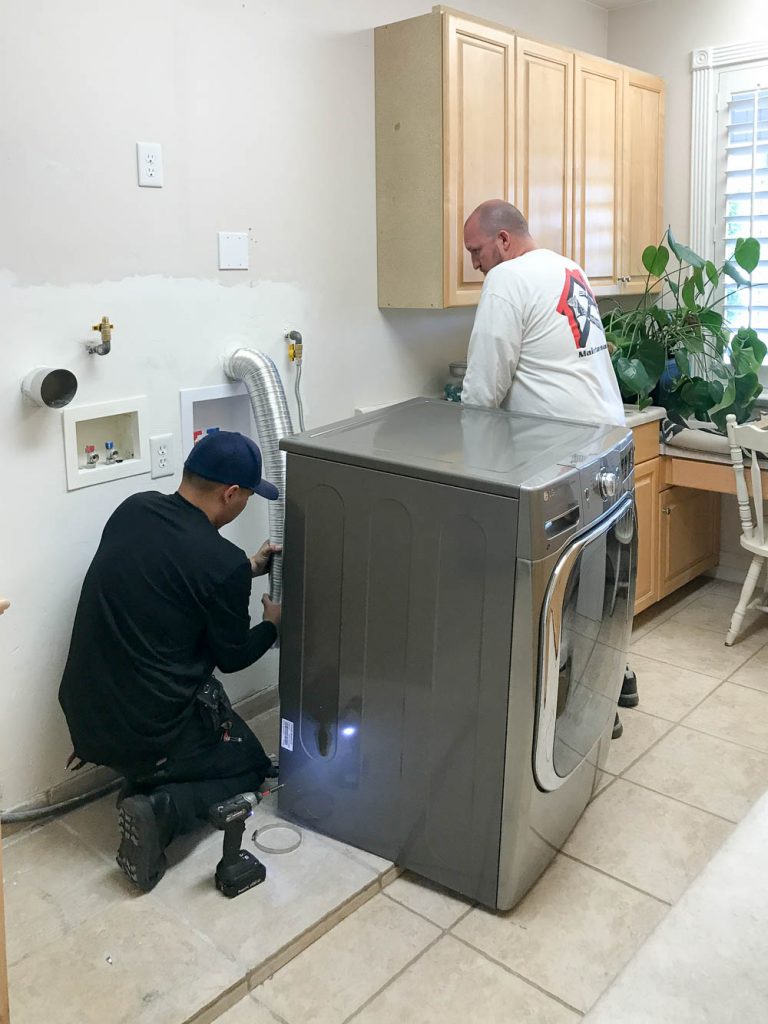
You can see the draining pipes better below. Plus, we also needed to move the gas pipes up the wall since the dryers will be stacked on top. So Dan split the existing gas pipe into two and moved them up the wall in order to install the new dryers higher than our old one was. He moved the electrical outlet higher also.
![]()
And then he moved the dryer vents higher on the wall too. Luckily the wall we were dealing with is an outside wall. Otherwise venting the dryers would have been much harder. Sidenote: The washers are both on the bottom because they are too heavy to stack on top.
![]()
Dan filled the hole where the old vent was with plywood and put a cover on the outside also. Unpictured: We put new insulation into the wall. We didn’t do blow in insulation like it was before, we just bought the traditional insulation from Home Depot and pieced it in. Finally, the wall was ready for a new piece of drywall.
![]()
We mudded it and sanded it and voila, it was ready for the appliances to arrive.
![]()
My husband is a good sport. I owe him BIG TIME for all the work he did for me!
![]()
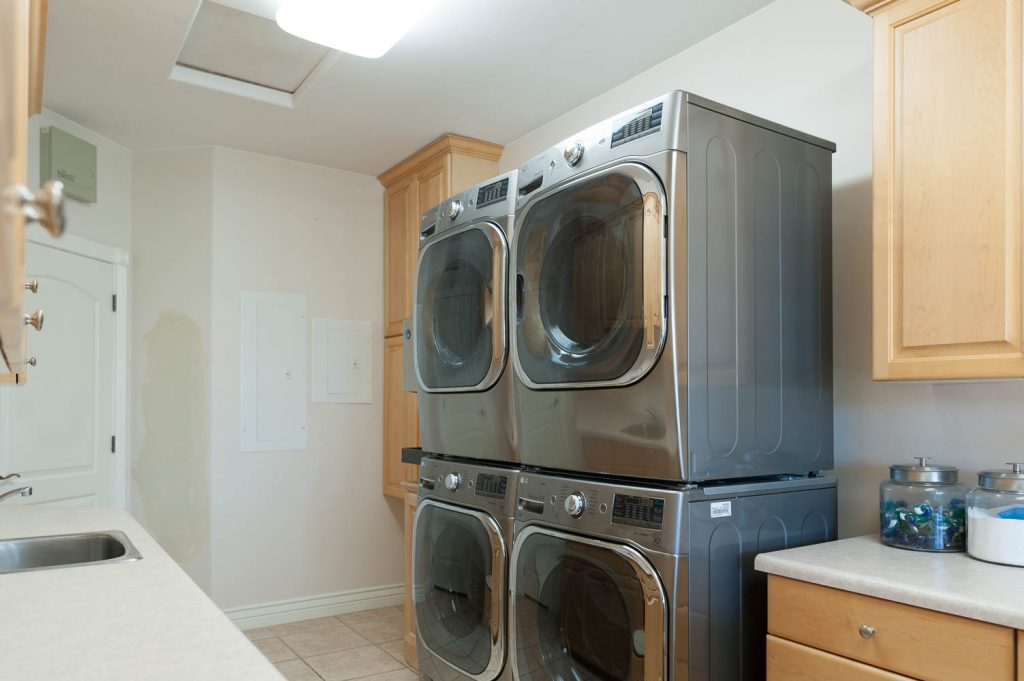
When the Home Depot delivery guys came, we quickly realized that we had forgotten to order our stacking kits. {DARN IT!} So they installed one set for me so I could do some laundry. I had been without a washer and dryer for a week at this point, and our dirty clothes were stacking up!
The space looked a little silly for the next week or so until the stacking kits came.
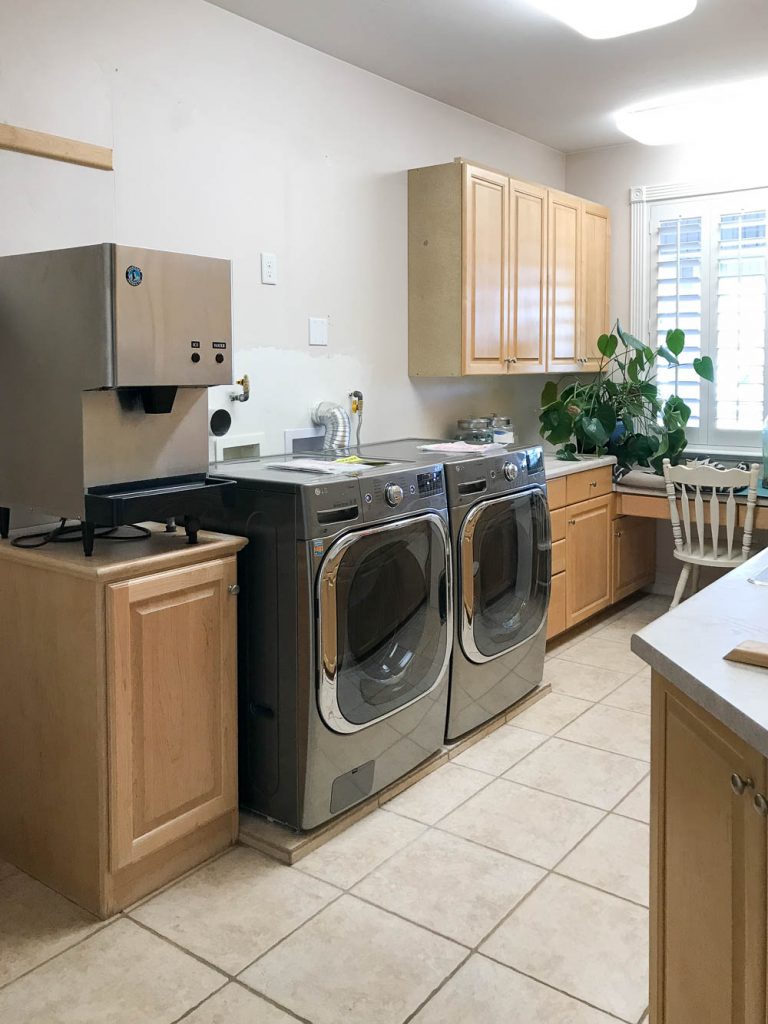
But it was like Christmas morning when they got here!
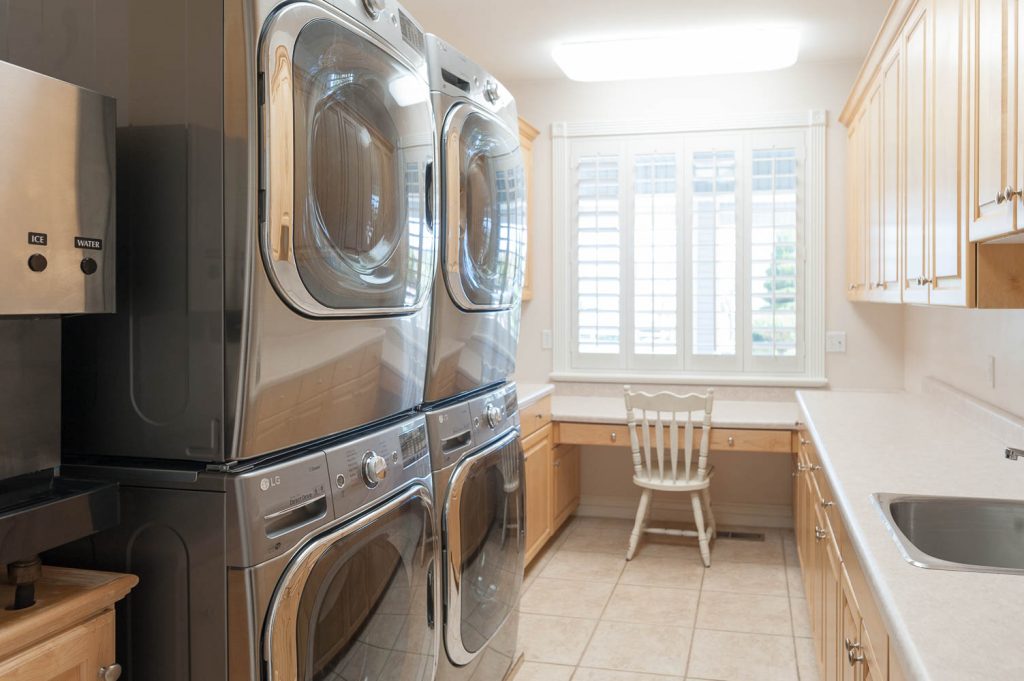
The amount of laundry that is happening in these sets is MIND BLOWING! If you read my article about why I chose LG appliances, you know that each washer has a capacity of 5.2 cu. ft. A standard washer is around 3.5 cu. ft. So, we basically tripled our laundry capacity with these two sets.
![]()
I am in awe and the amazingness of this room now. I cannot wait to give it a facelift, but this was more important!
It’s hard to tell, but on the left side of the washer and dryer, we now have a spot to put rolling laundry bins under our cabinetry on that side. I’m excited to show you that when the bins arrive!
Let us know if you have any questions!
We are extremely thankful for the chance we had to work with Home Depot on this project.
I cannot find your article on the Home Depot blog. Do you have a link?
Shoot. Let me see if I can find it.
Found it! Here is the link: Choosing the Right LG Laundry Appliances
They are so gorgeous! Is it a pain reaching the controls on the dryers? They seem super high.
What brand is your ice maker?
It’s a Hoshizaki! It’s amazing!
Do your vents both go directly outside? Or do they connect at some point to make one exit from your house?
Yes, they go directly outside. We are lucky. Our laundry room has an outside wall.
Any structural issues? Did you have to reinforce the floors? Also was this a first floor or second laundry room?
I know this is months later, but I’m hoping you will still see this and reply. We are ready to have another washer/dryer hookup installed in our space (we already have two sets of stackables with gas dryers) and the plumber who was here said we would have to run a completely new gas line because the existing line is only a half inch line. According to him this would not be adequate for both our dryers to run at the same time and dry our clothes. Did you guys have a 3/4” line already or did you simply split a 1/2” line? I’ve been trying to do some research online and I can’t find conclusive info on running two appliances off the smaller line. His solution (to avoid running a gas line through our attic for $$$) was to just have us sell our gas dryers and buy new electric ones. ? I’d love to hear your experience with this!
Jan, the photographs appear to indicate Brooke’s original gas feed was 3/4″. Recommend you just go big and run either a second gas line or a pair of 220v electric lines for your dryers.
Brooke I raise 8 kids. We had a top loading washer with the agitator in the middle.
I always wished I had two washing machines. I taught my kids all to do their own laundry by the time most of them were ten years old because the mountain of laundry was a never ending job for me.
You are one lucky girl. I love it. You must certainly be enjoying those machines.
Every family should be so blessed.
Since your dryers have a steam feature, did you need water hook up for the dryers as well? I am due with #10 soon and I really need to triple my laundry capacity! ?
Nope, you just add water to the steam container when you want to steam! We love them!
Why didn’t you run another line for the ice machine while you were at it?
Brooke I love this!!! And am planning on the LG also! I was curious if you needed to add a new circuit on your box for the 2nd dryer?? I’m wanting to add a 2nd set in my laundry room and our friend said we had to do that to add a 2nd dryer?!?
This is a great installation, thanks for sharing
Hi Brooke,
This is a dream for me (even for a small family) Less time doing laundry means more time for family or find more work =P
Our dryer has a different outlet connection than the washer. I noticed the dryer outlet is covered on your wall. Do you mind sharing how all four units are plugged in? And is there enough power to run all at the same time?
Thanks,
Joy Ann
Jan Nelson, I think, based on what I can see in the photographs, Brooke’s pre-existing gas line is 3/4 inches. But, just run an additional 1/2″ gas line or run some 220v electric lines. Go big!
This is a game changer! Every family with 2 kids playing sports need this. I have a household of 6 and we should have done this a decade before we did!!
Do you run both washers and does your washer over flow water???
We use both at the same time almost every single day, and no, the washer does not over flow.
Hi there! I found your blog and have wanted to do this for a long time! We’re a family of 7 and could use a 2nd set! Is your water drain pipe a 2″ or a 3″? You mentioned it is a larger pipe, but I didn’t see the size. Did you use the existing vent for both drains? Thank you!
It’s a 2″ pipe. Yes we used the existing vent.