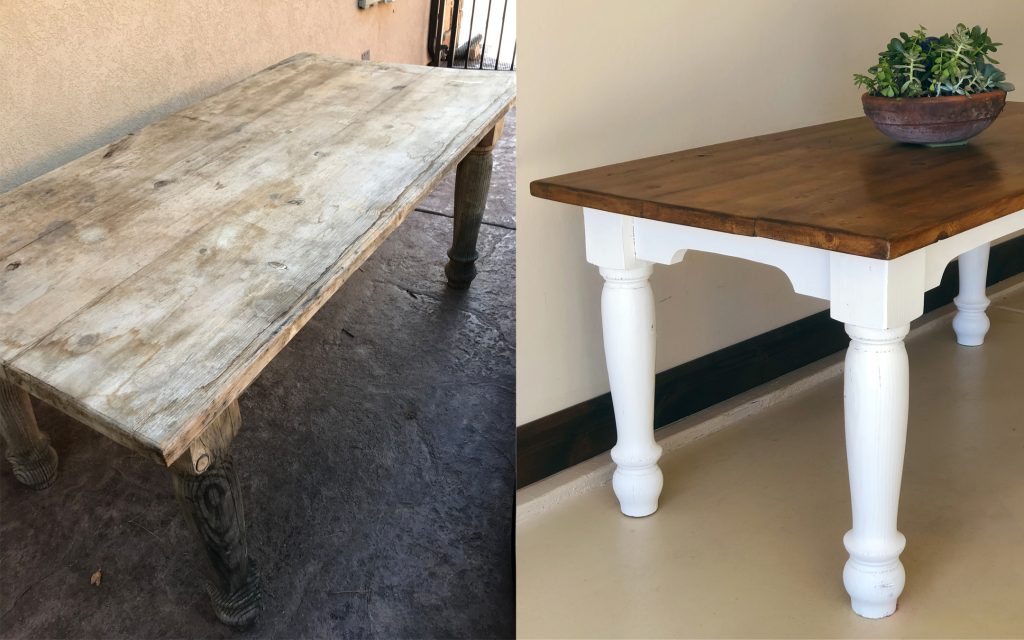
We recently acquired a farmhouse table from my in-laws. Sadly, it had been sitting on their back patio for the better part of fifteen years…
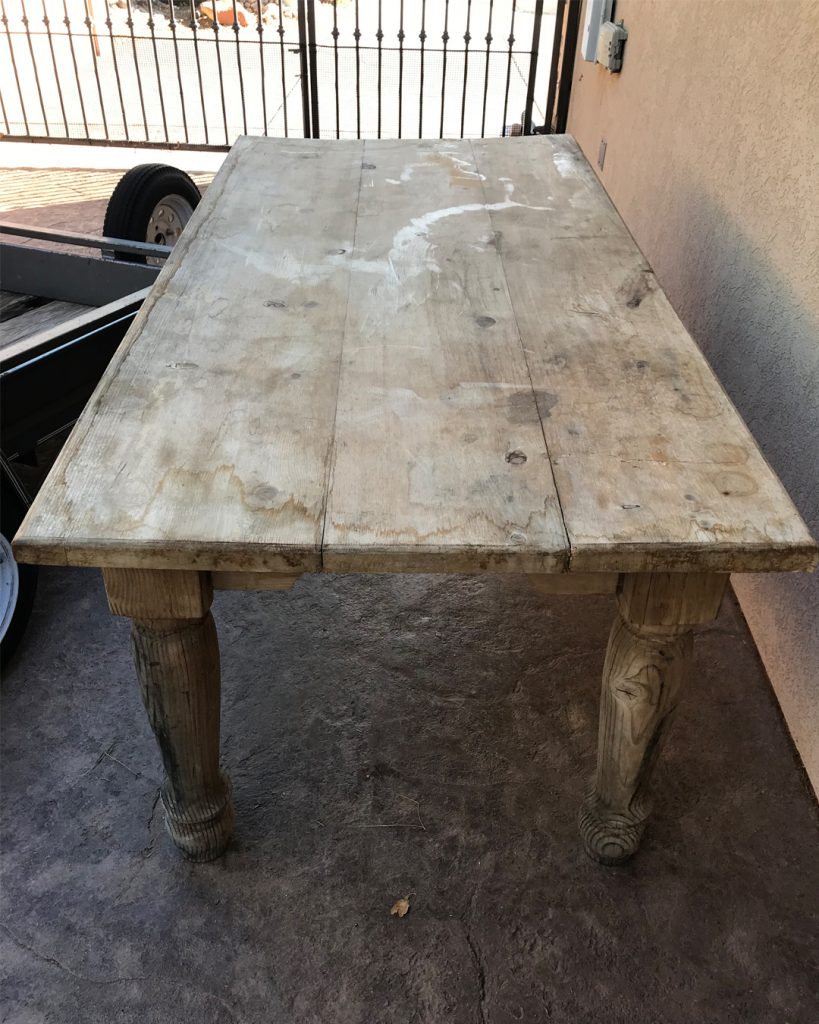
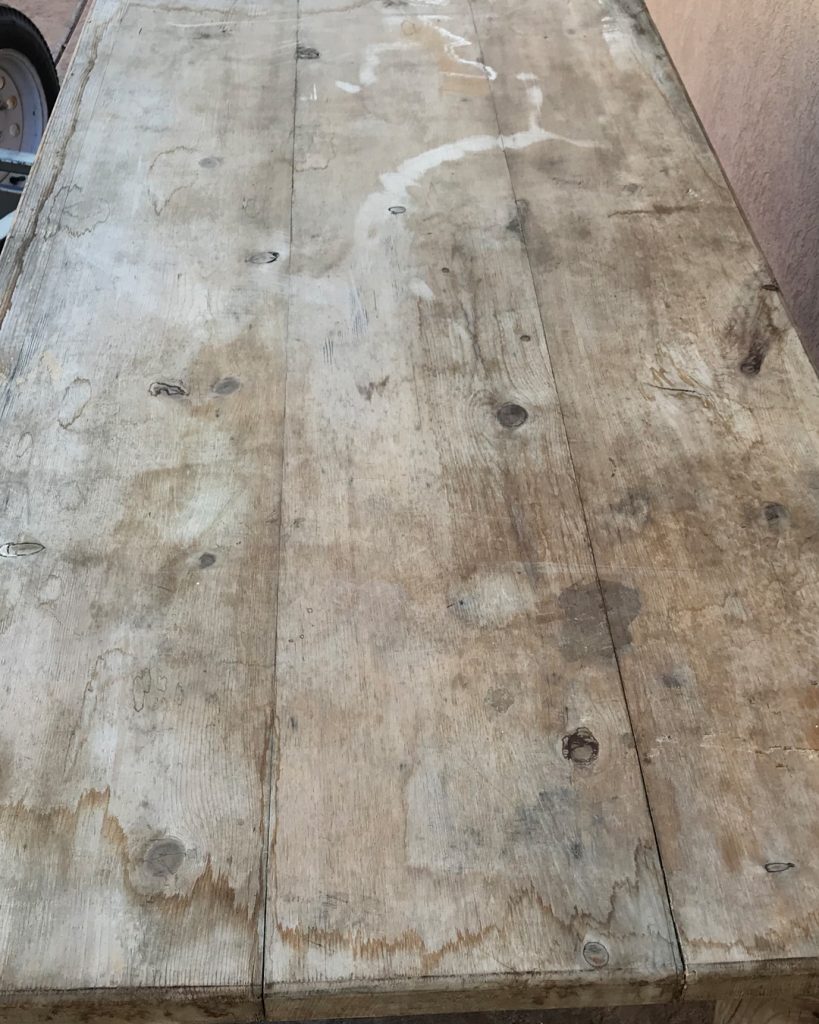
Not only was there no sign of ever having had a finish, the dirt, stains and dings were pretty much the worst I’d ever seen.
Pieces like this no longer scare me. In fact, the more worn and hopeless they are, the more likely people are to part with them for cheap or free!
It took a good sanding and cleaning before I could start painting. Normally, I would use my orbital sander to make the job go a little more quickly, but we are in-between homes and my sander is in storage. My dad’s palm sander did the trick in about two hours.
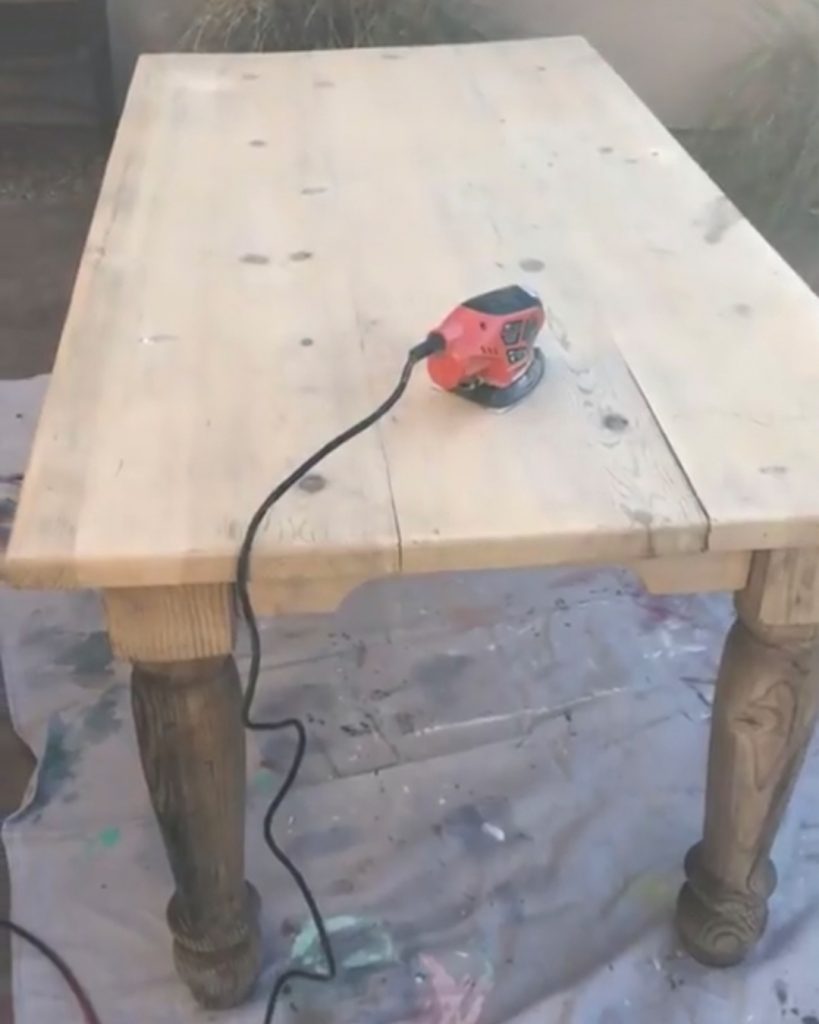
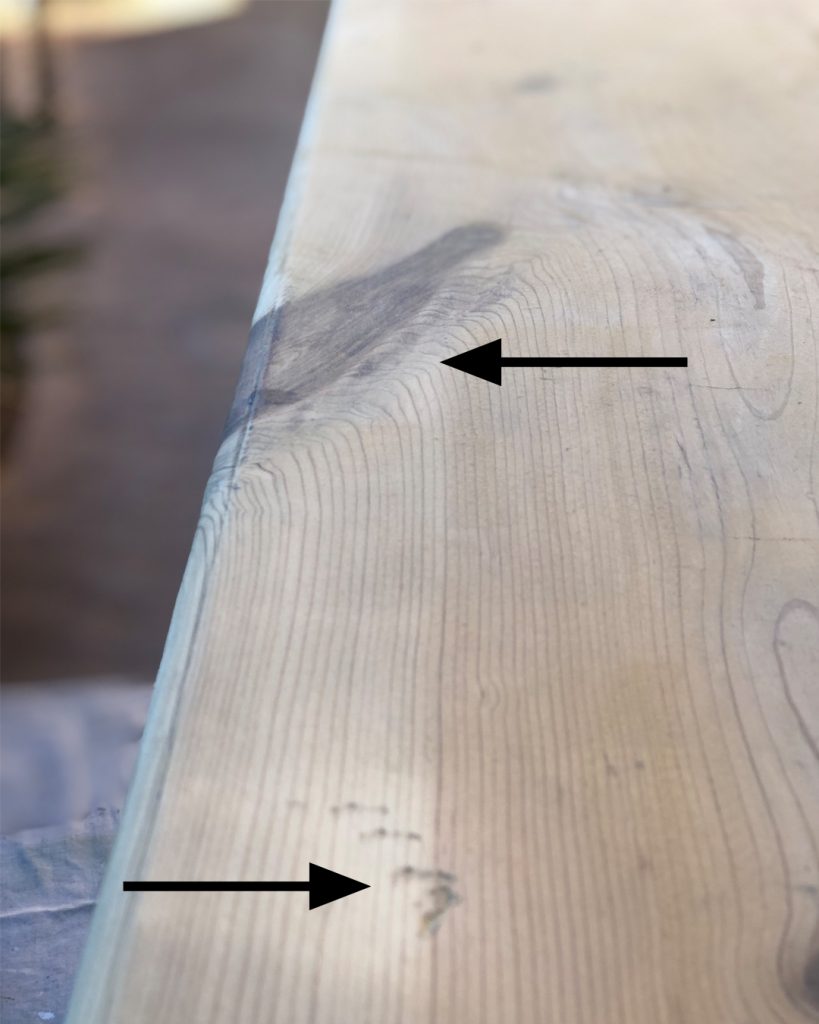
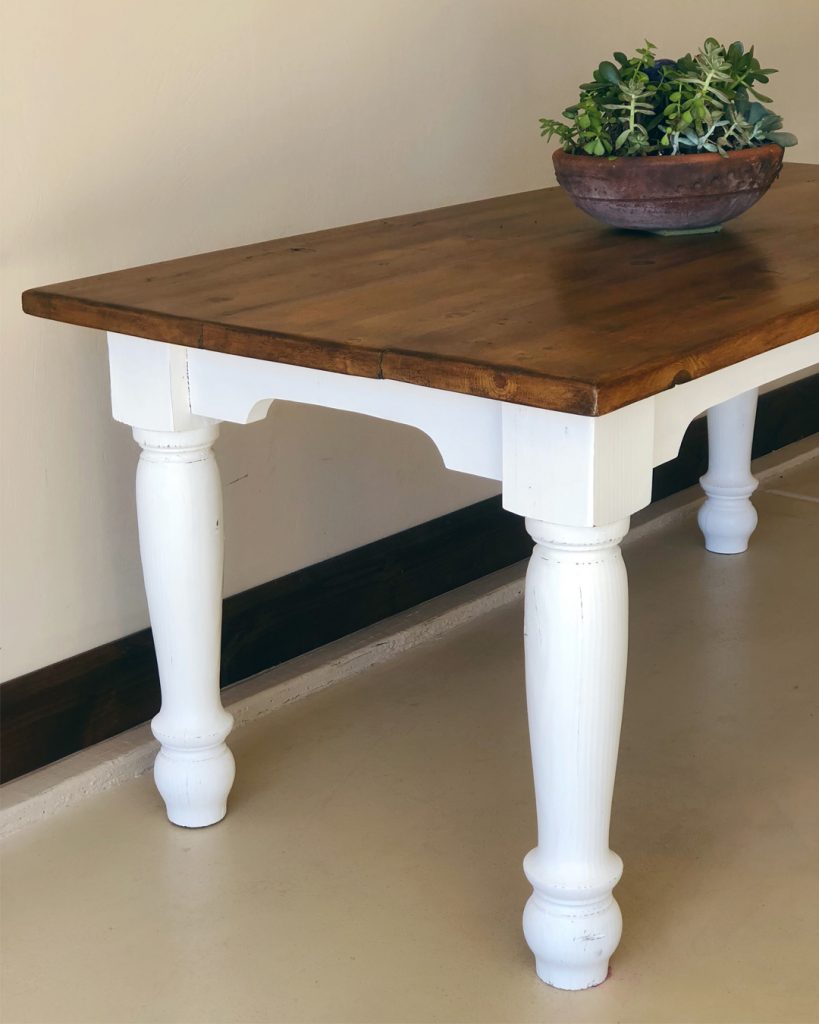
With the stains sanded away, the beautiful knots could really be appreciated. I even left a lot of the dings because those babies are character!
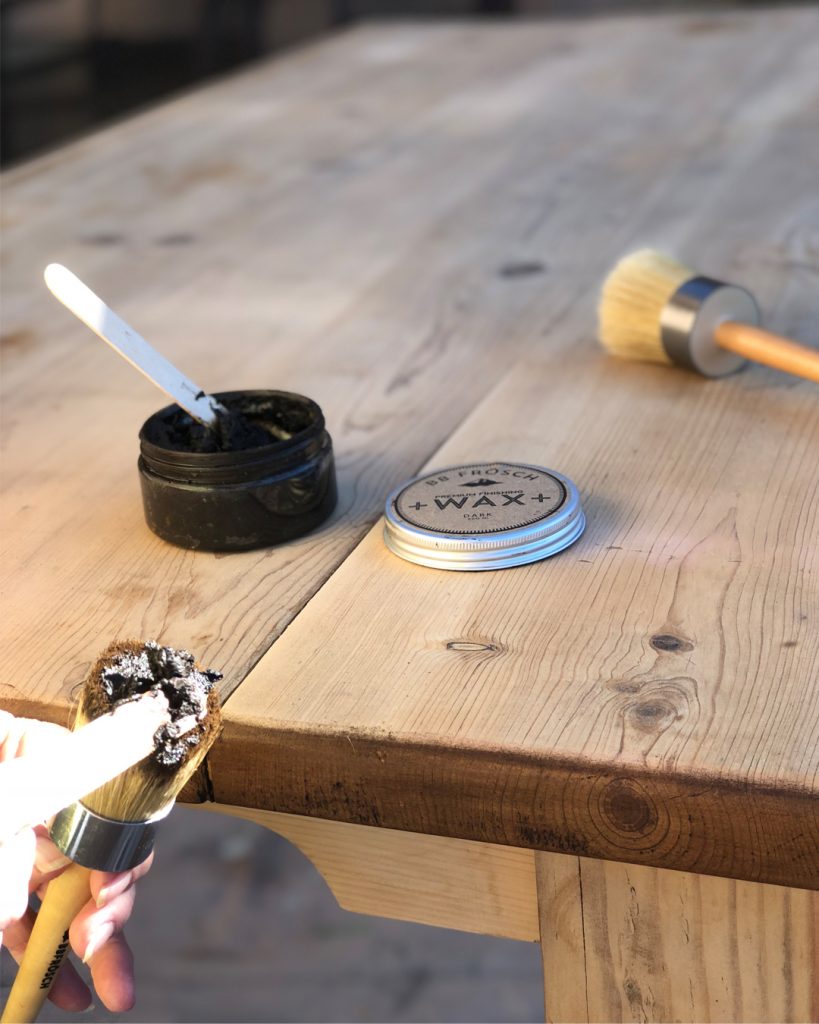
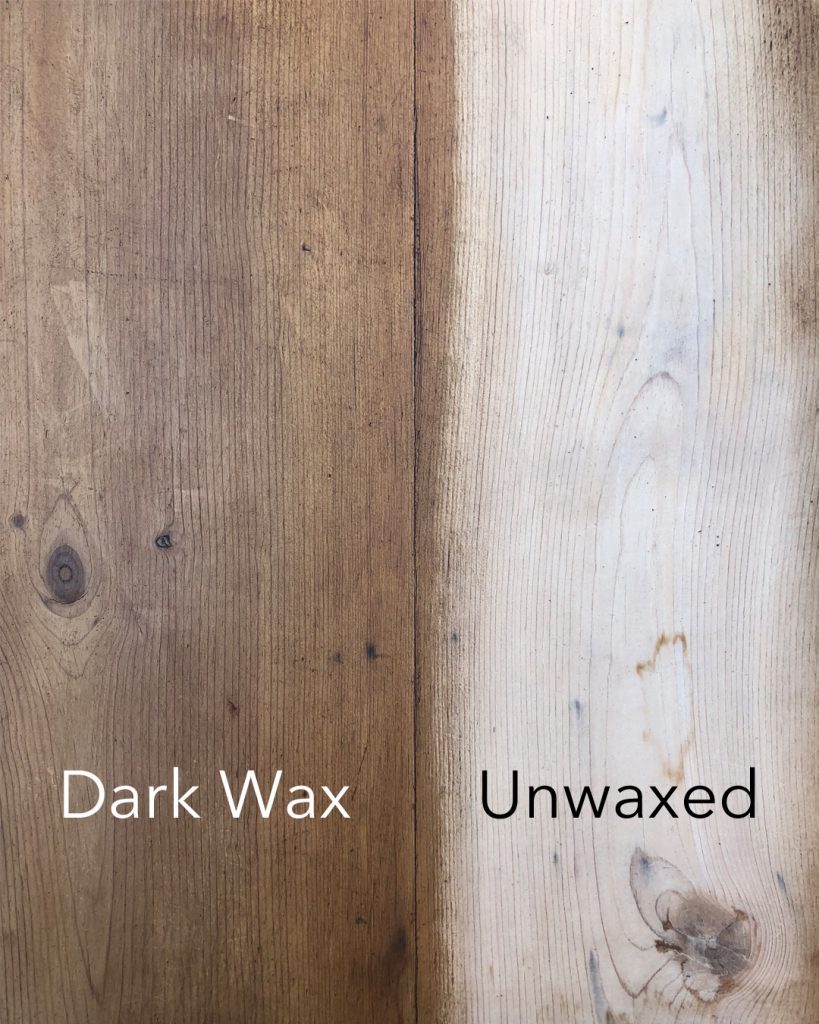
I wasn’t about to hide all the knots and dings, so I chose to simply wax the table top with BB Frösch Dark Premium Finishing Wax. This wax not only nourishes the wood, it seals and protects it.
The dark wax made such an incredible difference! Because it’s a table that will receive a little more wear and tear than other furniture, and because I wanted it a little darker, I did two coats of the dark wax. This is after just one coat:
Dark Waxing Tips:
- Apply with a wax brush. You will use a lot less wax.
- Butter the end of your brush instead of dipping brush into wax container. This keeps your brush from getting overloaded, and you will use a lot less wax.
- Apply in broad, even strokes moving with the grain. Applying dark wax in circular motions can tend to make things look muddy instead of natural.
- Wax in sections. Once you have no more wax on your brush, use a lint-free wax cloth to remove excess wax from the area you just waxed before re-loading your brush and moving on to the next section. With dark wax on surfaces like this table, my sections are long (the length of the table) and skinny, not square.
With the top waxed, I flipped the table (with a little help, since this is a solid wood beast) and dark waxed the underside of the table top.

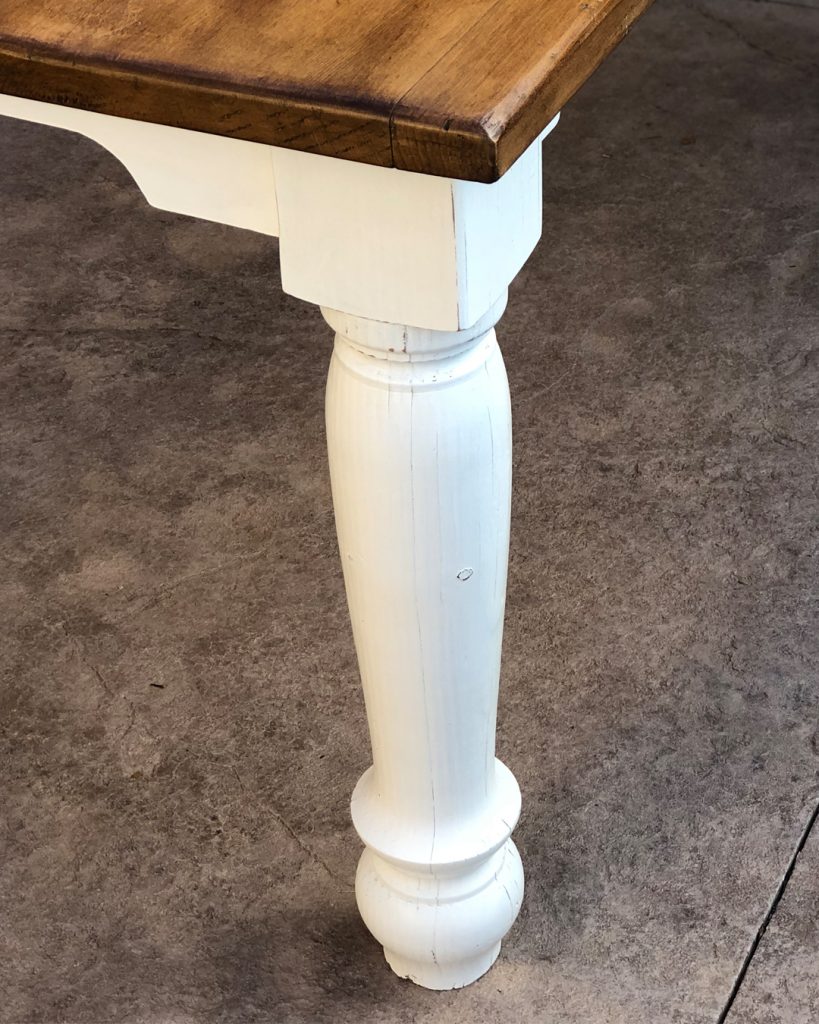
I mixed my own chalk paint using BB Frösch Chalk Paint Powder and Benjamin Moore Alabaster to paint the legs and skirt.
In keeping with the farmhouse style of the table, I lightly distressed and highlighted a few dings on the table legs. I clear waxed the table base with BB Frösch Clear Premium Finishing Wax to seal and protect the finish.
The whole project took about 4 1/2 hours. I expect a call from my in-laws ay minute asking for their table back 😉
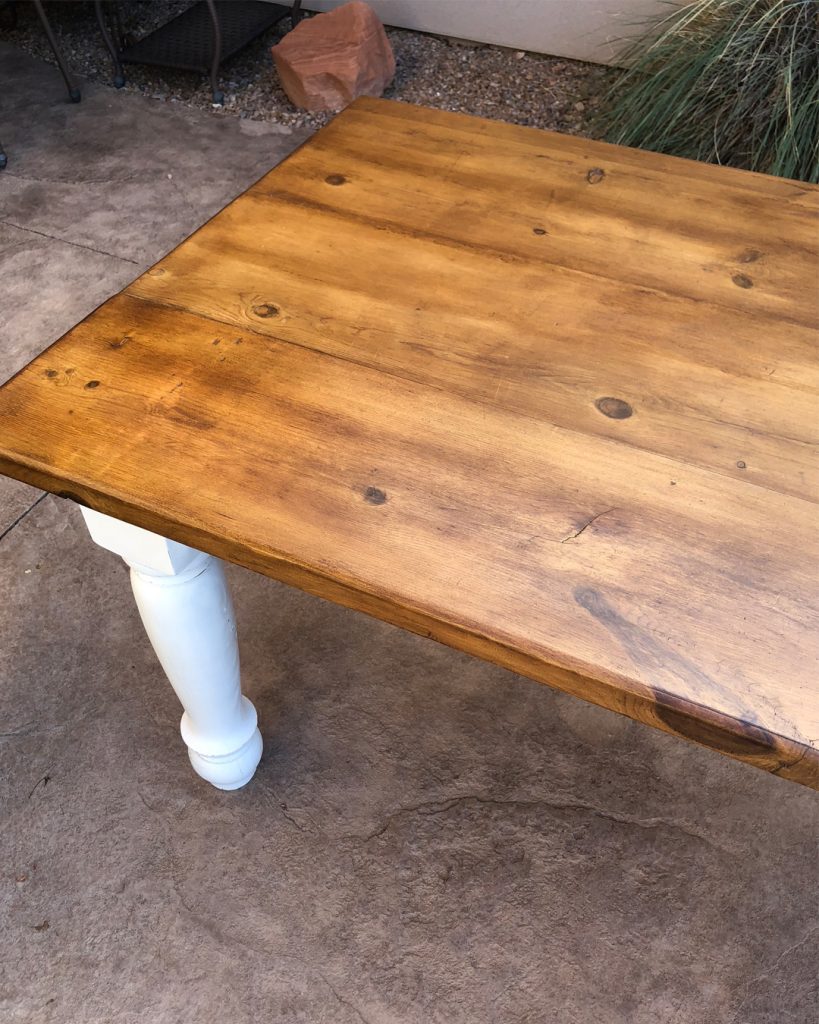
It’s always fun to recap with a before and after:
Find more affordable chalk paint inspiration at bbfrosch.com. Follow BB Frösch on Instagram, Pinterest and Facebook.
If you want to learn to chalk paint like a pro, here’s your chance! The exclusive BB Frösch workshop is now available online, so you can learn at home in your spare time. Click here to learn more.

Beautiful!! So how do you protect and seal a dining table from daily wear and tear with this method? No polyurethane?
Danielle–
BB Frösch Premium Finishing Wax protects against daily wear and tear. I do not use a poly over a wax. If damage ever does happen to occur (life happens, after all!) it is very easy to spot repair with wax just the area where the damage happened. Poly is a great sealer, but you won’t be able to easily spot repair any damage.
Hope this helps!
Kristin